3D printing hands on: Lessons learned from my first big project

Welcome back to DIY-IT's discovery series on 3D printing, where we learn about 3D printing together. This week, I'll take you through my first big project, which showcases just how cool it is to build custom objects that perfectly fit your exact, individual needs.
Let me set the stage for this project. First, it's not about my project or this project. What you should take away from this article is what it's like to take on a moderate scale project, what's involved from a design, production, and assembly point of view, and - most important - learn how much control 3D printing gives you to sculpt your environment to your exact requirements.
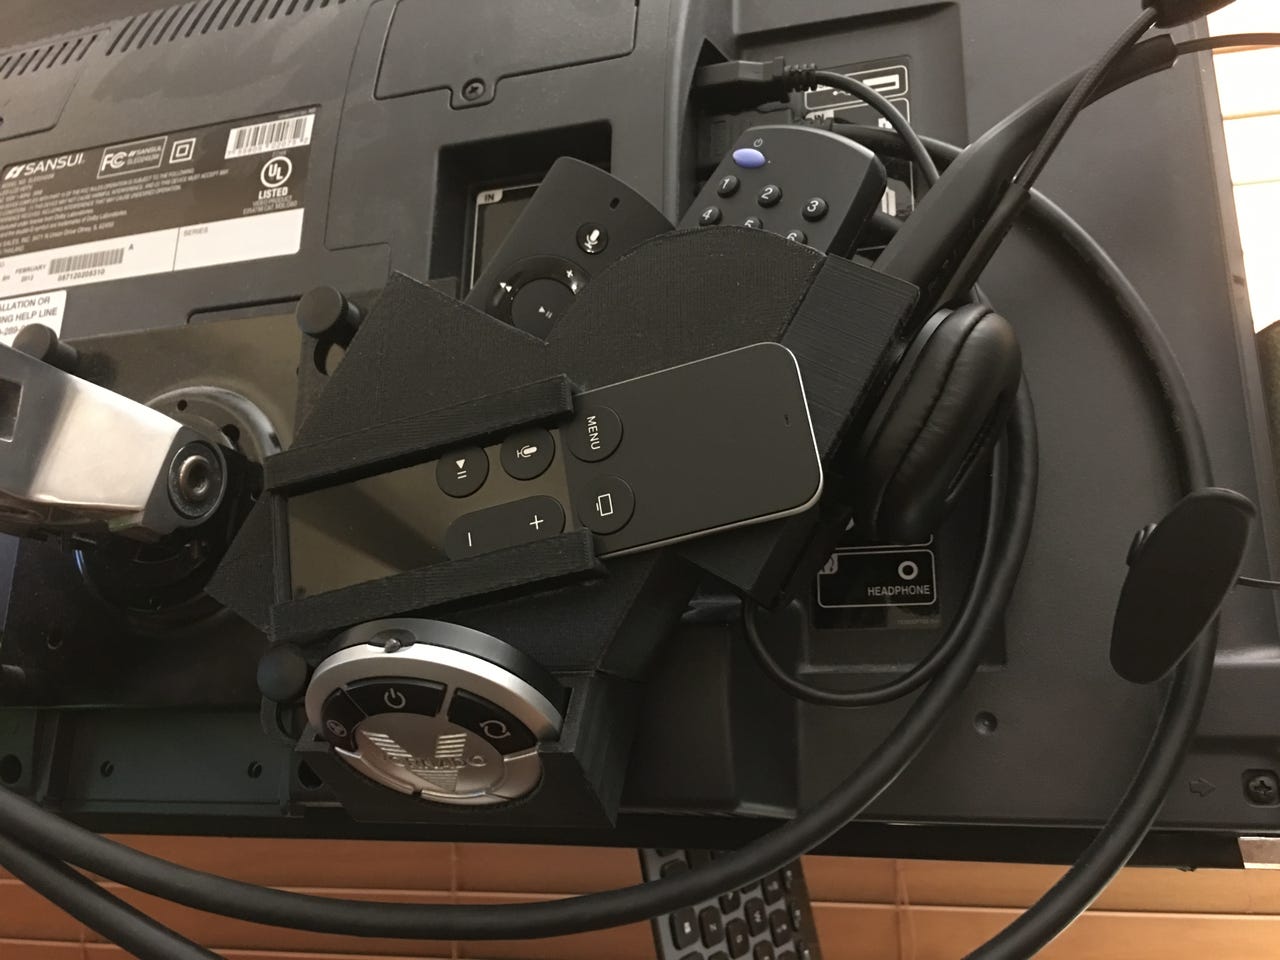
I created a one-of-a-kind monitor bracket remote holder and headset charger. It's designed to hold a number of gadgets that normally take up desktop space, but are now nicely integrated into a behind-my-monitor bracket.
It holds two remote controls (one for the monitor and one for the Amazon Echo in the other room), a fan remote control, a remote for the weird, new Apple TV remote control (which both I and Zack dislike rather intensely), and provides a powered dock/charger for my Bluetooth headset. You can see the whole thing, completed, below.
I started with a simple design, merely a bunch of rectangles rotated and stuck together. I printed it out the week after I got the MakerBot Replicator -- and it was a nightmare (but it got a lot better as I learned more about what I was doing).
Supports are a pain
More great project ideas
In 3D printing, there are these things called supports. To understand supports (and why they're kind of evil), you need to understand how 3D printing works. Remember that the printer deposits a new, ultra thin layer of plastic over a previous layer. Now, imagine you're 3D printing a wall with a doorway. All of the wall to the left of the door and all of the wall to the right of the door prints fine, one layer on top of the other.
But now it's time to do the span above the doorway. The molten plastic has to span that space. Sometimes if the distance is short enough, the stringy, molten plastic can make the jump without sagging too much. But if the span is too great, everything begins to sag, sometimes the printer head gets caught in the plastic, and things don't come out right.
Now, imagine that instead of a door, you're trying to do an entire roof. There's no way the 3D printer is going to fight gravity. That roof is going to collapse. To be able to build 3D objects that span empty air, slicers (read this for a good description of slicers) often generate temporary support structures that are also built up layer-by-layer. It's like having scaffolding underneath that roof.
In my first draft of this project, I trusted in the supports, and found that while they sometimes snap off your final print easily, sometimes they're almost impossible to remove, as the following picture shows.
I spent hours trying to pry out all those little plastic shards and they still seem to be everywhere in my workshop.
I did manage to build the remote holder, but I also discovered that I wanted to design without supports. Watch the accompanying video to see how I changed my design. Fundamentally, rather than building and designing one print that had to handle supports, I broke the print into segments and designed each to print without supports. I also added a bunch of new features, including the fan control holder and the headphone dock/charger.
Printing without supports using pins
Given that I was now building and printing separate elements, I had to come up with a way to join them together. If you're printing in ABS, it's pretty easy to use something called "ABS juice" to essentially weld the plastic together. But my printer is a PLA printer (which makes it far less toxic and PLA prints with a bit less hassle), and that means that ABS juice is not an answer.
I originally decided I wanted to build a universal joinery system. This proved to be dumb because (a) I'm a computer scientist, not a mechanical engineer, and (b) that was oh-so-overkill for a TV bracket. So I settled on the idea of little plastic pins and matching holes in each component.
Designing and punching the holes was easy. I just brought all the components into one file, aligned them properly, and used a "subtract" function to remove the pins. Subtract basically takes one shape and removes it from another shape. A similar feature is available in the shape tools in PowerPoint, so I was pretty up on the concept.
But as it turns out, it's not a really workable idea to make a 5mm hole and expect a 5mm pin to fit inside. There's probably an entire mechanical engineering class about this but (see I'm a computer scientist, Jim, not a grease monkey).
But this is where the 3D printer comes in oh-so-handy. Back in the day, if you made a mistake like I did, you'd have sent the parts out to some service bureau or fabricator and waited weeks to get them back. I just printed a test hole and a test pin and found out the pin was too tight. So I went ahead and printed four different sizes, from 4.75mm down to 4mm (which is merely typing in a number to a dialog) and tested the pins. Here's my test print:
I eventually tested and chose the 4.5mm pin, which in actual practice turned out to be a real challenge to insert into the more odd connections on the build. But I made it work - and learned that next time, I might make a smaller set of pins.
As it turns out, the pin mechanism (other than the challenge of making them fit) is really cool. Each slab of plastic is about 2.5mm thick, so a pin that is 5mm high by 4.5mm across almost perfectly ties two pieces together - and provides a lot more strength than simply gluing the components together.
I will definitely consider using the pin design again, especially in combination with a no-support design.
Testing, testing, and more testing
One other important aspect of design was the design/print/test cycle. If you're thinking code/compile/test/debug, you're thinking like me. I took measurements using a cheap pair of calipers I bought at Harbor Freight, but the actual real-world fit required actual, real-world fitting.
So my design process consisted of breaking down the project into the tiniest components, making each small component work, and then building up to the final piece. I printed each small component out and tasted it, tweaked it, and reprinted it until I was convinced it was a fit.
You might think this is a waste of filament or money, but all the test components, together, probably didn't cost me more than ten bucks. And there would have been no other way for a software guy like me to make a real, live object in meatspace. So, it was ten bucks well worth it.
Final conclusions and recommendations
This was a fun project. It did take quite a while to do, but that was because I was learning an entire new craft while doing it. Fabrication is new to me, as is designing things for use in the physical world. It wasn't particularly hard, but it did require a lot of thought and a lot of re-thinking until I finally groked it.
If you want to build this project (or riff off of it with your own design), I've posted it as a project on Thingiverse. Feel free to tinker with it.
After building this project, I find myself even more amazed by 3D printing and once again send a shout-out of thanks to the folks at MakerBot for providing the printer for this discovery series.
Now, every day, I can point to my weird, personal, custom, funky little monitor bracket remote holder and headset charger and say, "I designed that. And it's all mine." So go for it. Build something cool. Tell me about it in the comments below.
By the way, I'm doing more updates on Twitter and Facebook than ever before. Be sure to follow me on Twitter at @DavidGewirtz and on Facebook at Facebook.com/DavidGewirtz.