Erasing a drive in Mac OS X: step by step

With Mac OS 10.3 - El Capitan - Apple has removed the Secure Empty Trash function. Why? Because with solid state drives - SSDs - Apple couldn't guarantee that a secure erase would actually erase the data.
Thus when you sell a Mac - almost all of which have had SSDs for the last 4 years - using Secure Empty Trash with an older version of OS X, or trusting Empty Trash to nuke your data is asking for trouble. Follow these instructions and your data will be well and truly vaporized.
Nuking the data on your system drive also nukes Mac OS X. So you need to boot your Mac off an external drive - a USB thumb drive or external disk or SSD with Mac OS installed. If you are only encrypting your system disk - not erasing it - you can simply apply FileVault in place.
Step 1
Bring up System Preferences by clicking on the Apple menu in the upper left hand corner.
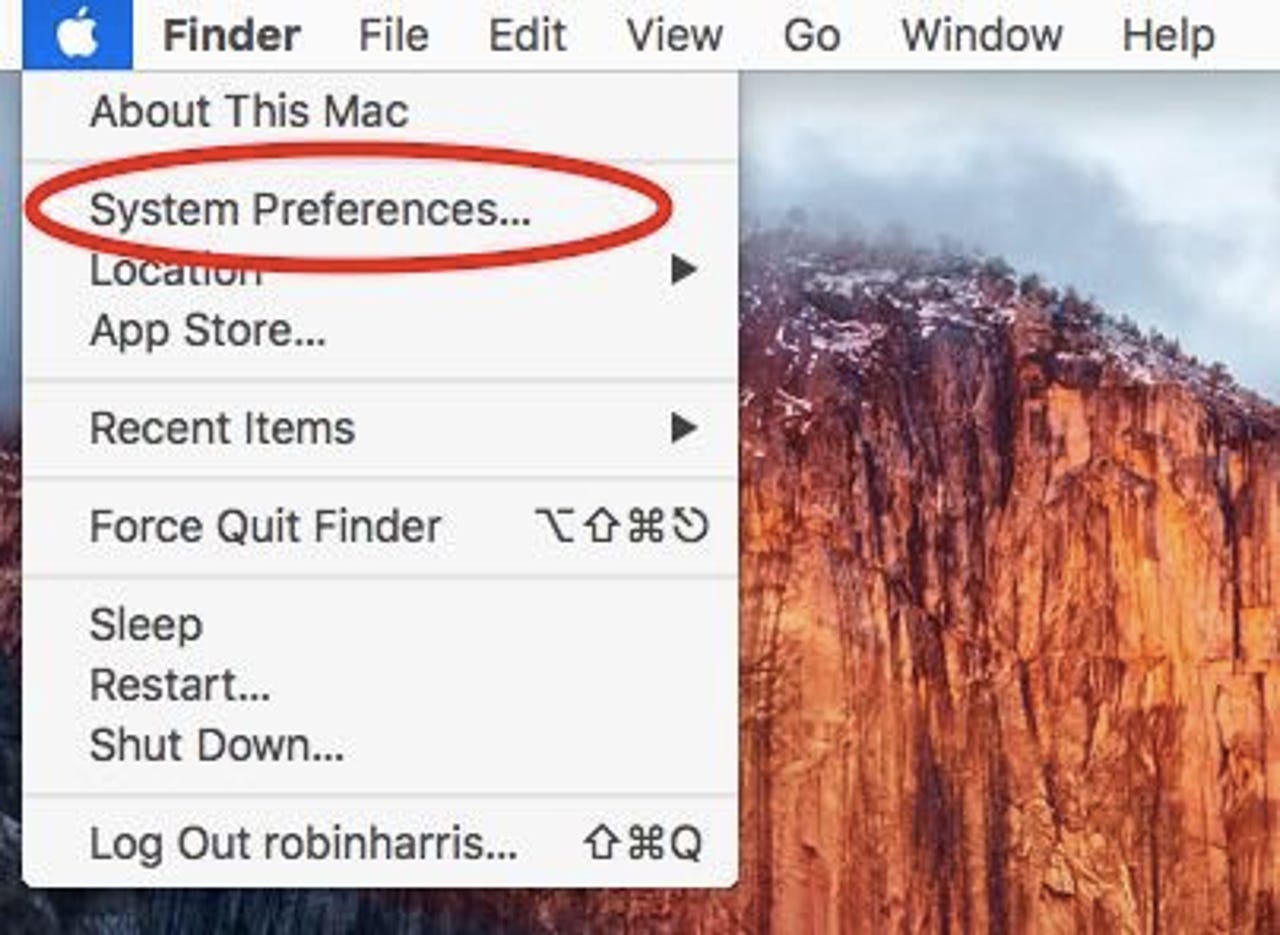
Click on System Preferences
Step 2
Now click on Security & Privacy.
Click on Security and Privacy.
Step 3
Now click on FileVault. Turn FileVault on. You'll be asked to choose a password option.
You'll have the option to keep the password on iCloud or personally. If you are protecting your everyday Mac, I recommend keeping the password on iCloud. If you don't, print out the password - take a screenshot - and keep it in a safe place. If you lose the password you could lose all your data!
If you have more than one account on your Mac - something I recommend for troubleshooting - you'll be asked if you want that account to have access as well. Click Enable User, enter that account's password and you're good to go.
Once you've done that, click Continue and the next window will ask you to restart the Mac to begin the FileVault encryption process.
Depending on the size of your drive and how loaded it is, encryption can take anywhere from minutes to hours.
If you just want to protect your MacBook data in case of loss, you can stop now.
Once encryption is complete the Security & Privacy pane of System Preferences will look like this:
Step 4
Now start the Mac OS Disk Utility, which is located in the Utilities folder in Applications. Choose the disk you are erasing and click Erase.
A dropdown window will warn you that you are about to erase all the data. Click Erase. The reformat will take a minute or less.
Step 5
Step 4 does not actually erase the data. It just sets the drive data structures as if the disk were empty, but the underlying encrypted files are still there, and the password may be on the drive.
To ensure full erasure go back to Step 2 and repeat the steps, which will proceed much faster since the disk now appears to be empty. After the second encryption and erasure is complete your data is gone forever.
Now reinstall Mac OS X if it is a system drive and your Mac is clean and ready for sale.
The Storage Bits take
Back when disks were 30MB, it wasn't too hard to remember what was on them. But today's terabyte drives are too big to rely on your memory. Be safe, not sorry!
Comments welcome, as always.