Hands-On: Upgrading my Acer Aspire Z3 with an SSD

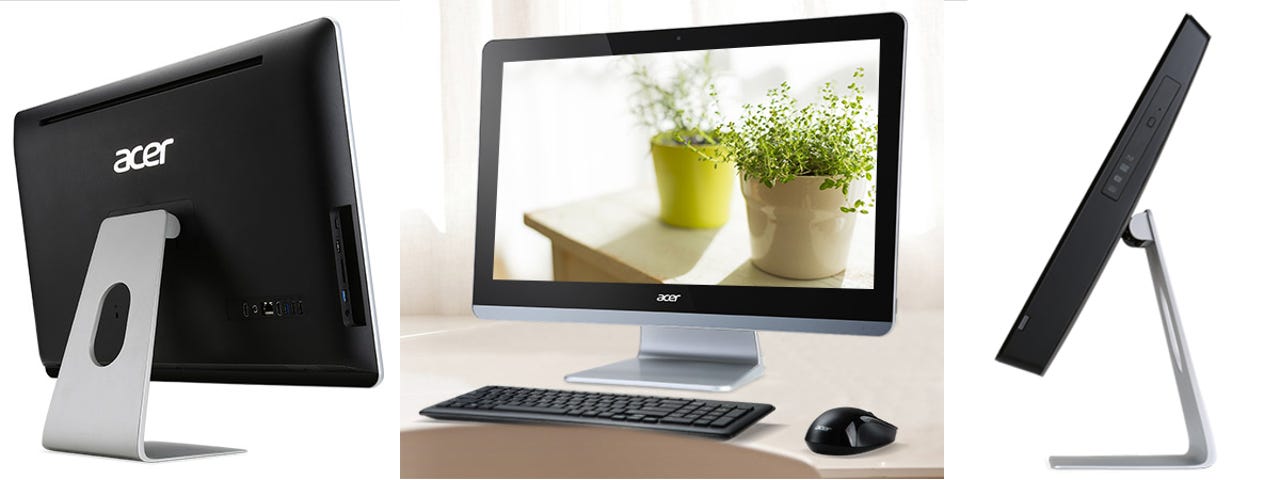
The Acer Aspire Z3 all-in-one desktop.
Shortly before Christmas I got a new Acer Aspire Z3-710 all-in-one desktop system. I have been using it every day since then, and I really like it a lot. I have wanted to swap out the factory disk drive for an SSD for some time now, but I couldn't see an easy way to get inside the unit. This week I did some web searches, and learned enough that I thought I was ready to give it a try.
Warning: the procedure I describe here will probably void the warranty on the Aspire Z3.
And note: there are a lot of different models in the Acer Aspire Z3 series. There are several different mount/stand/support systems used on various models, and several different kinds of cases which open in different ways. As far as I can tell, the procedure I am describe here will only work on the Z3-710 model. For some models it is not even similar.
Preparation. The only tools I needed for this job were a philips screwdriver and a thin, flat, stiff, unbreakable tool. I used an ordinary kitchen spatula.
I didn't go and buy a new SSD drive this time, I simply removed the one that I had previously installed in my Lenovo T400 (a Kingston HyperX). That is the system that I replaced with this Aspire, so it is fitting that the Aspire inherit the SSD as well. I reinstalled the original drive in the T400, and it is still working just fine.
The procedure for replacing the disk drive is conceptually very simple:
- Backup! Backup! Backup!
- Open the case, to gain access to the disk drive. Wouldn't this be a wonderful world if this were always easy? All credit goes to the T400 here, it could not have been easier - remove one screw from an access panel on the side, and slide the drive out. On the Aspire, however, at one point I thought I was going to have to use small explosive charges to get into the case.
- Remove the old drive
- Transfer whatever mounting bracket and hardware are necessary from the old to the new drive.
- Install the new drive
- Close the case - assuming that you didn't damage it so badly getting it open that it will never close again. Fortunately, I didn't.
- Install whatever operating systems you want/need on the new drive.
- Restore (or copy from the old drive) whatever data you need.
The reality of each of those steps is another matter entirely.
Open the case. I expected this to be the most exciting part, but it turned out to be a close second because of my own mistake on a later step.
The first thing I did was lay the system down on its face, to work on the back of it. I put towel under it to protect the screen.
Stand Mount
To get the case off, I first had to remove the stand-foot. There is a small plastic cover over the screws which has to be removed, so I just popped it up from the bottom edge first, and then slid it up and off.
Stand Mount
Once the cover panel is off, there were four screws attaching the stand to the chassis. I removed them, and lifted the stand away.
There are three screws across the bottom of the case which also had to be removed. Once they are out, it should be easy to remove the case - and on some models of the Aspire Z3 the case simply slides up and off. Unfortunately it is not this way on the Z3-710, and it is definitely NOT easy.
The case is attached to the frame by plastic press-click fasteners all the way around. Read that again, carefully. Plastic fasters, all the way around. I wonder if people lay awake at night trying to think of evil ways to put things together so that they can't be opened again?
Using a thin, flat, stiff (but not sharp) tool, I worked the edge of the cover away from the frame. I found it easiest to start across the top, but that might have just been chance. It doesn't take much separation to release the fasters - and it doesn't take much more than that to break one, so be very careful. Once I got a bit of a gap started I worked from there the rest of the way around, and it actually got pretty easy.
When the cover is free, I lifted it off and set it aside. The hard part is done, so take a break, and do a little victory dance around the desk - unless you broke the case in the process of getting it off, in which case foresake the dance and go off in search of superglue.
Exposed Chassis
The guts of the system are now exposed, and it is obvious what to do. A word of warning here, though. The DVD drive and the speakers are not attached to the frame, they were held in place by the cover. So if you decide to pick up or move the system, they can fall loose.
The disk drive is mounted in a frame at the bottom left corner. The SATA connecter is actually very tight and moderately difficult to remove, which led to a problem described below. Other than that it is trivial, one screw holds the disk frame on the chassis, and four more hold the disk drive in the frame.
Motherboard
Other interesting bits that are visible here... It would make sense for the memory to be under that nice long narrow panel, wouldn't it? It's not, of course. It's actually under the very large panel to the right. This system has two memory slots, one of which has an 8GB memory card installed. The second is free, so I could upgrade to 16GB. I just need to think of a reason to do that.
Oh, and that is some serious ventilation going to the CPU.
After installing the SSD drive and remounting the frame, it is wise to check that the SATA cable is properly attached at both ends. As I just said, the connector is quite tight on the old drive, and the cable is exactly the right length for where it needs to go. There's very little slack in it, and the other end is hidden under that large panel.
Just hypothesizing here, if you were to tug just a bit too hard on it while struggling to disconnect the old drive, and it pulled the cable just a bit - the other end of the cable might come off, and you might not even notice. Then when you swapped out the drive, and put everything back together, replaced the back cover, and the stand, and the cover over that... then you gleefully cabled up the system and booted it up, ready to install Linux... only to have it tell you that there was no disk drive installed.
That would be really nasty, wouldn't it? You might even suspect that Acer had done something really nasty with the BIOS, and it was refusing to accept your lovely SSD drive!
Not that I am the voice of experience or anything, oh no, not me... But opening the whole thing up again would be no fun, would it? Then when you got back inside the system your suspicion about the BIOS might seem even more plausible if there was no visible problem with the connections.
So you might replace the original drive, and then at least be smart enough to turn on the system and check the BIOS before replacing the cover again. Of course, if the BIOS still said there was no disk drive present, the light might start to come on in your thick skull - to check the concealed end of the cable, and find that it is disconnected. Duh.
So then you could reconnect that, power up and confirm that the disk drive is visible again. Then replace the original disk drive with the SSD. Again. Power up and confirm that now it is finally ok. Sigh.
Oh, and hypothetically speaking, if you were to go through all of this you might learn - the hard way - that the DVD drive and speakers are not actually attached to the chassis. Gaaaaa.
I'm not saying that I actually did any of that. Because it would be far too embarassing to admit. But theoretically, it certainly could happen, and it would be even more embarassing (and irritating) if you had taken a series of pictures of the chassis and motherboard while you had it open... and then some time later (like now) you were to go back and look at them, and discover that you could zoom in enough to actually see that the SATA cable has pulled out just far enough that is not making contact, but it is not actually separated from the connecter.
Anyway, that's it for the hardware bits. The system is back together, and everything is working. Now for the software bits.
The first decision to make is what to install. As I mentioned in the original article about this system, I had not bothered to install/configure Windows on it, I just shrunk the filesystem to get it out of the way, and then installed Linux. So I'm certainly not going to bother copying it to or installing it on the new drive. That makes things a lot easier, a lot faster, and a lot cleaner.
If it is important to you to have Windows installed, a lot of the SSD upgrade kits come with a disk clone program and an external USB case. Good luck with that. I would be willing to wager that I can install all 10 different Linux distributions that I use in less time than would be required to either clone Windows from the old to the new disk, or install Windows from scratch on the new disk.
There was one more small problem. Remember that I mentioned above that I removed the SDD from my old Lenovo T400? Well, that is an MBR (Master Boot Record) system, with a DOS partitioned disk. The new Aspire Z3 is a UEFI system, of course, and it wants a GPT partitioned disk.
This is not a big deal, fortunately. I booted a Linux Live USB stick, and used gparted to write a GPT disk label to the SSD. Problem solved. I then got on with the business of installing the various Linux distributions I keep around. Here is a summary and a few notes about each one:
- openSuSE Tumbleweed - I always install this first. I downloaded the latest snapshot from the openSuSE factory page and dumped that to a USB 3.0 stick. Plug that into a USB 3.0 port, and install to an SSD, and you get a blazingly fast installation. Almost unbelieveably fast. The Tumbleweed snapshot is always a complete installer, not just a live image, so it is about 3GB in size, and it installs in 5 minutes flat. I swear. Honestly. I couldn't believe it. Also, because the snapshots are made pretty frequently, the image you install will not need a lot of updates installed, so that also saves a lot of time compared to some of the other distributions. One other worthwhile note - because this was the first distribution I installed to a freshly-labeled GPT disk, the installation created an EFI Boot partition and a Swap partition, which will also be used by the other distributions that I subsequently installed.
- Fedora 23 - I installed the Gnome version from the Live image that was released last year. No problems with installation, but it has been three or four months since that release came out, so it also needed a lot of updates after the installation finished - about 660 or so, if my memory is correct.
- Debian (testing) - I don't like to deal with the testing installer, because it may be in development along with everything else for the next release. So I choose to install from the latest stable netinst image first (8.3), then boot that and change the repositories to point at testing rather than jessie, and do an 'apt-get update; apt-get dist-upgrade'. Also, because this is a testing version I selected every desktop available - it is now installed with Gnome 3, KDE, Xfce, Cinnamon, MATE, LXDE, and I even added i3 after installing. All selectable at login.
- Manjaro 15.12 - My current favorite. I install the others first out of habit, but this is the one I will be using every day. Manjaro is a very actively updated distribution, there is a new update bundle released almost every week, and the most recent Live installer is nearly three months old now. So there were a lot of updates to install, but it all went smoothly.
- Linux Mint 17.3 Cinnamon - From a Live USB stick I created shortly after it was released, so no problems with hacked ISO images. Surprisingly few updates to be installed, considering how long ago it was released. See ongoing discussions about Mint and frequency of updating.
- Linux Mint Debian Edition (LMDE) 2 Betsy MATE - I choose MATE for LMDE because I have Cinnamon for Mint 17.3. There were quite a few more updates for this than there were for 17.3. Seems a bit odd.
- Ubuntu 15.10 - Because this system has a wired network connection, I chose to let it get updates during installation. That seemed to work ok, and didn't slow the installation down terribly. Also, for this installation I had to be careful about the EFI boot directory name conflict with Linux Mint. So now I have two EFI Boot partitions. That will come in handy later, when I install Korora.
- Korora - Has the same problem with Fedora EFI Boot directory name conflict that Linux Mint has with Ubuntu. So now I have a second EFI Boot partition, which is used for Mint and Korora. The Korora 23 release is much newer than the Fedora 23 release, so there was nowhere near the number of updates that needed to be installed - something like 175, I think.
- Sparky Linux - This is my current favorite "Debian Testing Plus" distribution. I installed the Xfce version, with no problems. This is the only distribution that I installed which has a "first boot" script that offers to download and install updates - and there were lots of them to be done.
- openSuSE Leap - This is sort of redundant, since my main distribution on this system is openSuSE Tumbleweed. But I keep Leap installed so that I can see what it is doing, compared to Tumbleweed, and for reference/test in case something unusual happens. No problems on installation, there were lots of updates to be installed.
One last thing - and I have saved the very best for last. I mentioned in my original post about the Aspire Z3 that there was a very nasty situation with the UEFI BIOS boot sequence. Basically, no matter what Linux distribution I installed, it kept jumping back to trying to boot Windows. Finally when I installed openSuSE Leap that stuck - but it really stuck, now it always booted Leap no matter what other distribution was added, and no matter what I did with the EFI boot configuration manually.
While struggling to figure out why the SSD drive was not being recognized, my hypothetical friend stumbled across something very interesting in the BIOS configuration. On the 'BOOT OPTIONS' page, it has the following lists:
Boot Priority Order
1st Boot Device [Tumbleweed]
2nd Boot Device [CD&DVD]
3rd Boot Device [Removable]
4th Boot Device [LAN]
Hard Disk Drive Priority [Press Enter]
Optical Disk Drive Priority [Press Enter]
Removable Device Priority [Press Enter]
Network Device Priority [Press Enter]
I don't think this is a very obvious screen, to say the least. But what I eventually found out was that if you go down to the Hard Disk Drive Priority line and press Enter, you get this list:
Hard Disk Drive Priority
1st Boot Device [Tumbleweed]
2nd Boot Device [debian]
3rd Boot Device [Manjaro]
4th Boot Device [Mint]
Holy Cow! That's the EFI Boot sequence list! What the heck is that doing lurking this deep in the BIOS setup? Now, if you go to any line in that list and press Enter, you get a list of ALL the defined EFI Boot objects - exactly what you see with the efibootmgr command under Linux. You can then select any item from that list, and it will be placed on that line - and the EFI Boot sequence list will be changed accordingly!
Wow, does this ever explain a lot of things about how this Aspire Z3 has been behaving for EFI boot! Now that I have gotten over the initial surprise (and irritation) of finding this, I have to say that this is a powerful and flexible way to manage the EFI boot priority list. But geez, could they have buried it any deeper, and made it any more obscure than this?
So, my very lovely Acer Aspire Z3 All-In-One desktop system is running even better, from an SSD. Even better, it is completely Windows-free. What a nice weekend this has been!
Read more about Linux and open source:
- Linux and breakfast cereal: Why are there so many flavours?
- Hands-on with Kali Linux Rolling
- How to customise your Linux desktop: MATE
- How to customise your Linux desktop: Cinnamon
- How to customise your Linux desktop: Xfce
- Hands-On with openSuSE Leap RC1: A walk through of the installer
- Hands-On: KaOS Linux 2015.10
- Thus versus Calamares: Comparing Manjaro 15.09 installers
- Upgrading my Linux-Windows multi-boot system to Windows 10
- Hands-On: Linux UEFI multi-boot, my way
- Hands-On: Linux UEFI multi-boot, part two