How hard will it be to move to the Windows 7 Release Candidate?

Windows 7 head honcho Steven Sinofsky published a post on the E7 blog last week that outlined some changes beta testers will face when the next public milestone is released. The most surprising news was the official announcement that Microsoft will not support upgrades from earlier builds of Windows 7, including the official beta released in January. In fact, the RC build, which is due to be released before the end of May, will block upgrades unless you go through a fairly cumbersome seven-step process (which is, helpfully, documented in the same E7 blog post).
There’s good reason for shunning beta-to-beta upgrades, which can result in unusual instabilities and glitches. As Sinofsky noted in his characteristically exhaustive post, Microsoft doesn’t devote any development resources to tracking down bugs caused by these scenarios. When Windows 7 reaches the marketplace later this year, Microsoft customers will be getting the new software on a new PC, or they’ll be performing a clean install or an upgrade from Windows Vista. Those are the migration paths that are actively being tested.
Wrong.
There’s still the little task of reinstalling (and, if necessary, activating) all your programs on the new Windows 7 build. That’s a process that can take some time. In this post and the accompanying image gallery, I’ll show you how the Windows Easy Transfer utility works and how you can maximize its effectiveness. (If you want to skip straight to the details, go to Page 2 of this post.)
Before I begin, though, a little history lesson is in order. About a month ago (March 7, 2009, to be exact), Microsoft marked the three-year anniversary of its purchase of software developer Apptimum, Inc. Apptimum’s crown jewel was a technology for transferring installed programs from one PC to another, which it sold in two distinct packages: the consumer-focused Alohabob PC Relocator and its corporate cousin, Migrate DT.
At the time, Windows Vista was in the final stages of its long and tortured development cycle, far past the point where new features were going to be added in. But Microsoft promised that these features would make it into Vista’s successor. PC Relocator was rebranded the Windows Easy Transfer Companion, and Microsoft made it available as a beta release. Microsoft’s Nick White wrote it up in the official Windows Vista Blog back in February 2007, just a few days after Vista’s commercial release:
Although the standard Easy Transfer wizard does not move installed programs, this is a very important capability that's been requested by our customers. Because of this we have been working on a new tool called Easy Transfer Companion, which will transfer programs and program settings from a Windows XP-based PC to a Windows Vista-based PC. When used together with Easy Transfer, you will be able to move everything you need to your new PC running Windows Vista. Easy Transfer Companion has been designed to transfer many of the most popular programs for consumers and small businesses, as well as many others. You can transfer programs with either an Easy Transfer Cable or a network. We've released the tool in Beta so that we can take feedback on the overall functionality and get more information about the experience of transferring specific applications outside of those that we've tested internally.
And there it sat, for 18 months, apparently untouched. Last July, Microsoft unceremoniously pulled down its beta release of Windows Easy Transfer Companion and allowed the Knowledge Base Article describing it to vanish with no explanation. A Microsoft spokesperson told me that it was “unclear” whether the technology would ever be released and that its inclusion in Windows 7 was not a foregone conclusion.
There’s no trace of this feature in recent builds of Windows 7. Given that Windows 7 is now officially feature complete and a release candidate is imminent, I think it’s safe to say that the program formerly known as PC Relocator has been officially abandoned.
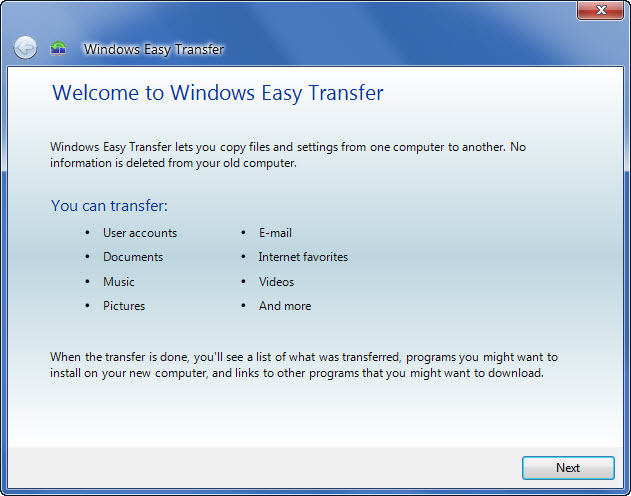
It’s not like Microsoft has completely ignored this feature area. The redesign of Windows Easy Transfer that appears in Windows 7 does a generally excellent job of moving files, user settings, and some program preferences between computers, far better than any previous edition. It's designed primarily to help you migrate from with Windows XP or Windows Vista. In page 2, I step through its workings and explain how you can use it to migrate safely from an earlier release of Windows 7.
Next –>
The Windows Easy Transfer utility has lots of options, but the basic process is fairly straightforward. Here are the seven steps you’ll need to follow:
STEP 1: Run the Windows Easy Transfer program on the old PC.
To get started, you need to run the Windows Easy Transfer program. On Windows XP or Windows Vista, insert the installation media (DVD) and browse the disk using Windows Explorer. Open the Support\Migwiz folder, and then double-click If you’re starting with an earlier build of Windows 7, you might be tempted to use the version on the Windows 7 Start menu. I recommend that you not do that. Instead, use the version on the installation media for your new Windows version, which is likely to have significant updates to the Easy Transfer support files.
STEP 2: Select a transfer method
The top two options in this dialog box are intended for situations where you’re transferring stuff between two physically separate PCs and can make a live connection. For this upgrade scenario, choose the third option, which specifies an external location (note that this destination can also be a network share).
STEP 3: Copy the files and settings from your old PC to the temporary storage location
For most Windows 7 beta testers, the “old” and “new” PC will be the same physical hardware, just with different installations of Windows. If your system uses a single hard disk volume, you can blast through using the default settings. If you have a dual-boot system or multiple drives, you’ll need to customize things using the advanced settings. I go into more detail here.
STEP 4: Install the new build of Windows 7.
For the sake of this walkthrough, I’m assuming you’ve chosen to perform a clean installation, which wipes out all your old settings. Don’t worry, you’ll be restoring them all later. After installation is complete, be sure to check for updates.
STEP 5: Install any must-have programs on the new Windows setup.
Although you can save this step for last, I recommend that you do this part now. If you use the Windows Live suite of programs (Windows Live Mail, Messenger, Photo Gallery, and Writer), I recommend installing them before you continue.
STEP 6: Restore your saved settings.
This part of the process is relatively easy. The Windows Easy Transfer utility is installed with your new installation of Windows 7, so you can run it from the Start menu (you’ll find it under All Programs, Accessories, System Tools). Choose the same option as in Step 2, but on the next screen specify that this is the “new” PC. The utility will step you through the process. If you have changed user account names or drive layouts, you might have to use the advanced options to map the old accounts and drive letters to the new ones.
STEP 7: Use the Windows Easy Transfer report to see which programs you have to reinstall.
After the Windows Easy Transfer utility completes its restoration, it automatically displays a report of what it did. (You can call up this report later by clicking the Windows Easy Transfer Reports shortcut, which is also in All Programs, Accessories, System Tools.) Check for any errors, and correct them, if necessary. Then open this list, which shows all programs that were installed on your old PC. If you chose to install some programs before running this step, you’ll notice that some programs on the list are marked with a green check mark as Already Installed. The links under each entry in the list take you to the program developer’s website, which typically includes the download link. You can leave this report window open, and it will update each entry in the list automatically as you complete it.
And that’s it. When I used this process to migrate 12GB or so of data from my old Windows 7 setup to a new one, each part of the process took a little less than 30 minutes. Your mileage will vary, of course, depending on factors like disk speed and how much data you have to migrate.
Here's a preliminary list of the programs whose settings can be migrated using Windows Easy Transfer. I compiled this list by hand using the XML files included with a recent build of Windows 7. It is obviously unofficial and subject to change. (I hope, in fact, that Microsoft will update it regularly after Windows 7 is officially released.)
- Ad-aware 6 Professional
- Adobe Creative Suite 2
- Adobe ImageReady CS
- Adobe Photoshop CS and CS 9
- Adobe Reader 9.0 (no earlier versions appear to be supported)
- AOL Instant Messenger 5 and 6
- Corel Paintshop Pro 9
- Google Chrome
- Google Picasa 3
- Google Talk 1
- iTunes versions 6, 7, and 8
- Lotus Notes versions 6, 7, and 8
- Lotus SmartSuite
- Microsoft Money Plus Home & Business 2008
- Microsoft Office (versions 2003, 2007, and 14)
- Microsoft Works versions 8.0 and 9.0
- Mozilla Firefox 3
- Opera 9
- Peachtree 2009
- Quicken Deluxe 2009
- QuickTime Player versions 5, 6, and 7
- RealPlayer Basic 11
- Safari 3
- Skype 3
- TaxCut 2008
- Windows Live Mail (versions 12 and 14)
- Windows Live Messenger, Photo Gallery, Writer
- WinZip 8, 9, or 10
- WordPerfect Office (versions 11, 12, and X3)
- Yahoo! Messenger
- Zune Software 3
I’ve used the new Windows Easy Transfer utility on a half-dozen or so recent upgrades and it’s practically foolproof on simple installations. I still wonder, though, why the option to move some programs can’t be made available.
Questions? Hit the Talkback button and ask away.