How to make the most of iPhoto


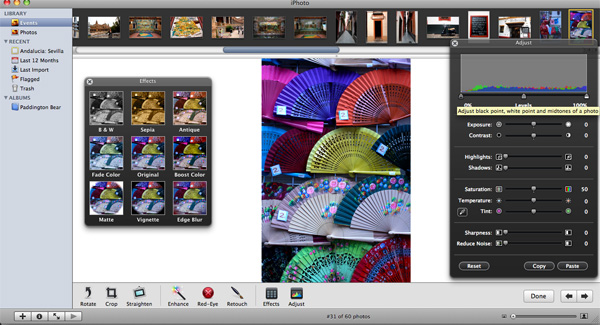
1. Photo Editing: iPhoto was built to be user-friendly, thus it has a lot of editing presents right out of the box, including Crop, Straighten (I love this since I always tilt my images a bit accidentally), and Retouch (great if you have pictures of people with shiny foreheads). I also make a lot of use of the Enhance tool, as it often brightens up the photo, but its not always perfect, so its really a judgment call if you like it or not. There's also two toolbars: Adjust and Effects , which allow you to touch up sharpness, exposure and saturation quickly, as well as applying overlay filters such as B&W, Sepia and Antique to give your photo a different mood. The filters work really well if you have a dull photo that needs some livening up.
If you do have Photoshop and you want to do some serious editing, you can easily drag your photo directly from the album in iPhoto to the Photoshop icon, which will trigger the program to open directly to your photo. When you're done, it if you hit Save (and not Save As) it will save directly to your iPhoto file.
2. Creating Albums and Slideshows: The file transfer process is extremely simple, usually just plug-in and accept transfer. Usually, iPhoto will automatically create "Events," which are folders with your pictures organized by date. You can drag other events into one if you want to combine, or cut and paste photos out into a new Event if you don't like the way its automatically arranged. Furthermore, you can create "Albums," which are organized on the left sidebar. This becomes handy when you want to organize pictures for printing or transferring photos to other Mac programs like iWeb.
You can also create slideshows quickly by either selecting an entire Event or particular pictures within an event, and just click Slideshow on the bottom toolbar. From there you can determine how fast you want your pictures to transition, transition effects and even add music from iTunes to go along with your slideshow. 3. Quick Batch Change and Updates: If you don't have Adobe Photoshop, you probably don't have Adobe Bridge, which allows Batch Changes to file information. You can do this on iPhoto (but you can't change as much info), by selecting all of the photos you want to change, then go to Photos > Batch Change, where you can change the titles, dates and descriptions to all of the photos at once.
4. Upload to Web: In the past year, iPhoto has gotten a lot better at being more facilitating in uploading photos to photo-sharing sites such Flickr and Facebook directly from iPhoto, rather than a third-party program (as I've done with Flickr most of the time). Check with the photo-sharing site that you use to get an authentic download for this process.
5. Ordering Prints and DVDs: In order to maximize how much money Apple can get from you, they've made ordering prints and other photo products quite simple. Pretty much just select pictures you're interested in ordering, click one of the buttons on the bottom toolbar. Products include ordering prints, DVDs, calendars, posters, cards and books. Once you click on the product you want, a pop-up will allow you to edit how you see fit, and then take you to a pricing and ordering site on Apple.com.