More hands-on with the Raspberry Pi Zero: Loading, booting and configuring

In part one of this mini-series, I described ordering, receiving, loading and initial booting of my lovely little brand-new Raspberry Pi Zero. Now I have had another day (well, evening) to experiment with it, and I have some more interesting information to pass along.
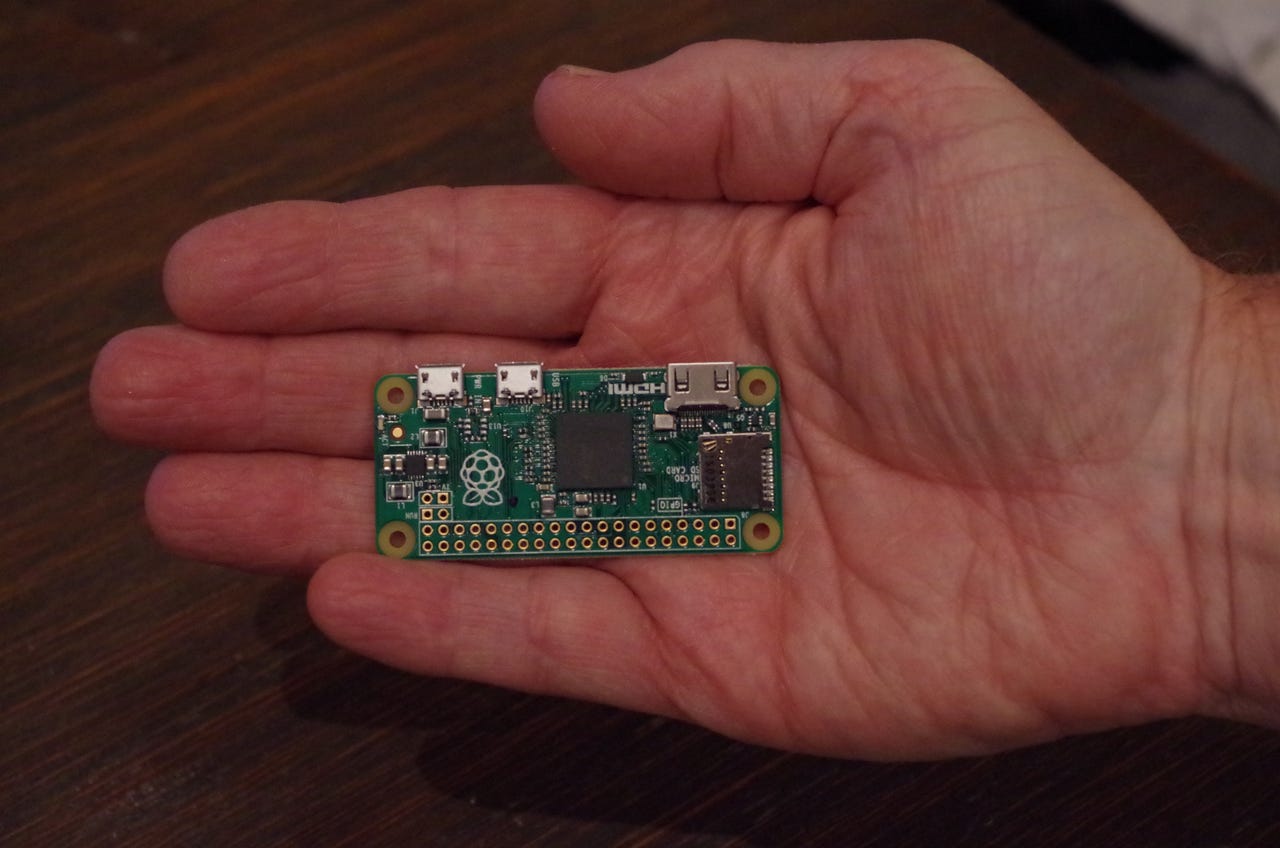
First, because I have been asked for pictures, and because it still doesn't feel to me like the commercial/promotional pictures I've seen of the Raspberry Pi Zero really convey how small the thing is, above you can see my own attempt at that. It's amazing, and the board is populated only on one side. Wow.
Now onto some more useful info...
Connections
I wrote previously about the basic connections on the board, so what I will add here is a list of what is not on this board compared to previous Raspberry Pi units.
- Wired network (RJ45) connection
- Composite Video / Stereo Audio connection(s)
- CSI Camera connector
- DSI Display connector
- 40-pin GPIO connector
The GPIO and composite video connectors can be added by a hobbyist, because the board is actually prepared for those but they have not been installed, to keep costs down. There is also a connection prepared for a reset/run switch.
Getting the software loaded
As you might have gathered from the comments to part one, it is sometimes possible to simply use a micro-SD card from another Raspberry Pi, if you are fortunate. But as was shown by my own experience, this doesn't always work, so don't panic if the Zero appears to be 'dead' if you try this. My best advice in this area is to simply initialize a microSD card from the latest NOOBS or Raspbian image, which you can get from the Raspberry Pi Downloads page.
Of course, if you want to connect to a wireless network, or you need separate USB connections for the keyboard and mouse, or you want Bluetooth, or any number of other things, you're going to need a USB hub.
As I said in the original post about the PiHub, this takes a bit of getting used to, both visually and mentally. (Please excuse the cable mess, I didn't have any shorter cables handy).
The mental hurdle here is that the PiHub is connected to the Raspberry Pi twice -- once with a USB A-B cable, which provides the logical USB connection to the hub ports, and once with a USB A-microUSB cable, which provides power from the hub to the Raspberry Pi. This cable should be plugged into the PiHub port which is marked on the case with a Raspberry Pi symbol rather than the standard USB symbol.
You don't have to use a PiHub, of course, you could use any other USB hub, and it doesn't have to be separately powered, if your USB-connected peripherals don't require it. The other thing that I find amusing about this picture is that the PiHub is actually a bit larger than the Zero.
If you look carefully at this picture you can also see that I have the Raspberry Pi Wi-Fi adapter plugged into the PiHub. That provided a pleasant surprise, although not totally unexpected. I did nothing but plug in the adapter, and it worked. It was recognized and configured by Raspbian, so when I clicked the network icon on the desktop panel, the available wireless networks were listed; I selected the one I wanted, entered the key and it connected. Very nice.
Initial boot
When I booted the freshly prepared NOOBS 1.5 microSD card, the Pi Zero went into the Recovery/Setup screen. Because I had no network connection at that point, the only option was to install Raspbian, which took about 10 minutes. It then rebooted, and came up running Raspbian in GUI mode, with the LXDE desktop. As I said, the Pi Wi-Fi adapter was recognized and configured, and all I had to do was select the wireless network to connect.
I will write one more post in this mini-series, with more information about the latest Raspbian (and screenshots, of course). What I can say here is that it is definitely faster than the original Model A/B/B+, but it is even more clearly not as fast as the Pi 2. More details on this tomorrow.