Raspberry Pi: New releases of Raspbian and NOOBS

The day before the announcement of the Raspberry Pi Zero, a new version of Raspbian Linux very quietly appeared in the Raspberry Pi Downloads, along with a new NOOBS archive that included it.
As there was no release announcement made at that time, and then there was so much excitement about the Raspberry Pi Zero the next day, the Raspbian release slipped past almost entirely unnoticed.
Now the Pi Zero excitement has died down a bit, and there has finally been a Release Announcement in the Raspberry Pi Blog, so I would like to take a look at what is new, different and interesting in Raspbian and NOOBS. I haven't written about Raspbian in almost a year (Raspberry Pi NOOBS 3.12), and there have been a couple of other releases in the interim, perhaps most importantly Raspbian jessie was released, so what I write about here will actually be a roll-up of those releases.
There are two ways to install Raspbian, either directly from the operating system image or as part of the NOOBS installation package. I explained the difference between these two in my previous Raspberry Pi post (Hands-On with the Raspberry Pi Zero, part 4: Wrap-up) so I will not repeat all of that here. This post will have two parts, the first looking at the details of Raspbian itself, and the second looking at the latest NOOBS package.
Raspbian
The Raspbian desktop has gone through some significant changes since Simon Long joined the Raspberry Pi team and took responsibility for it. His initial changes were met with mixed reactions, probably because of their magnitude and some lack of backward compatibility or lack of support for some previous ways of working (some names and links changed). But there is no doubt that the Raspbian desktop is cleaner, better organized and more pleasant to use as a result of his work.
The latest Raspbian release was made primarily to add support for the Raspberry Pi Zero, but there were a few other changes in the distribution as well. If you have purchased a new Raspberry Pi Zero, then you should download the latest installation images from the Raspbian Downloads page (or get them with NOOBS as described below).
If you already have a Raspberry Pi A/A+/B/B+/2 system, and you are already running Raspbian jessie there is no need to reinstall, you can get these latest changes by simply doing an 'apt-get update; apt-get upgrade'. If you are still running Raspbian wheezy, you would have to upgrade to jessie to get these changes, and that will probably require a reinstall because the changes between wheezy and jessie are very substantial, and as far as I know there was never a reliable upgrade-in-place process of this for Raspbian.
If you're not sure which version you are running, open a terminal window and run 'uname -r' to check the kernel release. If the output is 3.x you are running wheezy, if it is 4.x you are running jessie.
One of the biggest changes, which actually came in with Raspbian jessie, is that on a new installation the default is to boot directly to the desktop GUI, rather than the CLI. I consider this to be an advantage, because it is what is expected by a lot of new users. I think that if you consider the psychological effect of dumping a user into a CLI when they have never seen anything but a GUI, compared to dumping an experienced user into a GUI when they might prefer a CLI... Well, it seems to me that the experienced user is going to figure out how to change the startup configuration to boot to a CLI again, whereas the inexperienced user might get significantly intimidated or confused. So as I said, I give this boot-to-GUI default a thumbs up.
The default desktop for a freshly installed Raspbian looks like this:
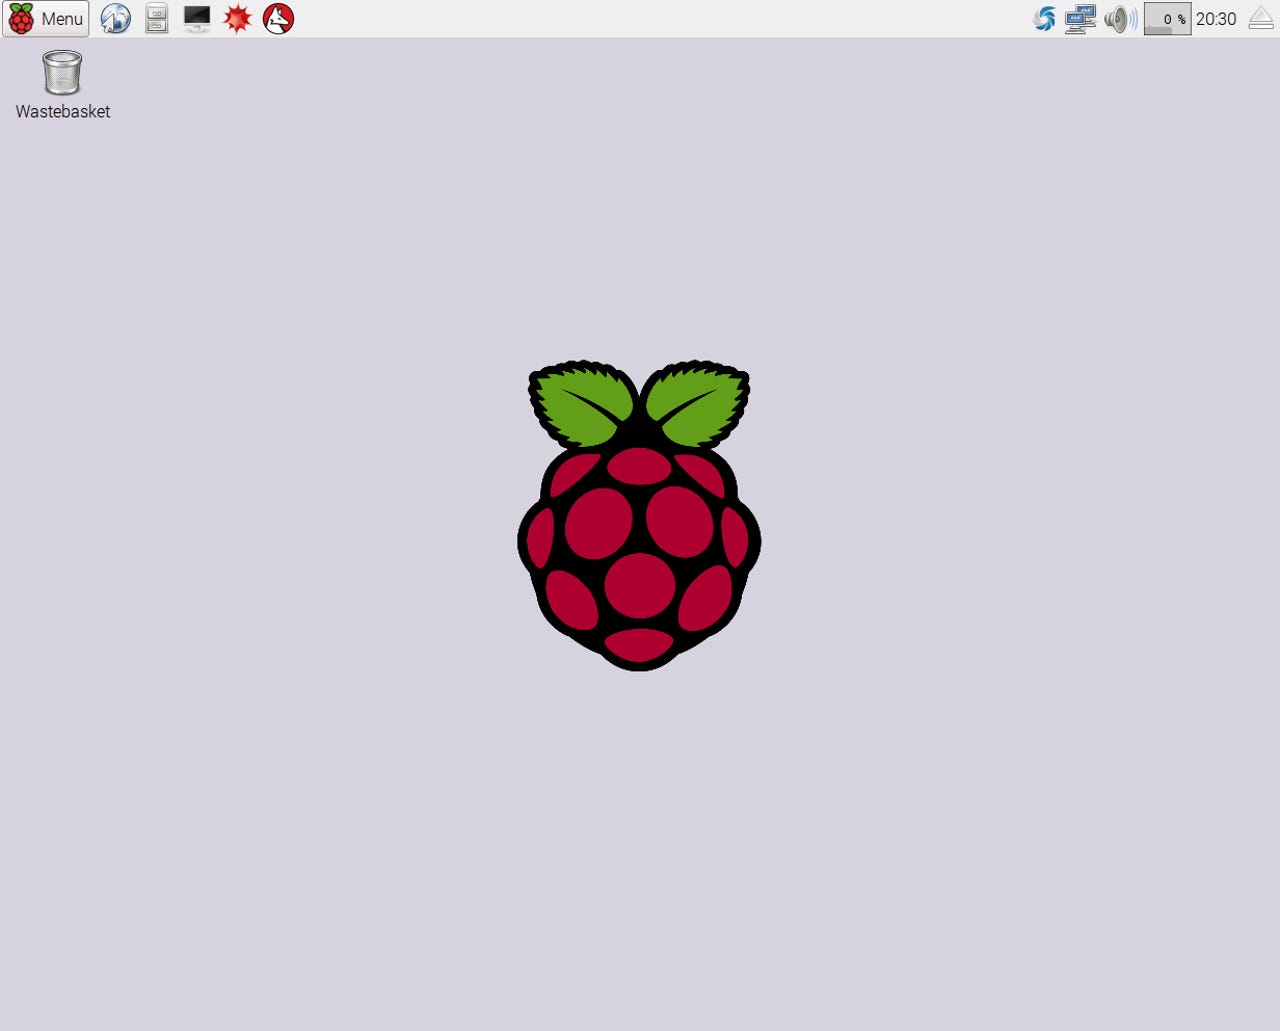
Raspbian Linux Desktop
That is a nice simply configured LXDE desktop, with a top panel which includes a Menu and some application launchers at the left end, and a group of controls and monitors at the right end. I am going to be writing about configuring the LXDE desktop in my next post in the "How to Customize Your Linux Desktop" series, so I am not going to spend any time on changing or customizing here. I am only going to look at the content and use of what is there by default.
The controls and monitors at the right end of the top panel have improved over the past few releases. As you can see here, in addition to the usual Network, Audio and Time icons, there are several new ones which have been added.
The sort of unusual looking spiral icon at the left end of this group is not standard on the Raspbian desktop, it is a dynamically-added icon the for the spectacularly good shutter screenshot utility that I use for these posts. If you need to make screen shots on Linux, you should consider shutter, it is really, really good.
In the middle of the group is a CPU Usage Monitor. I am generally not a big enthusiast of this kind of panel indicator, but because the Raspberry Pi is often running at or near its limit, it can be useful to have this where you can check it easily.
At the right end of the panel is the Ejector icon. This may seem trivial, but I absolutely love it. It is such a simple solution to the problem of managing removable storage (read as: USB sticks) without losing data or corrupting the filesystem. I don't have go looking around on the desktop for a removable filesystem icon which might have popped up just about anywhere when I plugged in the stick; I don't have to scour the Panel looking for an icon which should have appeared when I plugged in a USB stick (but frequently doesn't), and I don't have to go off and start a File Manager just to get to the eject icon. Oh, and I don't get disgusted and just close my eyes, hope for the best, and yank out the USB stick any more. Nice.
Some time ago Raspbian switched to a custom version of the Epiphany (Gnome Web) browser. The new release includes some Epiphany improvements in video playback, so if that is your thing you will appreciate this release. However, I don't spend much time on videos, and I still have problems with the stability and functionality of Epiphany (I was not able to write this blog post using it, for example), so I still always load midori as one of the first steps after installing a new Raspbian release.
Speaking of adding packages like midori and shutter, the latest Raspbian release includes a new graphical package manager, also derived from Gnome. This is likely to be a very welcome addition for many of those who were still using the CLI apt-get command for package management.
Personally, I have always added the synaptic package manager to Raspbian, and I am still going to do that for one relatively simple reason. I can use synaptic not only to add and remove packages, but also to download and install Raspbian updates. As far as I can tell, Gnome Packages doesn't do updates, but if I have overlooked that please let me know in the comments.
There are a few other new utilities and applications in the latest Raspbian release as well. One of the more notable is the Node-RED application for wiring the Internet-of-Things. It has not yet earned a launcher on the Panel, but you can find it in the Programming menu. Hmmm. In fact, I will do that as an example in the Customizing LXDE post later this week.
For those who are using the Raspberry Pi for development, Scratch has been updated with more and better MIDI and PiFace support, and a new GPIO Zero library is included which makes it easier to access the GPIO pins from Python.
All in all, this is a good, useful Raspbian update and it is well worth the time and effort needed to either update an existing system or install a new one.
NOOBS
NOOBS is the New Out-of-Box Software package for the Raspberry Pi family. As I have said before, NOOBS is undoubtedly one of the major factors in the success of the Raspberry Pi. What NOOBS does is take the standard Raspbian distribution and wrap it up in an installer package that makes it easy for anyone, technical or not, experienced or not, to select and install any combination of one or more operating systems on any Raspberry Pi.
You can either purchase a preloaded NOOBS SD/microSD card, or you can get the latest image from the NOOBS Download page. If you choose to download the image, all you have to do is extract the files from the ZIP archive onto an empty FAT formatted SD card. No special tools, no special commands, no danger of getting confused or making a typo and wiping your root filesystem by mistake. Good stuff.
For those who might be curious about how NOOBS works, it's really pretty simple. When the Raspberry Pi boots, it doesn't try to read a Master Boot Record (MBR) or UEFI boot partition from the disk, as most "typical" PCs do. It simply looks for the first FAT partition on the SD card, and then looks for a properly named boot file at the top level of that filesystem.
When a NOOBS card boots, it brings up a graphic display which has a menu across the top, and a list of available operating systems to install down the center. Exactly what is included in that list is variable. The one thing it will always included is Raspbian, because that is included on the NOOBS disk itself. But if the Raspberry Pi it is booting on has an active Internet connection, it will also scout around on the web for a variety of other operating system distributions, and if it finds them they will also be included in the list, as shown below.
The Raspberry Pi Model B, B+ and 2 have on-board RJ-45 wired ethernet connections, so that has become a sort of de facto standard way of downloading and installing other images. But the Raspberry Pi Zero and the Model A/A+ don't have a wired network connection, so that presents a problem for this kind of NOOBS operation. Hmm. I hadn't thought about this before, but the original NOOBS distributions included images of all the available operating systems, not just Raspbian as it does today. I had talked about this change in the previous post, and mentioned why I thought it happened. But now I wonder... in the beginning, for the Model A, it had to include all the images because it didn't have a network connection; I wonder now if the content was changed because the Pi Model B/B+/2 included a wired network connection, and they became more common than the A/A+?
Anyway, if you have a nice shiny new Raspberry Pi Zero (or Model A/A+), all is not lost because of the lack of a wired network connection. No indeed, the Raspberry Pi development team is looking out for you as well.
The Menu Bar at the top of the NOOBS window includes an option to configure WiFi networks. If you have a NOOBS-supported WiFi adapter installed, selecting that option will bring up a WiFi Network Selection window, with a list of available networks. Selecting a network from that list, and entering a password if necessary, will establish a connection and you will then get the full list of available NOOBS installation options. Yay!
Raspberry Pi WiFi Dongle
Please note, though, that I said it requires a "NOOBS-supported WiFi adapter". I haven't been able to find a list of these. I can only say from experience that the 3rd-party USB WiFi dongle that I got with my original Model B two years ago does not work with NOOBS (although it works perfectly once Raspbian is installed, no additional drivers or configuration necessary), but the Official Raspberry Pi WiFi Dongle that I got along with the Pi Zero works perfectly with NOOBS.
As a side note, I find this kind of ironic because if you look under the covers, the official dongle appears to be based on a Broadcom BCM43143 chip. That chip set has been a right royal pain in the butt with pretty much every Linux distribution on my Acer Aspire E11, but it works out of the box with both NOOBS and Raspbian. Go figure.
Broadcom WiFi USB Adapter
Sorry, another side note... In the process of writing this, I was looking up the Broadcom WiFi adapter, and I found a description of the Broadcom WiFi Adapter and Two-Port USB Hub for Raspberry Pi. What? Where did that come from? How cool is that! Right now I am about 5Km away from my new Pi Zero, and even at this distance I can hear it screaming about how badly it wants one of these.
Ok, so I have ordered one, it should be here in time for my next Raspberry Pi post (which will be about Ubuntu MATE on the Pi 2), next week. The first important question will be, is it NOOBS compatible? We'll see.
Back to the regularly scheduled program: the full list of NOOBS-supported operating systems is:
- Raspbian [Recommended]
- OpenELEC_Pi1
- OpenELEC_Pi2
- OSMC_Pi1
- OSMC_Pi2
- Arch Linux
- Pidora
- RISC OS
- Data Partition
As I said, you will only get this list if you boot NOOBS on a Pi with an active Internet connection. When you get this list, you can then select however many you want for installation, as long as they will all fit on your SD card and they are compatible with the Pi model you are installing to.
First, compatibility. Raspbian doesn't have any problems, it will install and run on any Pi, the only limit is what I mentioned above - the Pi Zero is supported starting with NOOBS 1.5.0. You will see in the list that OpenELEC and OSMC both have specific versions for the Pi 1 and Pi 2 (for the Pi Zero you have to use the Pi 1 version). The Pi 2 versions of these operating systems will take advantage of the newer, faster multi-core processor and larger memory in the Pi 2.
There is another aspect to compatibility that might seem a bit confusing. If you are installing to a Pi 2 and you choose a Pi 1 version, you will get a compatibility warning. This gets confusing if you select Arch Linux or Pidora for installation, because there is only one version of those so you can't choose a Pi 2 version. Don't worry too much about this, the installation will almost certainly work, but it isn't 'guaranteed' according to the Raspberry Pi developers.
Second, fitting on the SD card. As you select whatever you want for installation, the NOOBS interface will display the total amount of disk space needed for your selections and the total amount of space available on your SD card. That's a nice touch.
Once you have selected everything you want, click the Install button in the menu bar. NOOBS will install Raspbian first, and then will download and install whatever else you have selected (if anything).
The installation will take a pretty long time, even if it is only Raspbian, mostly because reading and writing to an SD card is slow - even if you are using a Class 10 card. If you select Raspbian, OpenELEC and OSMC, you can easily get a cup of coffee and a donut while it installs (what I wouldn't give for a donut right now). If you select everything (Raspbian, OpenELECT, OSMC, Arch and Pidora), you can go to lunch while it installs.
When you reboot after installation completes, the first screen you will see says simply "For recovery mode, hold Shift". This screen comes up every time you boot a system that was installed from NOOBS. It gives you the opportunity to go back to the installation/selection screen and start over again. That can be very useful, but pay careful attention to what I am saying here - Start Over Again.
You can not go through the Recovery (Install) screen to add/modify/delete anything which has already been installed. You can't change you mind and decide that you want OpenELEC after all, and just add it to whatever existing installation you have on the SD card. If you go through the Recovery/Install screen, after you make your new selections and click Install the SD card will be wiped clean of everything except NOOBS itself, and then everything that you chose will be installed from scratch.
Make sure that you backup anything that you may want to keep from the existing installation before going back through the Recovery/Install screen. You have been warned.
If you do not press Shift during boot, after a few seconds it will continue to a screen which presents a multi-boot list of the installed operating systems, where you can select the one you want to boot. If you make no selection, after about 10 seconds it will continue to boot whatever the last-booted system was.
If you are interested in the technical details of how the NOOBS installer partitions the SD card and installs multiple operating systems, take a look at my previous post (Pi Zero Part 4). If there is anything else that I have failed to mention, or which is not clear, feel free to ask in the comments.
Read more on the Raspberry Pi Zero