Ubuntu 17.10: Hands-on with Artful Aardvark

Ubuntu 17.10, Artful Aardvark, has now been officially released. I have not been much of an Ubuntu fan for a long time now, but this release includes a lot of significant changes, many of which might address some of my most serious objections about Ubuntu. So I think I should take a closer look at it than I normally do.
The release announcement mentions the major updates and changes - including the biggest of all, the switch from Unity back to Gnome 3 / Gnome Shell for the desktop. As I have not liked Unity from the very first time I saw it (that's a polite way to phrase it), I am very, very pleased with this change.
The release notes (for all versions) give a more complete list of packages updated, and a list of known issues. It also includes a statement that I know some users will not be pleased with:
- 32-bit installer images are no longer provided for Ubuntu Desktop
What it doesn't specifically say is that at least for now, it will be possible to upgrade existing 32-bit installations in the normal way. Also, if you read between the lines a bit, and check the download images, you will find that there is still a 32-bit installer for most of the Ubuntu flavors, including Kubuntu, Xubuntu, Lubuntu and Ubuntu MATE, so you can still install a new 32-bit system with one of those, and if you get really desperate (or ambitious) there is still a 32-bit Ubuntu Server version, so you could build your own desktop on that.
As usual with Ubuntu, you can either install the new release from scratch, or you can upgrade an existing Ubuntu system to the new release. I have done both of these on various systems around here, and found that they both work quite well.
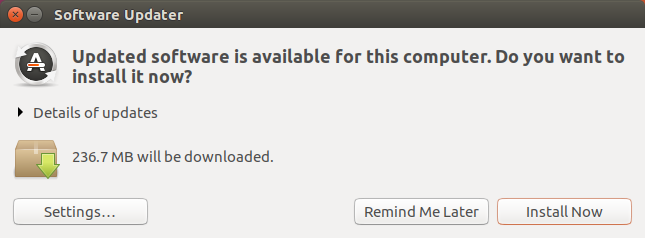
To upgrade an existing Ubuntu system, you must first make sure that all of the latest updates have been installed. To do that, just run the Software Updater. If there are updates which need to be installed it will inform you, and ask for permission to install them.
When you run the Software Updater again after the updates have been installed, it will tell you that a new release is available. Click on Upgrade and you're on the way!
The upgrade process then asks you to confirm that you want to upgrade, which seems a bit redundant to me since you got there by saying you wanted to upgrade...
The upgrade utility then scans your system, determines what needs to be done, and asks you one more time if you are really, really sure that you want to upgrade. This is starting to feel like the Department of Redundancy Department.
On all of the systems I have done so far there were about 1,500 packages with a total of about 1GB to download.
The complete process, including downloading and installing packages and removing obsolete package, takes about 30 minutes. When it is done, it will ask for confirmation to reboot. Thankfully it only asks once.
Click Restart Now and when the system comes back up, you will be running Ubuntu 17.10!
If you decide to install Ubuntu 17.10 from scratch, rather than upgrade an existing system, you cat get the installation image from the Ubuntu Desktop Download page. I am quite surprised that the download page, the release announcement and the release notes all make no mention of checksums or GPG signatures. Have we really become so complacent already?
Anyway, the checksum files and GPG signatures are available, but you have to go directly to a download server to find them, such as
Once you have downloaded the ISO image, and verified the checksum and GPG signature, you can either dump it to a USB stick or burn it to a DVD. Then boot that, and choose Install Ubuntu. I have walked through the Ubuntu installer quite a few times in previous posts, so I am not going to repeat all of that here.
I have installed from scratch on both UEFI and Legacy Boot systems, and on everything from my Acer All-in-One desktop system down to the little Samsung N150 Plus, with absolutely no trouble at all. The N150 Plus is terribly slow running this release, but at least it does install and work properly. Ubiquity is not my favorite Linux installer, by a long shot, but it works well with a minimum of fuss. The installation process only took about 10-15 minutes, which is about half the time that the upgrade took.
When you reboot after installing (or upgrading), you will see the new Ubuntu desktop:
They have obviously put some effort into making the new Gnome 3 / Gnome Shell desktop look roughly the same as the old Unity desktop. They have included the Dash to Dock extension, and configured it so that it vaguely resembles the Unity launcher. Fortunately they do not appear to have tried to reproduce the bizarre flopping about of icons in the Unity launcher.
By the way, take a close look at the title bar on that About Ubuntu window! The window controls have moved back where they belong, on the right end! Hooray! Something like five or six years ago Ubuntu took what I considered to be the first step on the wrong path by arbitrarily moving the controls to the wrong side (left) of the window title bar, claiming that they were making room for "windicators". Of course, windicators never came along, and the controls were later moved off the window entirely, going up onto the top panel - which was an even worse idea in my opinion. So I am very pleased to see them back where they belong.
I noticed that the new Dock was fixed in place, and I would very much prefer for it to autohide and free up some desktop space. Not knowing exactly how to change that, I went to Activites and searched for Settings, and hit the jackpot. The settings utility is a cornucopia of controls and information! Under the Dock option you can enable autohide, set the Dock to the left, right or bottom of the screen, and even set the size of the Dock icons, which then sets the size of the Dock itself. Nice.
Note: This was on the system where I made a fresh installation. I subsequently found that the Settings icon was already included on the Dock of the system that I upgraded. I assume that this was some sort of carry-over from the Unity launcher that was already on there.
Note: I also discovered that you can get to this Settings utility by clicking the right end of the top panel, and then selecting the tool icon at the bottom left of the drop-down window.
Another significant irritation - although I chose English for the installation language on the very first screen, and the entire installation dialog was in fact in English, the installed system was actually in German! I assume this happened because I chose a Swiss German keyboard. Bleah.
While I was working on this post, I got a notice that our wireless printer had been successfully configured. I hadn't even thought about trying to set up a printer yet, so that was a very nice surprise - and a good thing to point out to those who are still going around spouting 5+ years out of date information about how difficult it is to use printers with Linux.
Finally, a bit about the contents of the new release. The Linux kernel is updated to 4.13.x, which is a respectably recent version. Those with a good knowledge of Linux kernel versions will realize that 4.13 is not an LTS (Long Term Support) release. By the time Ubuntu 18.04 LTS comes out the kernel series 4.14 should be out and stable, and it should also be an LTS release, so that will match up nicely.
Perhaps the biggest change in the Ubuntu internals is that this release is using the Wayland display manager by default, rather than Xorg (insert your favorite needle about Mir and the Ubuntu NIH syndrome here...). As I said above, I have not had any trouble installing this on a variety of systems, both large and small, so I don't think this is gong to be an issue for many people. If you think that Wayland is causing a problem on your system, you can change back to Xorg by clicking the session selection icon on the login screen (it looks like a gear just under the password input box). Choose Ubuntu on Xorg and then Sign In.
Other applications included are pretty much the same as always with Ubuntu - Firefox, Thunderbird, Libre Office, Shotwell, Rhythbox and such. They still do not include GIMP in the base distribution, which I think is unfortunate, but it is easy enough to install using the Ubuntu Software utility.
One last relatively minor complaint. There doesn't seem to be an Ubuntu MATE 17.10 release for the Raspberry Pi. I know this is not a big deal, but I also know from the comments I have seen in the Ubuntu Mate blog, and other places online, that there has been some significant interest in this as an alternative to Raspbian. I would really like to see an updated version of it - but since the only version that is currently available is 16.04.2 LTS, perhaps they are only planning to do LTS releases for the Pi, and not invest the time and effort to track every Ubuntu release. I hope it is at least that, and not that the Ubuntu MATE Raspberry Pi project is dead.
PREVIOUS AND RELATED COVERAGE
Pi Desktop: This kit turns your Raspberry Pi into a Linux desktop
If you need to turn a Pi into a PC, this kit promises to do it -- in minutes.
Hardware spotlight: The Raspberry Pi [Tech Pro Research]
An overview of what this little board can do and how it's being put to use.
IT pro's guide to working smarter with Linux [Tech Pro Research]
Get practical tips and advice to help your organization get the most out of Linux.
READ MORE OF JAMIE'S MOSTLY LINUX STUFF