Use a handy new feature to add instructions to your Excel 2007 worksheets

Microsoft Excel
Use Editing, Fill, Justify to add instructions to your Excel 2007 worksheets
When you need to add instructions to an Excel 2007 worksheet, they usually look something like Figure A.
Figure A
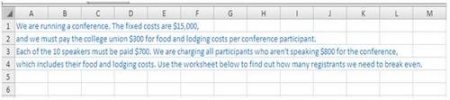
Each line has a separate cell and overflows onto the neighboring cells. In this case, each of the four lines was entered in cells A1 through A4, respectively. In earlier Excel releases, it was challenging to arrange these lines in a readable layout, but Excel 2007's new Editing, Fill, Justify feature makes it easier.
To arrange the text above to make it more readable, follow these steps:
- Select A1:G9.
- Click the Home tab, and then in the Editing group, click the Fill command drop-down arrow.
- Click Justify at the bottom of the list.
Excel wraps the text so that each line is shorter than the selection range (Figure B).
Figure BYou can now select and format the text as desired.
Microsoft Access
Reduce mouse clicks with these two Access options
If you are a heavy Access user, you probably find yourself doing an inordinate amount of mouse clicking as you navigate through the Word 2002/2003 database window. You can save yourself some time by activating the single-click database window option. Follow these steps:
- Go to Tools | Options.
- Click the Advanced tab.
- In the View section, click to select the Single-Click Open check box, then click OK.
All objects in the database window are now underlined, indicating that you only need to click them once to open them.
For those of you who write many macros, Access provides another timesaving option. In order to display the Names and Conditions columns in the Macro window, you first have to click the Names And Conditions button in the Macro toolbar. You can save time by having those columns display when the window opens.
Follow these steps:
- Go to Tools | Options.
- In the View section, click to select the Names And Conditions column in the Macro check box, then click OK.
Microsoft Word
Convert your Word documents into PowerPoint 2007 presentations
PowerPoint 2007 lets you create slides from your Word documents without having to retype or copy any text. All you need to do is to apply Word's built-in heading styles to your text, and PowerPoint will do the rest. For example, say you have typed the following text in your Word document:
Questions to ask about your financial investment:Is principal guaranteed?
What is the market risk? Is interest compounded free from current income taxes? Can you withdraw without penalty? Will it provide guaranteed lifetime income?
ABC Financial Ratings
A.M. Best A+ (Superior)
Fitch rating: AA (Very Strong)
Moody's Investors Service, Inc. rating: A1 (Good)
Standard & Poors' rating: AA (Very Strong)
For each slide in this example, the line to be the slide title received the Heading 1 style, and the remaining lines of text for each slide received the Heading 2 style. (PowerPoint 2007 can only convert text formatted with a heading style, but you can use any of Word's built-in heading styles.)
To convert this text into two PowerPoint slides, follow these steps:
- Open PowerPoint 2007.
- On the Home Ribbon, in the Slides group, click the arrow below New Slide.
- Click Slides From Outline, then navigate to the Word document containing your slides.
- Click Insert.
- Click the Design tab.
- Click the theme of your choice.
- Add a title to your title slide and save the file.