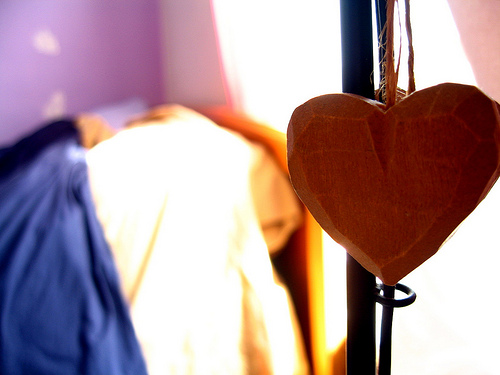
Understanding macro mode on a point-and-shoot camera

Don't think that beautiful, close-up shots can only be done with a digital SLR. You can still get some excellent close-up shots with a standard point-and-shoot model by using macro mode. It can usually be found on the back of your camera with a tiny flower symbol. By clicking on this, it will force your lens to focus on close-up objects, making background objects blurry.
Here's a few tips to understanding and using this mode better:
1. Focusing: This is probably the most important facet of macro mode. The lens will automatically focus on a particular close-up object, but it might not be the one you want. Sometimes you'll have to play around with the camera, usually by moving it around, pressing down on the shutter button lightly (but not all the way so it doesn't take a picture) to re-focus the lens. If you're model allows it, set your camera to manual focusing (usually found in the Menu) as this will make it much easier to select the object you want to zoom in on.
2. Framing: I find that the "Rule of Thirds" works best when it comes to composing a macro image. While you should always play around with different angles, the focus of a macro image often works best when framed off to the side rather than dead center. However, this could all depend on the object you're shooting. Also, keep the background in mind. Photo Axe has some suggestions when photographing commercial objects. But when shooting in macro mode outdoors or other situations where you can't move the objects, you'll have to move yourself and your camera around while keeping lighting on the object (and background) in mind.
Three more things to keep in mind after the jump...
3. Image Settings: This tip can apply to all photos, but its something to keep in mind especially when shooting macro images if you want a distinct difference between foreground and background quality. When shooting in macro, to keep the foreground crisp, its better shoot in high-quality mode with more pixels (i.e. pick 3072x2304 rather than 800x600). Sometimes point-and-shoot models won't let you select the size of your photos by pixel number, and it might show up as SHQ (super high quality) or HQ (high quality).
4. Lighting: If you can avoid it, don't use flash. Taking a picture with a lot of light will make for a clearer macro photo. This might be easier said than done, depending on the object you want to photograph. If you can't get a lot of light, and you're not getting the sharpness you want, follow the next tip.
5. Use a tripod: I say this a lot, but it really is a good investment (and tripods aren't all that expensive). Tripods come in handy with point-and-shoots too, reducing camera shake in low-light situations (or if you just have shaky hands like I do). You can keep your camera in one steady position while experimenting with different settings. You can also make better use of the self-timer function, eliminating camera shake. If you're in macro mode, you're probably not taking a picture of a moving object, thus, self-timer would be very helpful with the availability of a steady surface.
[Photo taken with a Canon PowerShot SD550]
