Set up regular automated backups with Windows Home Server

This gallery is also available as a TechRepublic ""="" href="http://www.techrepublic.com/blog/window-on-windows/?p=440">article and as a TechRepublic ""="" href="http://www.techrepublic.com/downloads/abstract.aspx?docid=296632">download.
The first step to automating your backups with Windows Home Server is of course to get Windows Home Server installed on a PC in your house. The hardware requirements are fairly light, and nearly any old PC you have should be sufficient. The next thing you must do is to install the Windows Home Server Connector on any PC you wish to backup. This will automatically detect your Home Server. The only information you will need to enter is the Administrator password, which you set up when you initially installed Home Server.
Next you will need to go into your Windows Home Server console (which should now be available on your local PC). On the Computers and Backups tab of the console, you will now see the computer (or computers) you have installed the connector on. They will also show as Not Backed Up. This status will change as your backups begin being performed.
You will first need to select the PC you wish to define your backup for, and then choose Configure Backup from the top menu.
The main issue you will have in here is to specify the folders that will NOT be backed up. By default Windows Home Server will backup all folders on the computer (save the pagefile, hibernation file, and some temp files).
You will probably want to add some folders to this. While there is no hard and fast list of what not to backup, some common examples of things to exclude would be folders in which games are installed, your downloads folder, and any folders with data you don’t care if you lose.
After selecting the folders to exclude you will get a summary of your total backup size.
The first thing you will need to do is to set the time period in which your backups will run. This period will need to be a time when your PCs will be on, and when there will be minimal activity. If you do not normally leave your computers on overnight, you will want to change this time to a period in which your computer will be on. If you computer is not on during this period the backup will not occur, and your data will not be protected.
You will also need to set your retention policy on your backups. Simply put this is how long the backups you make will be available to you. The more storage you have in your home server, the longer you can keep your backups. Simply set the amount of time you want your monthly, weekly, and daily backups to be stored on the server. The Home Server will then automatically delete the older backups as the newer ones become available.
After this is completed you can then perform a manual backup of your computer, or you can wait for the scheduled backup to occur. If you wish to perform a manual backup, then you will simply right click the machine in the Computers & Backups tab of the Home Server Console, and select backup now.
You will get a small window on your desktop showing you the progress of your backup.
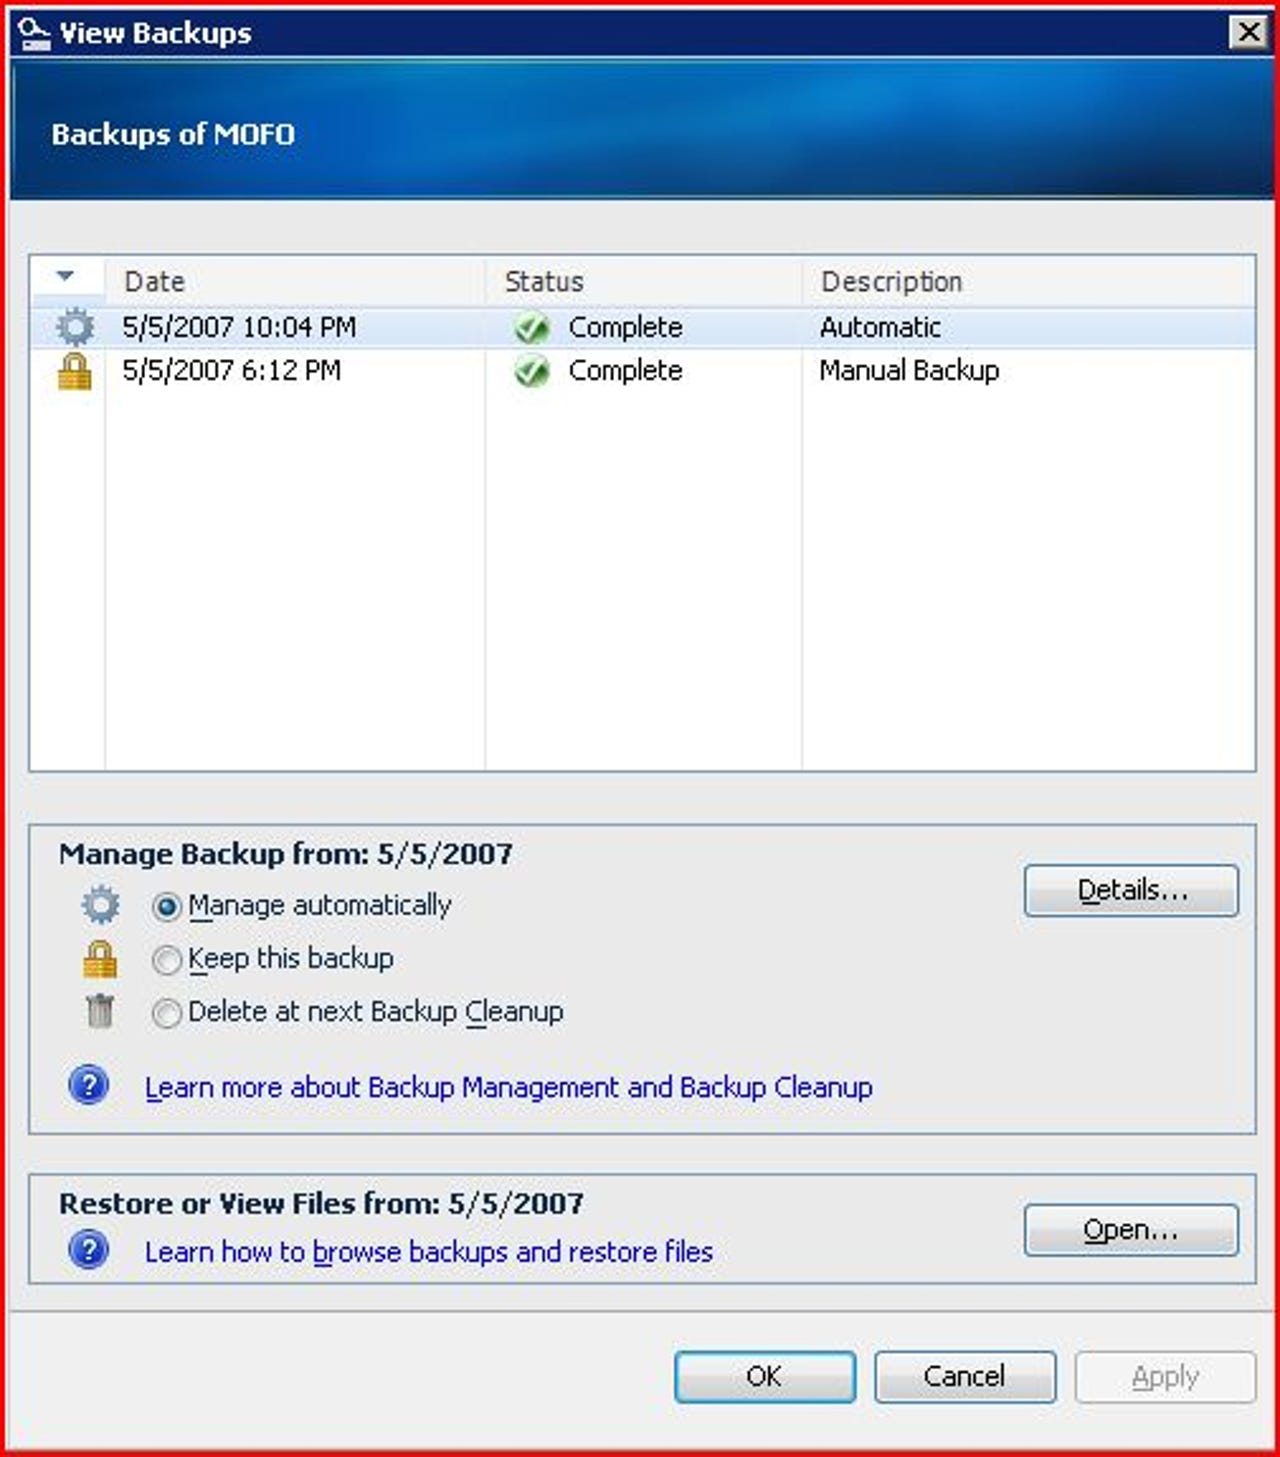
When the backup is completed you will be able to select View Backups to see a list of completed backups. From this screen you will be able to not only restore your files, but also to set a specific backup to locked mode (in which it will not be deleted based on the retention policies you already have set up), or to delete a backup if needed. As you complete more backups, they will be added to this screen, and you will be able to select from which backup to restore your files, and to manually manage your backups if you so desire.
As you can see if you are using Windows Home Server, it is very easy to create a backup regimen for your entire selection of home PCs. Windows Home Server removes almost all of the complexity from either manually performing or scheduling backups. This is a great step forward for home users who know they need protection, but don’t have the time, or the technical expertise to perform these operations on their own.