'ZDNET Recommends': What exactly does it mean?
ZDNET's recommendations are based on many hours of testing, research, and comparison shopping. We gather data from the best available sources, including vendor and retailer listings as well as other relevant and independent reviews sites. And we pore over customer reviews to find out what matters to real people who already own and use the products and services we’re assessing.
When you click through from our site to a retailer and buy a product or service, we may earn affiliate commissions. This helps support our work, but does not affect what we cover or how, and it does not affect the price you pay. Neither ZDNET nor the author are compensated for these independent reviews. Indeed, we follow strict guidelines that ensure our editorial content is never influenced by advertisers.
ZDNET's editorial team writes on behalf of you, our reader. Our goal is to deliver the most accurate information and the most knowledgeable advice possible in order to help you make smarter buying decisions on tech gear and a wide array of products and services. Our editors thoroughly review and fact-check every article to ensure that our content meets the highest standards. If we have made an error or published misleading information, we will correct or clarify the article. If you see inaccuracies in our content, please report the mistake via this form.
How to turn any photo into a professional headshot with Canva AI

Whether you need to set up your LinkedIn profile for the first time, add a photo to your Slack account, or simply want to revamp your website, a professional headshot is always a good thing to have.
However, hiring a photographer to take a professional headshot can get expensive. Plus I, like many others, often dislike how I look in those posed pictures where I'm trying to look my best. Instead, I prefer the more natural and candid photos taken by my friends and family.
Also: The best AI image generators of 2024: Tested and reviewed
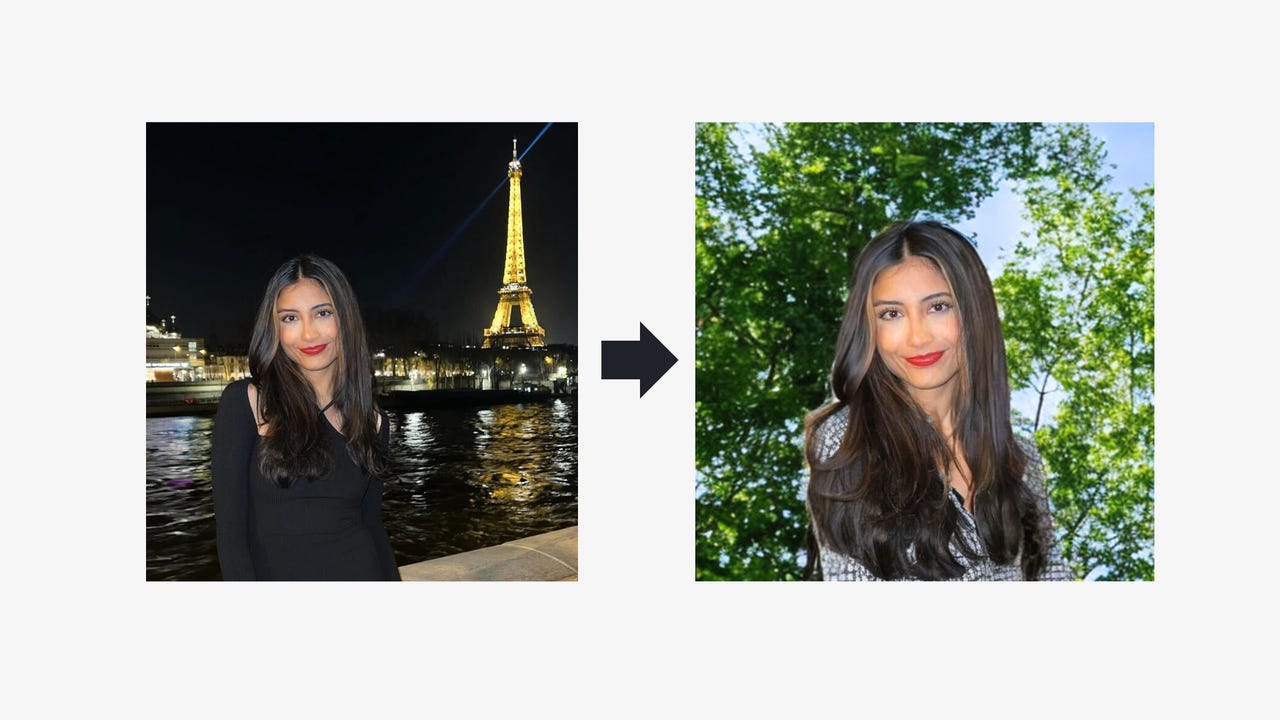
Canva's Magic Edit tool helps circumvent both issues by creating a perfect headshot from an image you already have and like. It doesn't matter what you are wearing in the photo or what the background is -- with the help of AI, you can transform it all. I break down how you can do it below, and the entire process should take you no more than five minutes.
How to use Canva to create the perfect headshot
Before you can get started with your project, you will need to become a Canva Pro member or sign up for the 30-day free trial.
The Magic Edit tool, as well as other AI-powered design tools, such as Magic Eraser and Magic Write, is limited to Pro users at the moment. The membership costs $120 per year for an individual account which includes other perks, such as image editing, stock photos, premium templates, and more.
Also: How to use Magic Eraser on the Google Pixel
Once you sign up -- or initiate the free trial -- and are signed in, you can get started on creating your headshot.
1. Start a new project
As soon as you sign into Canva, you will be brought to its homepage, which showcases different projects and templates you can create.
Although you can create this project by selecting any blank template, I recommend clicking on "Create a design" in the upper right-hand corner and choosing the "Instagram Post" option.
That option will bring you to a square, PNG template that is perfect for a headshot.
2. Upload your photo
Once you pick the picture you would like to transform into your headshot, click on the purple "Upload files" button on the left-hand bar and select your photo.
As a reminder, it does not matter what you are wearing in the photo or what the background is, as you can edit both.
3. Click on Magic Edit
Once you upload the image, you can click on the image.
Click on the "Edit photo" button in the top bar and then click on "Magic Edit" under the tools category.
4. Draw on the part of the image you want to change
If you want to change the background, your outfit, or any other image component, all you have to do is drag your cursor over the area you want to change and fill it in.
For example, I wanted to change the dress in my photo, so I highlighted it in its entirety.
5. Type a description of what you'd like instead
In the text box, you can type in exactly what you'd like the highlighted part of your photo to be replaced with.
For example, I typed in, "professional top, perhaps a blouse" for my photo since that is what I wanted to be wearing instead.
Also: How to subscribe to ChatGPT Plus (and 5 reasons why you should)
Once you finish typing in your description, you can hit the purple "Generate" button and watch the magic happen.
6. Select an option
Canva will generate four options for your image based on your text prompt. If none of the options are to your liking, you can hit "generate new results" to explore more.
When you are selecting your choice, keep in mind what you are looking to use your headshot for. If it is just for a LinkedIn profile picture, remember the circle is pretty small, so any imperfections you can see when the photo is blown up will be much less visible.
Once you find the option you like the most, all you have to do is click on it and you are set!
7. Repeat the same steps (optional)
Since the background also needed some editing in my photo, I just repeated the same steps to get more of a blurred, nature background.
Final result:
Remember, you can use other photo editing tools in Canva to make the photo more to your liking and make the background better blend with your photo, such as adjusting lighting, warmth, saturation, and more.
Disclaimer: You should consider the legal consequences (e.g. copyright) of using AI-generated images before implementing them into your work.