Hands-on with the New Raspberry Pi camera module

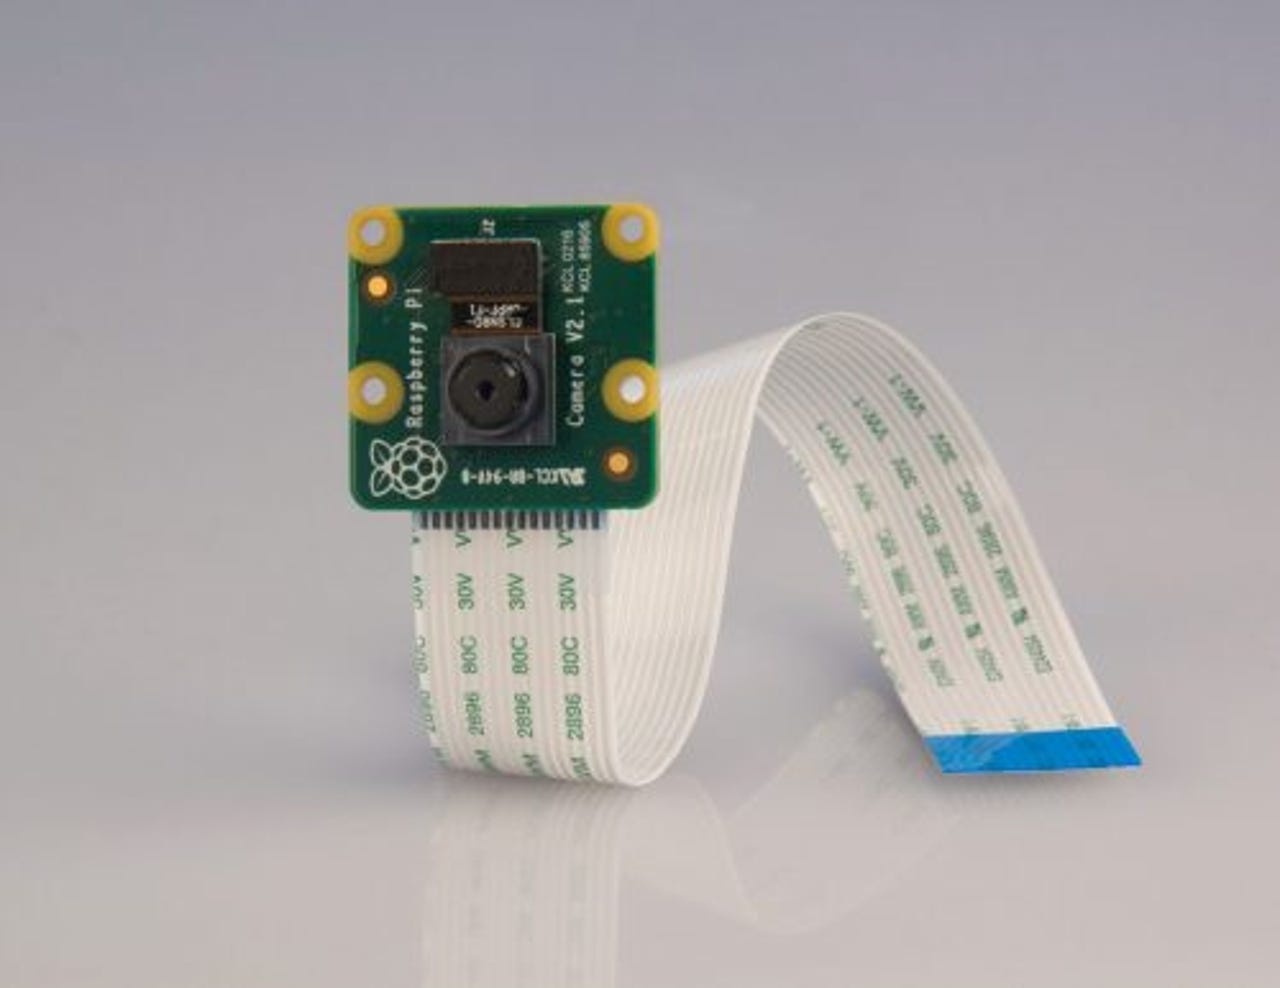
Raspberry Pi Camera Module v2.1. Image: Raspberry Pi
The Raspberry Pi Blog announced a new camera module (v2) in April. The primary reason for this was the simple fact that the sensor used in the original camera module had been end-of-lifed at the end of 2014. Raspberry Pi has been producing camera modules since then from stock it built up in advance, but as that was running out, a new camera module (based on a new sensor) was required.
Being the clever folks that they are, what the company has produced is a drop-in replacement that is higher resolution (8 megapixels vs 5 megapixels) than its predecessor, but also fully hardware- and software-compatible with the original camera module. It is available in normal-light and IR (infrared) versions.
That compatibility means that the new camera module works in all models of Raspberry Pi (original, 2, 3, and the new Zero), which is good news. Physically, the module fits in the same mounts and brackets as the original - I have put mine into the original mount that I bought more than two years ago. Logically, it works with all the same programs and APIs as the original. I wrote about the original camera module in January 2014, and I just went back through that post and made the same tests, all of which the new module passed perfectly.
Sample still image
There is a new Getting started with picamera learning resource on the Raspberry Pi Foundation web page which is really excellent. It starts with illustrated instructions for connecting the camera and enabling the device, and then goes through a simple Python tutorial showing how to test it, take still pictures and videos, adjust settings such as resolution and video effects, and even set colors and add annotation text.
I have one small word of caution about the Picamera tutorial. If you work through it, and you are just quickly following along the instructions, it is easy to overlook the bit at the beginning of the Python (IDLE) example where it says "open a new file and save it". You would then just type the sample Python code directly into the Python Shell window (you might even be clever enough to wonder why you are getting shell prompts in your window but they don't show that in the tutorial - but not quite clever enough to realize that might be worth investigating). If you were to do that, and get that far along (not that I know anyone who was that silly...), when you got to the statement camera.start_preview() it would immediately do just that. Surprise! (Not that I have ever seen anything like this, mind you.) If you were to get that far, and you were then able to stop the preview and get back to IDLE and the Python Shell, perhaps you could post a comment here explaining how to do that? Thanks!
Something else you may want to consider when adding a camera module, if you have a case for your Raspberry Pi, is whether you will be able to get the camera cable threaded out easily enough. If you have one of the very stylish Raspberry Pi Foundation cases, like the one shown here, there is no easy or obvious way to get the cable out with the case completely assembled.
The obvious solution is to pop off the top panel, but that makes a very large hole for a very small, flat cable.
Another alternative would be to pop off either of the side panels, and then do some creative flopping of the cable to get it to come out the side.
It also seems to me that a small amount of creative work with a file on the back edge of the case should do the trick, but I haven't tried this yet. If you decide to try it, be careful. Don't forget there is £10 or so at risk here.
A lot of the other common 'clear box' or 'sandwich' style cases provide a way for the camera cable to get it, either through a slot in the cover directly above the camera connector, or by having the lid slightly offset from the case, leaving a thin slot all the way around.
That's about all there is to say about the new camera module - it works, it's a moderate improvement in resolution and it's completely physically and functionally compatible with the original camera module. But while I'm on the subject of Pi cameras, I'll take the opportunity to mention another of the wonderfully silly projects that frequently turn up in the Raspberry Pi Blog.
Le Myope (The Shortsighted Camera) takes a picture, but then rather than showing it to you, it submits that image to Google image search and shows you whatever similar image it gets back. If you're photographing something well-known, such as your Aunt Maude next to the Eiffel Tower, you'll probably get back a picture of someone else's aunt (or ant) standing in front of the Eiffel Tower. If you photograph something more obscure, you might get back an image from who-knows-where of who-knows-what, which looks somewhat similar to whatever you photographed.
I would have to rate Le Myope at least as high as No More Woof (remember that post from March 2014?). There's a lot of good, serious education - and work - that can be done with the Raspberry Pi. But if it's not fun, then well, where's the fun in that?
If you are interested in uses for the Raspberry Pi camera which might be of a bit more practical value than this, just do a web search for something like Raspberry Pi camera, and you will see hundreds of examples - everything from security and surveillance systems to time-lapse photography, remote-presence, and extremely low-cost teleconferencing setups. Many of those applications will also benefit from the improved resolution of the new camera module.
Now read this