'ZDNET Recommends': What exactly does it mean?
ZDNET's recommendations are based on many hours of testing, research, and comparison shopping. We gather data from the best available sources, including vendor and retailer listings as well as other relevant and independent reviews sites. And we pore over customer reviews to find out what matters to real people who already own and use the products and services we’re assessing.
When you click through from our site to a retailer and buy a product or service, we may earn affiliate commissions. This helps support our work, but does not affect what we cover or how, and it does not affect the price you pay. Neither ZDNET nor the author are compensated for these independent reviews. Indeed, we follow strict guidelines that ensure our editorial content is never influenced by advertisers.
ZDNET's editorial team writes on behalf of you, our reader. Our goal is to deliver the most accurate information and the most knowledgeable advice possible in order to help you make smarter buying decisions on tech gear and a wide array of products and services. Our editors thoroughly review and fact-check every article to ensure that our content meets the highest standards. If we have made an error or published misleading information, we will correct or clarify the article. If you see inaccuracies in our content, please report the mistake via this form.
How to install Kali Linux on Apple Silicon Macs

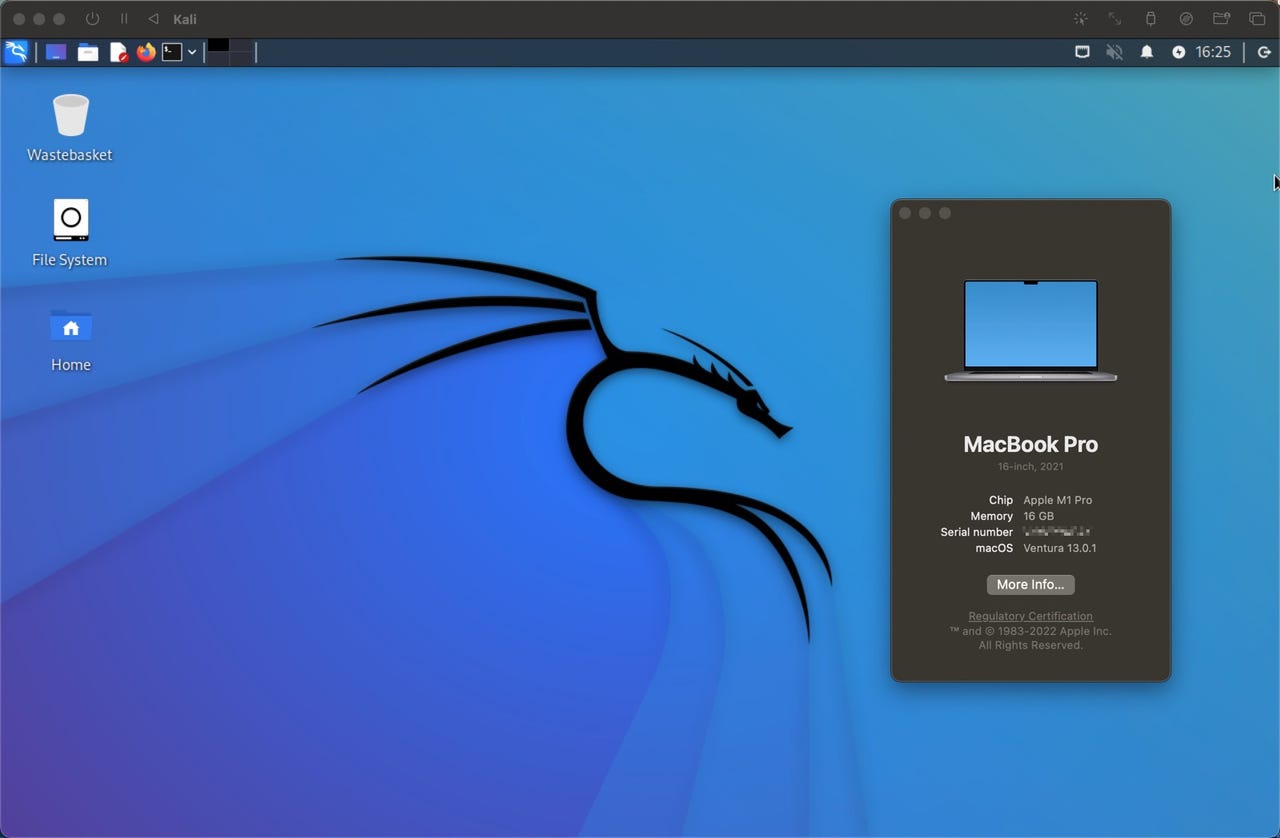
Kali Linux running on an Apple Silicon M1 MacBook Pro and macOS Ventura
I've had messages from a number of people asking me for information on how to install Kali Linux on Macs running the M1 and M2 Apple Silicon chips.
Also: The best Linux desktops for pros
See also
On the face of it, I thought it would be simple -- install virtualization software onto the Mac, download a Kali Linux installer, and install it into a virtualized system on the Mac.
Yeah, as it turns out, it's not that easy.
I tried a number of different virtualization platforms, and messed around with a lot of settings before I finally got it to install.
What is Kali Linux?
Kali Linux is an advanced penetration testing Linux distribution used for penetration testing, digital forensics, ethical hacking, and network security audits.
Also: Mabox Linux: Old-school Linux with a new-school look and feel
How to install Kali Linux on M1 or M2 Macs
Here's what you need
- UTM: This is virtualization software for Macs. You can download this for free direct from UTM (it's also available from the Apple Mac Store, where it will set you back $10 for the same thing).
- A Kali Linux installer: Head over to the Kali Linux website, find the installer images, and download the one for Apple Silicon. I'm using the latest 2022.4 installer.
Step 1: Install UTM
This is the easy bit. Install it using all the default settings.
Step 2: Fire up UTM and create a new virtual machine
You do this by clicking on Create a New Virtual Machine, and then select Virtualize.
From the list of operating systems, choose Other, then click Browse… and find your Kali Linux installer that you downloaded earlier.
Once selected, click Continue, and I bring the Memory slider to 2048MB. You can assign more, but I find 2GB to be more than enough.
As for storage, I find that 32GB is more than ample for Kali Linux.
Once you get to the Summary page, give the virtual machine a name, check the box next to Open VM Settings, and click Save.
Create a new virtual machine
Step 3: Tweak some settings
There's one tweak you need to do on the settings panel. In the left-hand pane, click on New… and select Serial, and then click Save. This will add a terminal window to allow you to install Kali Linux properly.
Adding a Serial device, which allows the installation to properly run
Step 4: Fire up the virtual machine
Click the big play button to fire up the machine and kick off the installer. You'll notice two windows pop up, you want to work in the Terminal 1 window (the other window will do blank, which is the problem people seem to be having).
Select Install and work your way through the Kali Linux install process.
Kicking off the installation of Kali Linux
A couple of points:
- You may have to manually configure the time zone (click Cancel at this point to select the correct zone).
- When it comes to partitioning, choose Guided – use entire disk (don't worry, this won't trash your macOS installation)
Don't worry, the partitioning doesn't affect your macOS installation
Step 5: When the installer is done, do these two things
Once the installer is done, close the terminal window and the window for the virtual machine, and carry out two tweaks.
- Go into the settings for the virtual machine. Then right-click on Serial and click Remove.
- Next, in the left-hand pane, go down to USB Drive, click on it and then click on the Clear button next to Path. When done, click Save.
Here's where to click to enter the Settings screen
Remove the Serial device
Removing the installer file to allow the virtual machine to boot into Kali Linux rather than the installer
And you're done!