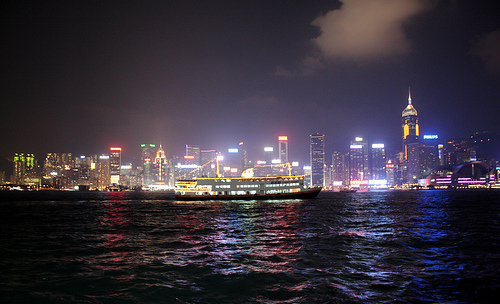
How to take clear pictures at night

With Halloween just a day away, you might be thinking about shooting photos at parades or your kids trick-or-treating. But most of those activities are at night, which could hinder photographers. But there are a few steps that can help you take clear, crisp photos at night, despite the spooky darkness.
1. Timing: The night sky is often a few shades lighter just after the sunsets, slightly allowing you a longer shutter speed and also giving you more texture for your photo. Nonstop English recommends that you also consider timing as for when the sun sets, the moon rises, etc. if you want to include these objects in your background.
2. Equipment: Tripods are essential. If you can't afford one or don't want to carry one, scout out your location in advance and see if you can find a steady object, like a picnic table, a brick fence, etc. to steady your camera on. We're all prone to camera shake, so it would also be wise to bring a remote control or shutter-release cable for your SLR (definitely recommended more over point-and-shoots for nighttime shots), to avoid shaking the camera when its shooting at lower shutter speed.
3. Weather: It would be wise to check the weather forecast, just so you don't get rained on if that's not what you're aiming for. Although lightning and bright storm clouds do make spectacular subjects. But you're going to need a digital SLR for this one, set on B-shutter speed. Weatherscapes suggests you bring a fixed-local lens, with range from 28mm to 135mm minimum. With your SLR steadily mounted to a tripod, use a low ISO (100 or 200). But you also need to take extra security precautions in bad weather, such as staying away from trees, bodies of water or on top of a hill. Weatherscapes has a long list of precautions you should keep in mind.
4. Flash: Please avoid it. You can do this easily by bringing a tripod, or if you know your situation has enough light to shoot without one. It makes your subjects look fake, and the flash reflects off of windows and mirrors, which can still be seen even if they're deep in the background.
5. Long Exposures and Aperture: Use slower shutter speeds to allow more light in to your photo. Generally, you want an exposure from either half a second or more, but two or three would be better. As for aperture, Basic Digital Photography recommends that for longer exposures you should use a smaller aperture to avoid overexposing any stationary lights. in the picture. But if you're shooting with a shorter exposure time, use a larger aperture to avoid any motion in your shot.
6. ISO: Generally, you're camera is going to want you to use a higher ISO number to compensate for the lack of light. For the most part you should listen, but continually check your photos to make sure the images don't appear grainy.
7. Switch off Anti-Shake: DSLR Tips suggests temporarily switching off any anti-shake or image stabilisation systems you're SLR might have when using a tripod. If the camera is steady, these functions could introduce shake as they attempt to counteract something that isn’t there.
8. Be safe!: Nighttime isn't the safest time of day, so take caution and scout your surroundings well during the day so you know the place in the dark. Also, carry a flash light and make sure your cell phone is fully charged in case of any emergencies.
Do you have any tips to share about taking better pictures at night?
