Time Machine - Part II: Going back in time with Time Machine

Yesterday I took a look at how to set up and create the first backup using Apple's new Time Machine utility. I found the process to be swift, efficient and enjoyable. However, there's more to the backup process than setting up the software and making the first few backup - you need to be able to retrieve your files from the backup when you need them. Today I'm going to look at how to do this using Time Machine.
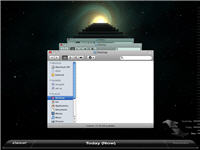
The way that Time Machine works is simple. Rather than having to learn some new interface, as is the case with almost all other backup utilities, in Time Machine you are faced with a series of cascading Finder panes (think Windows Explorer if you are a Windows user). Each one of these Finder screens represents a snapshot of your
Once you have the Finder in the foreground you can work with it to find the files that you want to recover. Using the Finder interface to navigate through snapshots is a brilliant idea that simplifies the whole recovery process dramatically. If users knew where their files were before they lost them, they'll be able to find them in Time Machine.
I said it yesterday but I'll say it again, Time Machine is, without a doubt, the best backup utility for your average consumer. It has a number of strengths but without a doubt the most compelling is how simple it is to use. If you're a Leopard user and you have an external hard drive then you really should be using Time Machine (and if you're a Leopard user and you don't have an external hard drive, drop what you're doing now and go get one - if you had the money to drop on a new Mac or a copy of Leopard, you should spend a few more bucks and invest in an external hard drive).
My guess is that users who embrace Time Machine won't so much look at it as a backup system but more like an insurance policy or safety net since it's ideal for recovering a text file after a cataclysmic edit and save or a photo that's been 'shopped just a little bit too far. While Shadow Copy offers a somewhat similar feature in Vista, it's nowhere near as polished or easy to use, which, I have to say, is disappointing.
Thoughts? Anyone here making regular use of Time Machine?