Xubuntu Netbook Edition 10.10 stylee

Rather than moan about how not particularly brilliant Ubuntu Netbook Edition 10.10, I thought it would be a positive step to come up with an alternative.
My mine gripe is that UNE is slow on my old Acer Aspire One, that the launcher panel takes up too much horizontal room, and that the interface isn't configurable.
Enter Xubuntu, a lightweight version of Ubuntu using the XFCE window manager. In this step-by-step guide, I'll install Xubuntu, add applications and customise the desktop.
1. Install Xubuntu.
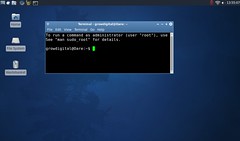
First of all, be aware that you have if you have a memory card in the SSD slot on an Acer Aspire One, you have to take it out, otherwise the install may well hang. Create an install from the Xubuntu ISO disk image on a USB stick using the System > Administration > Startup Disk Creator. Hold down the F12 key, and boot from the Flash Disk.
If you boot Try Xubuntu without installing first, this enables you to establish a wireless internet connection before the install, so that you can install updates whilst you install (very cool). I also Install this third-party software, ie MP3 encoders.
Also, I accept the standard partitioning but I'm not sure if the ext4 filesystem places any more wear on SSD cards?
(FWIW, the install took 38 minutes. Not bad at all for a tiny wee netbook.)
2. Install additional software
I find Chromium, the Free Software variant of the Google Chrome browser, much faster than Firefox, alas. And as the netbook is my writing machine rather than my web developing machine, I don't need the incredibly useful Firefox add-ons.
Of key importance is the installation of GNOME Do, a keystroke launcher that enables you to free up acres of desktop space. Indeed, once you start using it, your life will change forever. Guaranteed.
I also installed Shutter, as it enables me to do more exotic screengrabs for the purpose of this tutorial.
(FWIW, this took me 50 minutes to download and install the software, and 16 minutes to update the system).
3. Configure the desktop
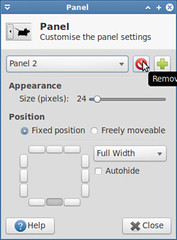
3.1 Right-click the bottom panel, click on Customise Panel... and delete it. Go on, don't be shy. We never did like those bottom panels anyway.
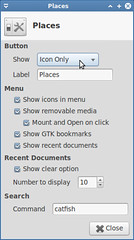 3.2 Right-click the Places icon on the top panel, click Properties and then Show Icon Only in the dropdown.
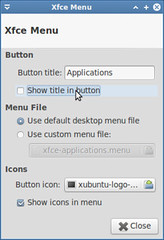 3.3 With the Applications icon on the top panel, right click, Properties and then uncheck Show title in button.
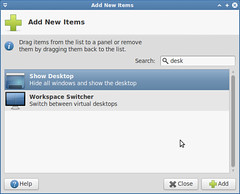 3.4 Next up, right-click the top panel and Add New Items..., and we want a Show Desktop icon. Once it's been added, right-click to move, and I like it in the top left hand corner.
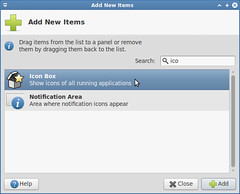 3.5 Now Add New Items... again, this time the Icon Box, which shows icons of all running applications. An app switcher, in other words.
3.6 Enough of adding stuff. Get rid of the Quit button by right-clicking, Remove and Remove "Action Buttons". It's easier to quit by using GNOME Do (just type in "shutdown").
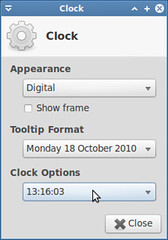 3.7 Personally, I like to have the seconds showing on my clock. This way I can see if the system has slowed right down. Right-click on the clock, click Properties... and then select Clock Options with seconds.
There we go! All the beauty and functionality of Ubuntu without the window fluff or slowness of Ubuntu Netbook Edition.
Post script: some of the dialog windows don't fit on the netbook screen by default. Does anyone know the app that enables you to move a dialog box off screen? I've tried alt+click&drag but this doesn't work on Xubuntu.
Post post script: Thanks to jw's post on Xubuntu which reminded me to try out Xubuntu again!