'ZDNET Recommends': What exactly does it mean?
ZDNET's recommendations are based on many hours of testing, research, and comparison shopping. We gather data from the best available sources, including vendor and retailer listings as well as other relevant and independent reviews sites. And we pore over customer reviews to find out what matters to real people who already own and use the products and services we’re assessing.
When you click through from our site to a retailer and buy a product or service, we may earn affiliate commissions. This helps support our work, but does not affect what we cover or how, and it does not affect the price you pay. Neither ZDNET nor the author are compensated for these independent reviews. Indeed, we follow strict guidelines that ensure our editorial content is never influenced by advertisers.
ZDNET's editorial team writes on behalf of you, our reader. Our goal is to deliver the most accurate information and the most knowledgeable advice possible in order to help you make smarter buying decisions on tech gear and a wide array of products and services. Our editors thoroughly review and fact-check every article to ensure that our content meets the highest standards. If we have made an error or published misleading information, we will correct or clarify the article. If you see inaccuracies in our content, please report the mistake via this form.
How to move from 'iTunes for Windows' to Apple's new media apps without losing content

Apple has officially released three new apps that aim to reduce the reliance on iTunes in Windows 10 and 11. With the Music app, the TV app, and the Devices app, you can listen to music, watch TV shows and movies, and sync your favorite content with your iPhone or iPad. After installing the new apps, the only need for iTunes at this point is to access your audiobooks and podcasts.
However, the transition from iTunes for Windows to the new apps can be tricky. Your existing content is supposed to be migrated to the replacement apps, a process that can potentially go kerflooey. In some cases, you may need to do some cleanup and repair work afterward.
Also: Sideloading on iPhone? OK, but Apple still plans to charge fees
In my testing, iTunes libraries that were small made it through the trip relatively intact. But larger iTunes libraries resulted in more glitches, such as content that failed to show up or album artwork that didn't appear. But I found some ways to fix the glitches. So if you're game to move away from iTunes toward the new media apps, here's how.
Before you get started, heed these five bits of advice:
- First, you'll need to install all three apps; you can't just install one or two of them. If you download only one of them, iTunes for Windows will prompt you to download the other two.
- Second, don't try to remove iTunes after installing the new apps as you'll still need it to view your podcasts and audiobooks.
- Third, don't remove or move the iTunes Library folder or files after the installation. The new apps need to read that content to provide access to all your albums, TV shows, and movies.
- Fourth, be prepared for a shakeup. After you download the Apple Music app, Apple TV app, and Apple Devices app, you'll no longer find any of your music or video content in iTunes. And you'll no longer be able to use iTunes to manually sync and manage your iPhone or iPad. To see your iTunes Store purchases in the new Music and TV apps, you may also have to reauthorize your Windows PC with your Apple ID.
- Fifth, if your iTunes library is extremely large (anywhere from several hundred megabytes to more than a gigabyte) and you don't want to spend time cleaning up any errors, then you may want to hold off on this migration. Otherwise, here are the steps you'll want to follow.
How to switch from iTunes for Windows to Apple's new apps
1. Review your content in iTunes
First, open iTunes and review all the music, TV shows, and movies in your library. Remove any content you no longer want. Look for duplicate content. You should also open File Explorer and browse through your iTunes Library folders to make sure all your content and the associated folders and files are organized properly.
2. Download the new apps
To download and install the new apps from the Microsoft Store, click on the following links:
3. Open the Apple Music app
Open one of the media apps. Let's start with Apple Music. Sign in with your Apple account when prompted.
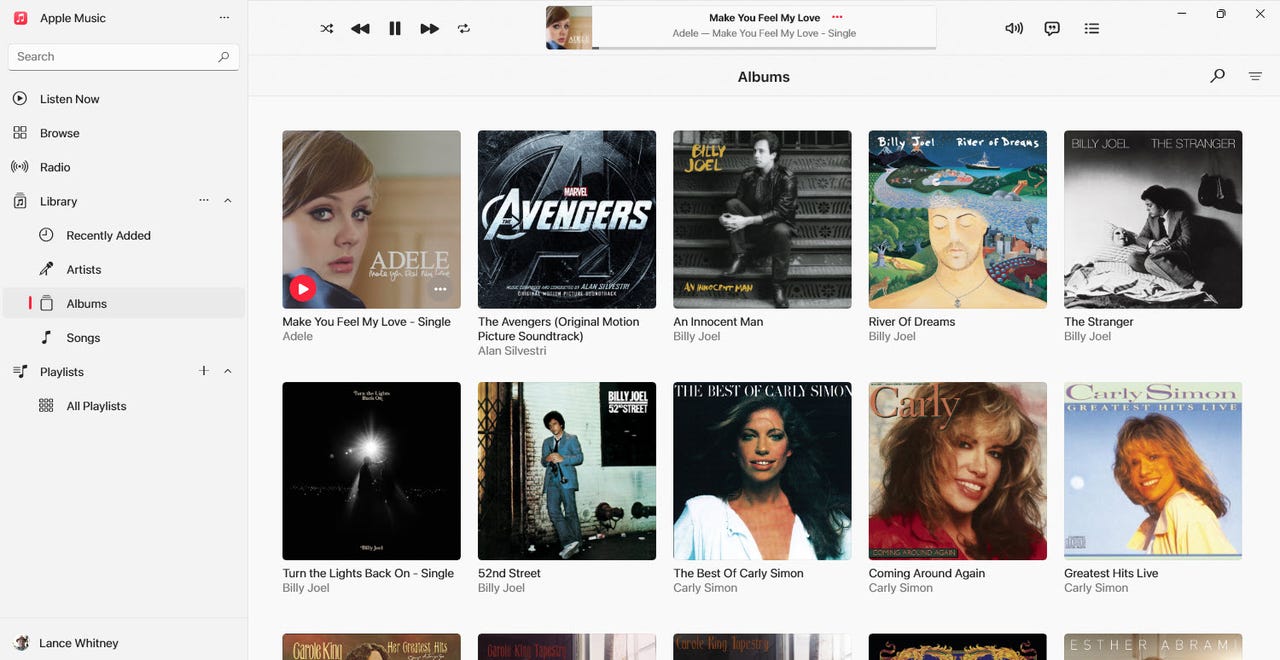
4. Allow your library to appear
After signing into the Apple Music app, wait for your music library to pop up. Click on each of the folders on the sidebar -- Albums, Artists, Songs, and Playlists. Make sure all your albums are intact and try playing a few songs from different albums.
Also: The best live TV streaming services for cord cutters
5. Open the Apple TV app
Next, open the Apple TV app. Select the folders in your Library for Movies and TV Shows to make sure all the content appears. Try playing a minute or two of different movies and TV shows.
6. Open the Devices app
Next, try the new Devices app to make sure you can back up and sync your iPhone or iPad. Open the app. The first time you do this, a message pops up telling you that Apple Mobile Device Support needs to be uninstalled. Click Continue and allow the tool to be removed.
7. Connect your iPhone or iPad
Connect your iPhone or iPad to your PC. Click the Trust button and then type your passcode on your device.
8. Back up your device
First, try backing up your iPhone or iPad. Select one of the two options: Back up important data to iCloud, or Back up important data to this computer. If you wish to encrypt the data, check the box for Encrypt local backup and then type a password to secure the backup.
If the backup doesn't kick off automatically, click the Backup Now button and wait for it to complete. When the backup is finished, a bar at the bottom will show the amount of storage space used up.
Also: How AI helped get my music on all the major streaming services
9. Check or change options
Scroll down to the Options section. Check or uncheck any boxes depending on your preferences. Typically, I leave all four options unchecked.
10. Sync Music
Next, you'll want to try syncing your content. Music is a good place to start. Click the three-lined hamburger icon at the top of the left to display the sidebar and select Music.
11. Set up the syncing
Check the box for Sync music onto iPhone (or iPad). The first time you do this, you may receive a message asking if you want to remove your existing music, movies, TV shows, and books. Selecting Remove & sync will delete all your content, forcing you to resync it. Instead, click Cancel.
12. Sync your music
Recheck the box for Sync music onto iPhone. Make sure the option is enabled for selected artists, albums, genres, and playlists. Scroll down the window and choose how you want to select the music to sync. You can opt for Artist, Album, Genre, or Playlist. I typically go with Artist and then Playlist. Select the category you want to use and then check the boxes for the items you want to sync to your device. When ready, click Apply or Sync.
After the process is finished, the graph will show you how much space is taken on your device by all your content. Hover over each colored section on the graph to see the used space for each content type.
13. Sync Movies
Click the hamburger icon and select Movies. Check the box for Sync movies onto iPhone. Check the boxes for the movies you want to sync to your iPhone or iPad and click Apply.
Also: The best Windows laptop you can buy: Expert tested
14. Sync TV Shows
Click the hamburger icon and select TV Shows. Check the box for Sync TV shows onto iPhone. Check the boxes for the shows, seasons, or episodes you want to sync to your iPhone or iPad and click Apply.
15. Sync Photos
To sync photos from your computer to your mobile device, click the hamburger icon and select Photos. Check the box for Sync photos onto iPhone from. Click the dropdown menu to the right and select the folder with the photos you want to sync.
To sync everything in that folder, keep the selection set to All folders. Otherwise, click the box for Selected folders and check the boxes for the folders you want to sync. Check the box for Include videos to sync any videos in the selected folders. When ready, click Apply.
16. Check iTunes
After you've set up the new apps and synced your content, you should check iTunes, if only to make sure that your audiobooks and podcasts are still accessible. Open iTunes. By default, a message pops up telling you that music, movies, and TV shows are now available in the Apple Music and Apple TV apps. Check the box to prevent this message from appearing each time.
In iTunes, click the dropdown menu at the top and select Podcasts. Review all your podcasts and try to play a couple of episodes. Click the menu again and select Audiobooks. Check all your audiobooks and start playing a minute or two from selected titles.
Problems and solutions
To test the process, I tried setting up the apps and syncing content on three different computers. Two were test PCs, one with Windows 10 and one with Windows 11. I didn't bump into any issues with these, but their iTunes libraries were relatively small. On another Windows 10 PC with a library of more than 1GB in size, I ran into a few glitches, most notably missing content.
On the problematic PC, the missing content displayed a generic icon instead of the correct artwork. When I tried playing anything (album, TV show, or movie) with no artwork, nothing happened. To fix this, I had to remove the missing content and then add it back. Adding content was relatively simple as I just dragged and dropped the album, movie, or TV show from File Explorer into the Apple Music or Apple TV app. The content then displayed the correct artwork, and I was able to play it.
Also: I tested iOS 17.3.1: What's inside, who needs it, and how it affected my iPhone
If you do run into trouble during or after the migration, you also can remove the three apps and try again from scratch -- or leave them uninstalled and go back to using iTunes. But hopefully, the process will work smoothly -- or at least smoothly enough -- so that you can use the new apps to play and sync your favorite content.