'ZDNET Recommends': What exactly does it mean?
ZDNET's recommendations are based on many hours of testing, research, and comparison shopping. We gather data from the best available sources, including vendor and retailer listings as well as other relevant and independent reviews sites. And we pore over customer reviews to find out what matters to real people who already own and use the products and services we’re assessing.
When you click through from our site to a retailer and buy a product or service, we may earn affiliate commissions. This helps support our work, but does not affect what we cover or how, and it does not affect the price you pay. Neither ZDNET nor the author are compensated for these independent reviews. Indeed, we follow strict guidelines that ensure our editorial content is never influenced by advertisers.
ZDNET's editorial team writes on behalf of you, our reader. Our goal is to deliver the most accurate information and the most knowledgeable advice possible in order to help you make smarter buying decisions on tech gear and a wide array of products and services. Our editors thoroughly review and fact-check every article to ensure that our content meets the highest standards. If we have made an error or published misleading information, we will correct or clarify the article. If you see inaccuracies in our content, please report the mistake via this form.
How to set up Alexa's new Map View, and why you'll need one of these iOS devices

The Amazon Alexa app just got a much-needed upgrade in favor of a better user experience. Amazon announced that the Alexa Map View feature is now available on a preview basis on some devices to make it easier to control smart home devices.
If you've ever used the Alexa mobile app to control your smart home, you've likely noticed it can be a tedious experience. Scrolling through a list of dozens of randomly named devices to find the one I need doesn't make for a friendly user interface. Map View may change that.
Also: Everything you need to upgrade to a smart kitchen
"Even I struggle with this. Scrolling through a long list to find that device with a name I can't remember," Charlie French, Amazon's director of smart home, explained during the company's initial Map View announcements in September. "We knew we had to make it easier."
Map View is a visual layout of your home, where the smart devices connected to Alexa are easily accessible. Using the Alexa app, consumers can create a map of the rooms in their homes and then drag and drop each smart device to its respective location, making it easier to find the device they need in less time.
Map View will only be available on some devices. In a preview interview with ZDNET, French explained that LiDAR-enabled iOS devices are necessary for the room scanning process that creates the map. At this time, only iPhones 12 Pro and Pro Max, 13 Pro and Pro Max, 14 Pro and Pro Max, 15 Pro and Pro Max, and iPad Pro (4th gen or newer) will be able to use Map View in the Alexa app.
Also: 12 smart home devices that make great gifts this holiday season
I've been looking forward to Amazon improving the Alexa app for a long time. I told French I have at least two smart plugs that are connected somewhere and working but I have no idea what their names are, making them effectively "lost." My husband has woken me up from a dead sleep at least three times by mistakenly turning on my bedside lamp to 100% when he was trying to turn on a light bulb in the living room.
How to use Map View on Amazon Alexa
A sped-up view of how the Alexa app scans rooms.
What you'll need: The Amazon Alexa app with any compatible smart devices added and a compatible Apple device.
1. Open the Alexa app
Open the Amazon Alexa app on your iPhone 12 Pro or Pro Max or newer or iPad Pro 4th generation or later.
Map View works on the Amazon Alexa app, not the Amazon Shopping app.
2. Select Devices
Tap on Devices at the bottom of your screen on the Alexa app.
3. Tap on Map View
Tap on the pin-drop icon on the top right corner of the Devices screen. This is where you'll access Map View after setting it up.
4. Pass through the intro to Map View
The first time you enter Map View, you'll be introduced to the feature with some slides. These introductory pages explain what Map View is, that it is a new Alexa feature only available in the US, how you'll use your phone to create 3D models of each room, and some privacy information.
Also: How AI in smart home tech can automate your life
Tap on "Next" at the bottom of the screen through each one.
Tap on Start Now to get started and read through the next few pages.
5. Add your floor
Select which floor you're scanning first. I chose the first floor since I started with the home office downstairs.
Tap on "Next" and then choose the floor you're scanning first, or create a custom floor.
6. Learn how you'll create your map
The app will walk you through how you will create your floorplans with your phone. Make sure that your rooms are well-lit, to capture every wall from floor to ceiling and all pieces of furniture, and only scan one room or area at a time.
You can always edit these maps later and even separate areas in an open floorplan.
Once you read through the scanning instructions, you can tap on "Start Scanning" at the bottom of your screen.
7. Start scanning
Start scanning your room with your phone. Move your device to capture the area with your camera, and move around and turn to ensure it scans the entire room.
Also: 5 things I learned while building my smart home
When done, tap on "Finish Room" at the top right.
Scan your room and tap on "Finish Room" when done.
8. Name the room
Select or enter a name for your scanned room. I selected "Office" since that's the room I scanned.
9. Finish your room layout
Confirm your room's floorplan looks accurate. Next, you can add a "New Room" or tap on "All Done" to finish for now.
I selected "All Done" to finish mapping and start adding devices to my room.
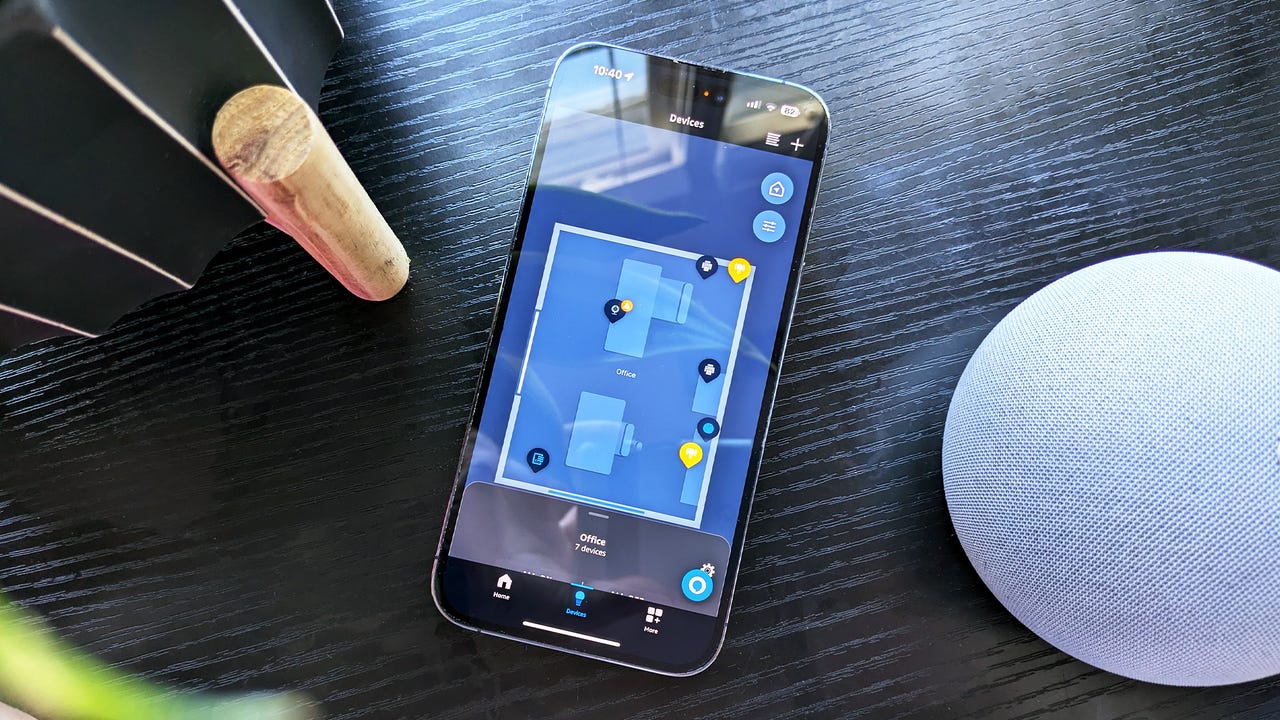
10. Drag and drop your devices
Find the room's devices from the carousel at the bottom of your screen and start adding them. Drag and drop each one and place it in the room where they're located.
You can tap on Done when finished and start controlling your room's devices from your map.