10 top tweaks for Windows Vista

[Update 17-June: Part 2 is now available.] Part 1: In nearly two decades of working with and writing about Windows, one lesson I’ve learned above all others is that the best ways to enhance performance and productivity are usually fairly simple. They don’t require registry edits or custom code; instead, they involve learning how the basic building blocks of Windows work, and then rearranging those components to cut steps out of the tasks you perform most often.
Vista changed some of those building blocks, and many people are struggling because they’re trying to use the new tools with the old techniques.
In that spirit, I’ve put together this list of my 10 favorite tweaks to Windows Vista. It covers a lot of ground, so I’ve split it into two parts, each containing five entries. In today’s installment, I explain how to make the list of installed programs easier to work with, how to tweak the taskbar, the Start menu, the Quick Launch toolbar, and Windows Explorer. And I also cover the most important time-saving technique for any user of any computer: how to create an automatic backup routine that works.
| Image Gallery: These screenshots show these top tweaks for Windows Vista, step by step. | 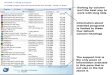 | |||||
Here’s a quick list of what’s in part 1:
1. Get installed programs organized and up-to-date
The default format for the list of installed programs in Control Panel is a dull, gray list that matches its Windows XP predecessor. But with a few clicks, you can add a wealth of useful information (like current version numbers for every program in the list) and group entries in ways that are more useful.
2. Tweak the taskbar and desktop
The first thing I do with every new Windows system I set up is to make the task bar taller. I also make desktop clutter vanish completely without losing access to files and shortcuts on the desktop. Here’s how.
3. Set up a smart, automated backup system
How often should you have to reinstall Windows? The correct answer is “Never.” Using built-in backup tools that are included with some Vista editions, you can save a system image that can be restored from disk – complete with drivers and your installed programs - in a fraction of the time it would take to reinstall.
4. Get fast access to common tasks
I constantly hear that some tasks in Windows Vista take too long, especially those that have to do with networking. Want one-click access to network settings and other useful tasks, complete with automatic keyboard shortcuts? Follow the step-by-step instructions.
Vista’s version of Windows Explorer is a radical reworking of the XP-style Explorer you know and probably don’t love. With three tweaks and a slightly adjusted mindset (hint: think of a modern airline’s hub-and-spoke model), you’ll find most file-management tasks significantly easier.
If you have feedback, questions, or suggestions for topics you think I should cover later in this series, please leave them in the TalkBack section below.
Tweak #1: A smart Programs and Features list -->
1. Get installed programs organized and up-to-date
As I’ve shown before, one of the best ways to make a Windows system work better is to clean unwanted programs off it. On any platform, your goal should be to uninstall software you don’t want or no longer use and keep programs you regularly use updated. In an era when security exploits commonly target third-party applications, that’s even more essential.The starting point for this essential maintenance task is the Programs and Features window in Control Panel. Its default list format is similar to the Add or Remove Programs list in Windows XP and isn’t all that helpful. But the Vista version allows some interesting tweaks not possible in XP. To make the Programs and Features listing more useful, I supplement the four columns in the default display with additional information, including the version number and links to support and update pages. The new, improved format shows more useful information at a glance and also allows a variety of grouping and sorting options.
[Click image to see full sequence of step-by-step instructions.]
To create the revised list format, open Control Panel’s Programs and Features list, right-click any column heading, and click More. That opens the Choose Details dialog box, which allows you to choose from an additional 15 columns. Many of those additional columns contain little or no information, but a handful are exceptionally useful. On my systems, I like to display the Version column, so I can see at a glance whether a program update applies to my system. I also like to display the Location column, which shows the name of the folder where a program’s files reside.
After adding extra columns, I rearrange their order and width to fit the screen, then use the drop-down group and sort menu to rearrange the display on the page. The result? I get a more complete picture of all installed software.
A few annoyances remain: Although the Programs and Features list allows you to display links to update and support sites (as supplied by a program’s publisher), those links aren’t live, and there’s no way to copy them to the Clipboard. There’s also no easy way to save a list of installed programs (complete with version numbers) from the Programs and Features list. (You can create a WMI script that retrieves information for most programs installed with Windows Installer, but that list isn’t complete.)
Tweak #2: Bigger taskbar, cleaner desktop -->
2. Tweak the taskbar and desktop
One of my all-time favorite tweaks works just the same under Windows Vista as it did under Windows XP, so I reprise it here. On a modern desktop display or any notebook except the tiniest ultraportables, you’ll find it easier to work with running programs by increasing the height of the taskbar to two rows. As a side benefit, you get extra information from the system clock and get a more efficient arrangement of icons in the notification area (sometimes referred to as the system tray).[Click image to see full sequence of step-by-step instructions.]
By default, the taskbar is locked, to prevent you from accidentally changing its size or dragging it to a different edge of the display. Right-click any empty space on the taskbar and click to clear the Lock The Taskbar option. Then aim the mouse pointer at the top of the taskbar and drag it up until two rows of buttons are visible. After making this tweak, be sure to lock the taskbar again.
The other change I like to make is to hide all icons on the desktop. Right-click any empty space on the desktop, click View, and clear the Show Desktop Icons option (in Windows XP, this option is at the bottom of the Arrange Icons By menu). With desktop icons hidden, how do you get to program shortcuts or files you’ve stored there? You can click Start, click your user name on the Start menu, and then open the Desktop folder from your user profile folder, but I prefer an easier way: add a custom Desktop toolbar to the taskbar.
Right-click any empty space on the taskbar; at the top of the shortcut menu is a Toolbars option, which includes the Desktop folder as one of its defaults. When you click that option, the Desktop toolbar appears on the right side of the taskbar, with its contents available as a pop-up menu. Click the arrow to the right of the folder name to show its contents; at the top of the list you’ll find links to all locations in the file system.
You can also add custom folders to the taskbar. From the Toolbars menu, click New Toolbar and choose an existing folder from any location in the file system (hint: shorter names work better). Any shortcut or file you add to that folder is instantly available from the pop-up menu for that folder. I sometimes use this type of custom toolbar when I’m working on a big writing project; I keep Word documents, Excel lists, and shortcuts to FTP and SharePoint sites in a single folder for that project and add that folder as a custom toolbar for quicker access to whatever I’m working on.
Tweak #3: A backup strategy that really works -->
3. Set up a smart, automated backup system
Every edition of Windows Vista includes a capable file-based backup program. Setting up scheduled backups is possible on every edition except Home Basic, and you can do full image-based backups to an external hard drive or DVD if you have Vista Business, Ultimate, or Enterprise editions. In fact, the Complete PC Backup feature alone is worth the upgrade price to Vista Ultimate edition, in my opinion.The Vista backup strategy I recommend is twofold:
- Use Complete PC Backup (or a third-party image backup program) to snap an image of your system with up-to-date drivers, all your favorite software installed, and the system fully activated. You can save the image to an external hard drive (USB, FireWire, or eSATA, for example) or to DVD, but not to a network location. In the event of a hard disk crash, you can restore this image in minutes. That’s a big improvement over the alternative: a clean install of Windows, followed by a reinstall of drivers and software.
[Click image to see full sequence of step-by-step instructions.]
- Use the Back Up Files option to automatically back up data files at regular intervals (daily is best, but weekly is acceptable if you’re willing to accept the loss of a few days’ work). You can back up to an external hard drive, to a network storage device, or to a shared folder on another computer.
If you’ve just finished setting up a new PC for the first time, and you haven’t yet added any data files, use the Complete PC Backup option with recordable DVD disks. Thanks to compression, you can typically squeeze an entire Vista system onto two DVDs. Put those backup disks in a safe place and use them instead of the manufacturer’s restore disks if you ever need to start fresh.
For file-based backups, you might be put off at first by the inability to back up the full contents of a specific folder. But if you accept the backup program’s design, you’ll discover that it offers excellent protection and makes very efficient use of disk space. (Backup files are saved in a folder hierarchy under the name of the computer being backed up, with each backup set stored in a folder identified by date, and backed-up files saved in compressed files that use the standard Zip format.) When you open a backup set, you can use the Search box to find a specific file or group of files to restore; for disaster recovery, you can simply restore your original image backup and then restore the latest data backup to be back to work quickly.
Tweak #4: Get one-click access to common tasks -->
4. Get fast access to common tasks
The Quick Launch toolbar has been around forever. Its original goal was simple: to give you easy access to your favorite programs, via small icons on a toolbar just to the right of the Start button.Windows Vista adds a subtle but extremely useful new feature to the Quick Launch bar. Each icon you add here automatically gets a keyboard shortcut that matches its position. To execute the first Quick Launch icon, press the Windows log key+1. The second program is Windows logo key+2, and so on, with program number 10 available as Windows logo key+0.
The Quick Launch bar can contain any kind of file, not just program shortcuts. You can add shortcuts to document files, scripts or batch files, folders, shared network locations, scheduled tasks, even administrative tools and Control Panel options. Here, for example, is the Quick Launch bar on my notebook:
The icons in the top row of the Quick Launch toolbar represent my solution to a common complaint about Vista’s Network and Sharing Center. If you think it takes too many clicks to get to common tasks, this solution might work for you as well.
- The second icon jumps directly to Network and Sharing Center. To add this shortcut to the Quick Launch toolbar, open Network and Sharing Center and drag the icon from the left side of the Address bar onto the Quick Launch toolbar.
- The third icon opens the Network Connections folder. From Network and Sharing Center, click Manage Network Connections, then drag the icon from the left side of the Address bar and drop it on the Quick Launch toolbar.
- The icon in the number-four position provides quick access to the wireless network connection. You have to create this shortcut on the desktop first and then drag it onto the Quick Launch toolbar.
With this particular set of icons, I can accomplish most network tasks with a minimum of effort. For example, I can press Windows logo key+4 to open a list showing all available wireless networks. Likewise, if I need to adjust TCP/IP settings I can press Windows logo key+3 to open the Network Connections folder, select a connection icon, and then click the Change Settings button to work with that connection’s settings. You can adjust your Quick Launch toolbar any way that works for you. If you make sure your favorite shortcuts are in the group of 10, you can get to any of them with one click or keyboard shortcut.
Tweak #5: Fine-tune Windows Explorer -->
5. Fine-tune Windows Explorer
XP’s version of Windows Explorer is built around the Folders list, which mostly assumes you’re going to start at the root of some disk drive or in the My Documents folder, and then work your way through the hierarchy until you get to the file or folder you’re looking for. Vista hides the Folders list by default (although it’s still there if you insist). In its place is a Favorite Links pane that is prepopulated with a handful of default locations where the Windows designers decided you’re most likely to store files.The secret of the Favorite Links toolbar is to customize it with the places where you open and save data files most regularly. I have it organized like the hub-and-spoke system that most modern airlines follow today. The folders I use most often have links in the Favorite Links pane of Windows Explorer. In the Documents folder of my user profile, I have a Work folder that in turn contains subfolders for the projects and clients I’m actively working with. A link to that Work folder is near the top of my Favorite Links pane, as is a link to the ZDNet folder where I keep drafts of blog posts, interview notes, screen captures, and so on.
[Click image to see full sequence of step-by-step instructions.]
My Favorite Links pane also contains shortcuts to shared folders I use most often, like the Software folder on my Windows Home Server machine, the Live_Music folder on my Windows Media Center machine, and the default folder for documents created on a shared scanner. In Windows XP, I would have had to go to My Network Places, find the computer, find the shared folder, and then drill down through the subfolders to find what I want. With a little customization, I can use Vista’s Explorer to go directly to that shared folder and skip at least three clicks each time.
A few things worth noting about the Favorite Links pane:
- You can add a shortcut to any location where you can save or open files, including drives, folders, network shares, and shell folders such as Computer and Network.
- Links are stored as shortcuts in the Links folder of your user profile. If you rename a link, the name of the location to which it points is unchanged.
- To adjust the order of entries in the Favorite Links pane, drag an item up or down.
- Shortcuts in the Favorite Links pane are valid drag-and-drop targets, so if you want to move or copy an item from the current folder to a location in the Favorite Links pane, you can drag (or, better yet, right-drag) it.
- The Recently Changed link is a custom Search Folder that displays a list of every file you’ve worked with for the past month, sorted by date in reverse order. It’s an excellent way to locate a file you worked with recently without having to remember exactly where you saved it.
- The Favorite Links pane in Open and Save dialog boxes includes a Recent Places link, which lists shortcuts to folders, drives, and other locations where you’ve opened or saved items recently. It’s a fast way to find a location you’ve used recently that isn’t on the Favorite Links pane.
Of course, that only scratches the surface of what you can do with Vista’s version of Explorer. I’ll cover other techniques, including searching, grouping, filtering, and sorting, in next week’s installment.