'ZDNET Recommends': What exactly does it mean?
ZDNET's recommendations are based on many hours of testing, research, and comparison shopping. We gather data from the best available sources, including vendor and retailer listings as well as other relevant and independent reviews sites. And we pore over customer reviews to find out what matters to real people who already own and use the products and services we’re assessing.
When you click through from our site to a retailer and buy a product or service, we may earn affiliate commissions. This helps support our work, but does not affect what we cover or how, and it does not affect the price you pay. Neither ZDNET nor the author are compensated for these independent reviews. Indeed, we follow strict guidelines that ensure our editorial content is never influenced by advertisers.
ZDNET's editorial team writes on behalf of you, our reader. Our goal is to deliver the most accurate information and the most knowledgeable advice possible in order to help you make smarter buying decisions on tech gear and a wide array of products and services. Our editors thoroughly review and fact-check every article to ensure that our content meets the highest standards. If we have made an error or published misleading information, we will correct or clarify the article. If you see inaccuracies in our content, please report the mistake via this form.
How to order Apple Vision Pro: Tips, tricks, and my secret to a good face scan

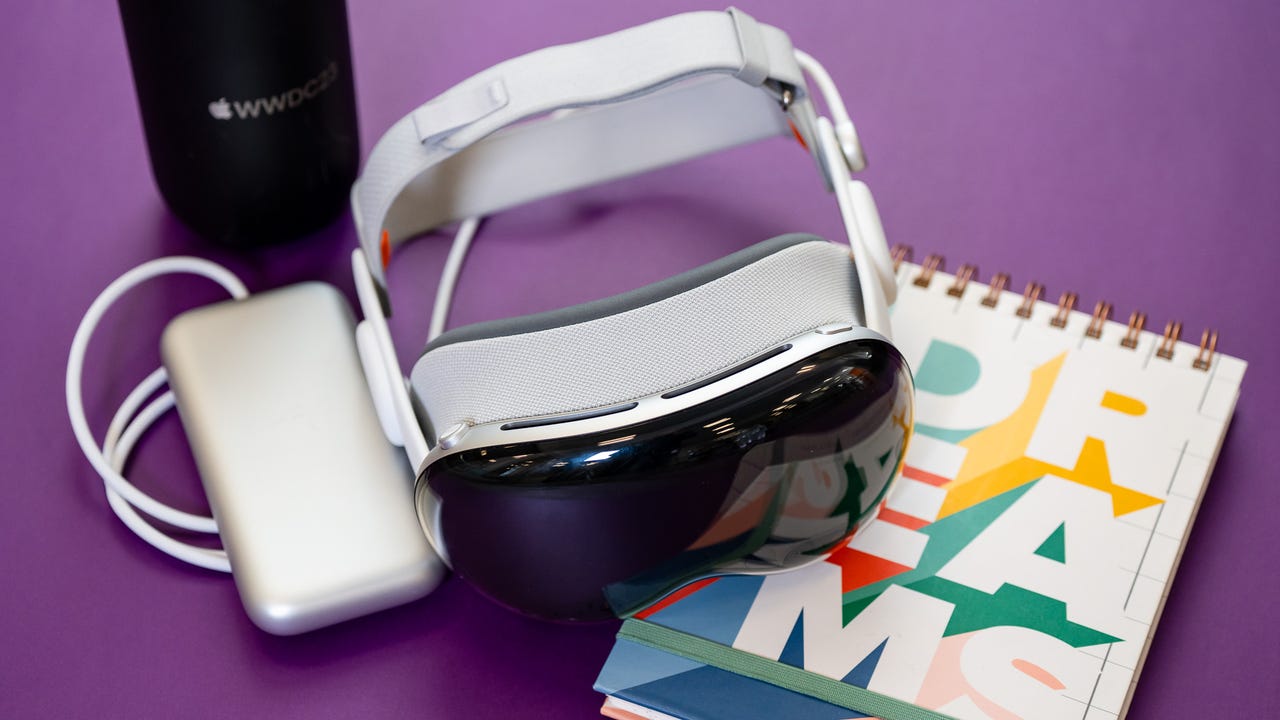
Last week, I finally decided to spend the big bucks and order an Apple Vision Pro. To be honest, I've yet to see a productivity benefit in the device, but I've pretty much reached the limits of using the Xcode simulator for writing articles about the Vision Pro. I'm looking forward to using it and finding its hidden talents.
Review: Apple Vision Pro: Fascinating, flawed, and needs to fix 5 things
There are a lot of steps involved in buying Apple's headset, especially if you do it online. In this article, I'll take you through the process step-by-step, with screenshots for almost every step. I'll also share some tips for getting prescription lens inserts (if you need them), and for getting a good face scan.
I strongly recommend you read this entire piece before you go to Apple.com and begin your order. This will help you know what to expect, gather the necessary items you'll need, and remove confusion when you hit a couple of the more fussy parts of the ordering process.
OK, let's go.
How to order Apple Vision Pro
1. If you wear glasses or contacts
This is important. If you wear glasses or contacts, you must read this. Otherwise, there's a chance you'll order a device you can't use.
Once you go to the Vision Pro ordering page at Apple, you'll see this:
You might think you should just go ahead and hit Get Started (at 2), but you actually need to click the tiny link (at 1) in the upper right corner. This will give you some very critical guidelines before you start the order.
Be sure your phone is up to date, and you have the Apple Store app installed (and that it, too, is up to date). For those who wear corrective lenses, it's the paragraph under "Have your vision prescription handy" that's going to be very important.
Also: How to get your iPhone ready for the landmark iOS 17.4 update
You must have a current prescription
When I bought my custom lenses for the Quest 3 XR headset, I just typed in the eyeglass numbers that corresponded to the glasses I currently wear. But I couldn't use that prescription for ZEISS (the company that makes the lenses for Apple).
Notice that the guidelines say that you need to upload a "valid, unexpired prescription from a US eye-care professional." Well, my prescription was done in the deep, dark days of the pandemic. I generated that prescription myself. I used a gadget called an EyeQue VisionCheck. With the help of an app on my iPhone, I came up with eyeglasses numbers that have worked perfectly for the last three years. Frankly, it's the best set of glasses I ever had -- but I did spend hours getting it just right.
That prescription works fine in my Quest 3, but Apple and ZEISS won't accept it. I had to book an appointment with my local optometrist.
It's your distance prescription that counts
When you go to see your optometrist, you'll need to get a distance prescription for the lens inserts. Some people think you'll need both close and distance prescriptions, particularly if you need glasses to read a book or your phone. But that's not how it works.
When viewing something in spatial computing, everything you see is on exactly the same plane, at a focal distance of about 1-2 meters away. Keep this in mind: You're looking at two screens that are a fixed distance from your eyes, so even if something appears up close, it's exactly the same distance from your peepers as something in the mountains in the far back of the scene.
Also: I've tried Vision Pro and other top XR headsets and here's the one most people should buy
My optometrist didn't know anything about writing a prescription for XR devices -- in fact, he let out a derisive snort when I told him what I needed the prescription for. But I printed out and gave him the "If you wear prescription eyeglasses" section from the guidelines Apple PR sent me when I asked them what to tell optometrists and gave it to him.
Note that Apple specifically states, "Intermediate distance, task distance, or computer distance should not be part of that prescription."
In any case, within a half hour, I had a new distance prescription that was current and official.
Confirm your prescription can be used
Now, you need to take one more step. Point yourself to the ZEISS Eyeglass Prescription Guide page. At the bottom of the page, you'll see this interactive form:
Fill it out with the relevant data from your current prescription and click Check Prescription. In most cases, the form will report your prescription is fine for the Vision Pro. However, some people have reported that their prescriptions fall outside the bounds of what is needed to use the Vision Pro.
Also: Vision Pros are cracking for no apparent reason: Here's what to do if yours cracks
This is why you need to do all the prescription preparation first. Apple points you to the ZEISS page after the order has been completed, but by that time it's too late. The order has already been placed. It would be extremely inconvenient to find out you can't use the headset, and have to go through all sorts of hoops to either cancel the order or return the device.
By checking these details first, you can save yourself that annoyance.
2. Get a successful face scan
The next step is the process where Apple determines the size and shape of your face to fit the pads that are used to protect your face and block out ambient light. In my case, I found this to be quite difficult, but I did figure out a method by which you can do it quite easily.
I'll go into more detail as we step through the process, but here's a quick summary:
Assuming you've confirmed your prescription is eligible for use with inserts, let's go back to that original Vision Pro ordering page and click Get Started.
- Make sure you have a lot of light. Turn on all the lights, open the window shades, etc.
- Prop your phone up on a bookshelf so it's eye height and you're not touching it.
- Move your body into the scan range and slowly move your head according to the prompts.
Also: 7 reasons why people are returning Apple Vision Pro
All of this kicks off once you hit the Get Started button I showed earlier. You'll immediately be presented with a screen containing Apple's interpretation of a QR code.
I'm not blurring mine out because these codes time out after a while. This one is expired. In any case, open your iPhone's camera app and point it at the code:
Tap the little yellow button, which will cause the iPhone to transition to the Apple Store app.
The Apple Store app is tied to your ordering session online. You'll first be shown this screen, which provides some guidelines for finding the best fit. Hit this new Get Started button to get started with the fit-finding process.
After that, you'll be asked to position your face inside the white border bars. This is where I started having difficulty.
Blurred for privacy
When I did eventually get the app to accept the placement of my face, it transitioned to the next phase, where the app scans your face in various positions.
Blurred for privacy
The app will tell you where to move your face, so follow the arrow.
Eventually, the app will complete, and you'll be sent back to the browser session
This process took me a very long time. Not only did I have difficulty trying to get my big head into the little circle, but I was also trying to screenshot everything as I did it. Each time I took a screenshot, my screen turned off and I had to start over. I finally turned on screen recording from the phone's control panel to get the screenshots you see above.
Also: Meta Quest 3 vs. Apple Vision Pro: How accurate was Zuckerberg's review?
But the real trick, which I mentioned at the start of this section, is that I turned on all the lights and set the phone down at face height, so I could stand in front of it. Before that, I tried again and again to make it like me. As soon as I used a stable, head-height platform, it took the requisite measurements in less than a minute.
3. Pre-order the optical insert lenses
Let's get started. For those keeping track, we're at our third "Get started" prompt:
And with that, we can move on to the ordering process itself.
Ordering your optical inserts will involve two phases. First, you answer a bunch of questions that Apple asks before completing the Vision Pro order. Then later, once you've completed your Vision Pro order and checked out, you'll be asked to go to the ZEISS site to provide your prescription and some other details.
Also: This Apple Vision Pro case is almost half the size of Apple's
For now, though, we're working through the Apple side of this process. This is the first time you'll tell Apple you wear glasses:
If you wear contacts, you could conceivably use them instead of optical inserts, but you must make sure the contacts provide you with good distance vision.
Now, describe the type of glasses you wear.
Here's where you let Apple know whether you're near-sighted or far-sighted.
The prism value has to do with optical misalignment. Here you're letting Apple know if it's on your prescription.
The configuration wizard will tell you the type of inserts you need:
Next, you'll have the opportunity to customize your inserts with your initials. I didn't do this because I didn't think it was necessary. It might be useful if the device is being shared by multiple people with the same size and shape head and you don't want to get the inserts mixed up. It doesn't cost anything extra to have the inserts customized with your initials.
And, finally, you're done with the first phase of ordering your optical inserts. Remember, we'll be back to visit the ZEISS site after the Vision Pro checkout is completed.
4. Order the Vision Pro itself
Now, it's time to decide how much storage you want to have on the Vision Pro. Keep in mind this is very much like choosing the storage on your iPhone or iPad.
I took a cue from ZDNET's Senior Reviews Editor Kerry Wan and went with 512GB -- for the same reasons he cited. I'm going to be installing a lot of stuff in order to write about it.
Also: The Apple products you shouldn't buy this month
I'm not ready to give you a storage recommendation, except to say that if you're commonly pushing the storage boundaries on your iPhone and iPad, you might want to add some storage to the Vision Pro. It's fundamentally an iPad you strap to your face.
Your next choice is whether you want to buy it outright or finance it. For Apple purchases, I like to use the Apple Card, because it gives 12 months of zero-interest financing. That's convenient, although -- at $320/month -- these monthly payments will be disconcertingly close to my car payments of yore.
Next up, it's time to decide about AppleCare+. Just a quick note about nomenclature. AppleCare (without the plus) is the standard warranty that comes with the device and provides one year of coverage for manufacturing issues (i.e., if Apple built the device incorrectly).
AppleCare+ adds coverage for accidental damage for a period of two years, but there's also a per-incident charge ($299 for the Vision Pro) on top of the $499 for AppleCare+.
Also: New iPhone 15 models compared: iPhone 15 vs. Plus vs. Pro vs. Pro Max
I decided to forego the AppleCare+ fee, because it bothered me that just the extended warranty on this thing cost as much as a Meta Quest 3. But I have 60 days after the device arrives to change my mind, and I'll decide during that period if I feel the added protection is either necessary or worth the cost.
And now, it's time to sit down and rethink your life. Because you're about to start clicking the buttons that will obligate you to buy this thing.
Next, it's upsell time. Apple offers several accessories, including a case and battery holder. I didn't buy anything else.
Once again, it's time to rethink your life. Check over what you're about to spend and think long and hard about the decisions that brought you to this moment in time.
Scroll down to see the rest of the order.
And, if you want, you have yet another opportunity to rethink your life. There are a lot of buttons to push to get this thing ordered.
You think we're done, do you? Hah. There's more.
Now, you get to decide if you want the device shipped to you, or if you want to run out to your local Apple Store. I'm not a big store guy, so I'm having mine shipped.
After verifying the lens order, you'll be asked for your shipping address.
I skipped showing you the screen where I specified the delivery address, because -- as much as I love you folks -- I'd prefer that you didn't show up at the crack of dawn hoping for pancakes.
Also: The best VR headsets right now (and how Apple Vision Pro stacks up)
Even though you've been clicking buttons for what seems like a decade, you still haven't placed your order. That happens now.
And there you go. You're done. Except: It's time to move on to ZEISS.
5. Upload your prescription to ZEISS
Now, it's time to upload your prescription to ZEISS. Apple does let you come back later (like if you didn't read this article and just found out you need a current glasses prescription and have to run to the optometrist). But you are reading this article because you're smart and good-looking.
This takes you to ZEISS's site, where you first have to admit whether or not you're old. Sigh. Yes, I'm over 40.
Make sure you have a PDF or JPG of your prescription. I just snapped a copy of the paper prescription on my iPhone and uploaded it directly from my Photos app.
Next, you'll need to agree that ZEISS can have your prescription information. Of course, it's pretty obvious that if you've gotten this far, you're pretty committed to sharing your prescription information so you can, you know, get the lenses.
Finally, ZEISS will let you know that they'll examine your prescription and let you know if it's usable for them to make your prescription inserts.
Also: This expert says VR's biggest problem is how we're using it
Whew. You're done. Now it's time to sit and wait. In my case, I got a notice the next day that my prescription was approved and the inserts were being made.
6. And now you wait for delivery
I have to admit, doing this order was a pretty tedious process. Part of it was made more difficult because I was capturing screenshots and screen recording video along the way so I could write this article. Part was because I had to capture my facial features. And part was because the expense just kind of freaked me out.
Also: Apple Vision Pro review: Fascinating, flawed, and needs to fix 5 things
Interestingly, as I reported last week, availability for the Vision Pro seems to be high. I have subsequently found out that the Vision Pro itself will arrive early, but the lenses will take a bit longer.
And there you go. I'll have a lot more hands-on tips and techniques to share with you once I can put this thing to use. Stay tuned.
What about you? Did you order a Vision Pro? What did you think of the ordering process? Did you already have your prescription information? Are you going to wear contacts instead? Or do you need vision correction at all? Let us know in the comments below.
You can follow my day-to-day project updates on social media. Be sure to subscribe to my weekly update newsletter on Substack, and follow me on Twitter at @DavidGewirtz, on Facebook at Facebook.com/DavidGewirtz, on Instagram at Instagram.com/DavidGewirtz, and on YouTube at YouTube.com/DavidGewirtzTV.