Windows 7 on a Mac: my Boot Camp survival guide

I have a Mac and a PC side by side on my desktop. In a multi-platform world, being able to switch back and forth between the two platforms is a crucial part of what I do.
For some comparisons, I find it useful to run Windows directly, without the interference of a virtualization layer. For that, the only alternative is to run Apple’s Boot Camp software.
After multiple Windows installations on Apple hardware and much research (including a thorough reading of the Boot Camp Installation and Setup Guide [PDF] and hours on Apple’s Boot Camp Installation and Storage forum), I’ve concluded that Boot Camp is second only to iTunes in its ability to inflict pain on Windows users. It has some unexpected limitations, and setup is more complex than it needs to be. (Why, it’s almost as if Apple is trying to make this process difficult.)
I have no illusions that Apple will pay any attention to my complaints and improve Boot Camp. But I decided to share my experiences here anyway, in the expectation that I can save you a few hours of banging your head against the wall if you need to use Boot Camp.
In this post, I assume you’re trying to install Windows 7 on an Intel-based Mac and that you’re following the official instructions. Here are the gotchas you need to know about.
You must install from a Windows 7 DVD.
My 2009-vintage Mac Mini has a defective DVD drive. It will play most audio CDs, but it spits out just about any data disc I try to feed it. If I try to burn an ISO image to a blank DVD, I get an error message like this one.
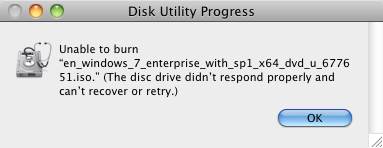
If this were a plain old PC, I would have lots of options. I could run setup from a USB flash drive, or use an external DVD drive, or even copy the setup files to a local hard drive and start the installer from that drive.
None of those options are available on a Mac. You must have an internal optical drive (the only exception is the MacBook Air). The makers of the superb rEFIt toolkit offer this confirmation:
Booting Windows or Linux from an external disk is not well-supported by Apple’s firmware. It may work for you, but if it does not work, there is nothing rEFIt can do about it.
Be prepared for a silly formatting error.
The Boot Camp Assistant creates a new partition and labels it as BOOTCAMP. But it doesn’t format the partition using NTFS, which is required for a Windows 7 installation. During the early stages of Windows Setup, when you choose the partition on which to install the OS, you have to click Drive Options (Advanced) and format the partition as NTFS. This awkward extra step is documented on page 8 of the setup guide, but you might miss it if you decided not to RTFM.
Update: In the TalkBack section, Joe Raby adds some context for this incompatibility:
The reason why you have to format the partition yourself is because Apple didn't license NTFS from Microsoft (that's why you can't write to NTFS in OS X) , and Apple's OS requires that every volume has a file system, which is why they format it FAT32.
You’ll need a USB keyboard and mouse to get started.
My Mac came with a Bluetooth keyboard. It works fine out of the box with the Mac, but it goes AWOL during the Windows setup process. The solution? Have a USB keyboard and mouse handy and use them to get through the initial installation. Once you get the Boot Camp drivers installed, you’ll be able to set up your Bluetooth hardware and you can put the USB hardware back on the shelf.
Download the Boot Camp files first.
The Boot Camp files include a handful of Windows drivers, two Control Panels (Boot Camp and Startup Disk), and a system task icon for the notification area (aka the Windows tray). That doesn’t sound like a lot, but you will need nearly 1.5 GB of Boot Camp files to get everything set up.
You’ll find the Boot Camp 3.0 files (required for Windows 7) on the Snow Leopard installation DVD. You can only read these files from Windows, and you can copy them from the DVD to a flash drive or a network share and install them from there.
Note: In the Boot Camp Assistant, you’ll find an option to download the Windows support software. Unless you have a MacBook Air, do not waste your time. This option does not work for any other model.
That’s nearly a gigabyte of mostly unnecessary software, but you’re just getting started. After you install those files and restart, you need to install the Boot Camp 3.1 update, reboot, and then install the Boot Camp 3.2 update and reboot.
You can save yourself some time by downloading the necessary update files and saving them to a local drive first.
Boot Camp 3.1 Software Update for Windows
32-bit (Windows XP SP3/Windows Vista SP2/Windows 7)
64-bit (Windows Vista SP2/Windows 7) Boot Camp 3.2 Software Update for Windows
32-bit (Windows XP SP3/Windows Vista SP2/Windows 7)
64-bit (Windows Vista SP2/Windows 7)
And after you're done with all that, you'll find a big mess in the Programs option of Windows Control Panel, where every single revision of every single driver package gets its own entry. On my modest little Mac Mini, that's a total of 51 packages. Unfortunately, there's no easy way to clear up this clutter.
Choose a solution for sharing and syncing files.
Assuming you’ve used the Boot Camp Assistant, you’ll end up with two partitions—one for OS X and the other for Windows. From the OS X Finder, you can browse and open files on the Windows drive, but you can’t write files to that volume—it’s read-only.
From Windows, you can read files on the OS X volume but if you try to write files to that location you get an error message.
The official solution is to format an external drive using the FAT32 file system, which both OSes can read and write. But I prefer to use a sync solution like Windows Live Mesh (works great on a Mac or Windows PC) or DropBox (ditto). Just make sure your data folders are shared and you can let the software handle the drudgery of keeping everything in sync.
Do you use Boot Camp? Any secrets you want to share? Leave them in the TalkBack section.