Windows 10 tips, tricks, secrets, and shortcuts: File Explorer

For the past few months, I've been working with my two longtime partners, Carl Siechert and Craig Stinson, on a new book, Windows 10 Inside Out. It's off to the printer this week and should be available in about a month.
Putting a book of this size together is always a learning experience, and that's especially true with Windows 10, which mixes classic elements that have been part of Windows for many editions with all-new stuff.
Over the next few weeks, I want to share some of that learning here, in a series of how-to posts. Today's edition covers tips, tricks, secrets, and shortcuts for using File Explorer. Even if you're a certified Windows master, I bet I can show you a trick or two you didn't know before.
1. Open a File Explorer windows fast
Get to know the classic shortcut combination for File Explorer, Windows key+E. For opening a single window, it's only a few microseconds faster than clicking the taskbar icon, but it's a huge time-saver when you're trying to open a second window.
Knowing that shortcut is especially handy when you plan to move or copy files between two folders. To open a second window using the mouse, you have to Shift+click. Instead, press Windows key+E twice to open two windows, which you can then snap left and right for easy dragging and dropping.
2. Customize the Quick Access list
The signature feature of Windows 10's revamped File Explorer is the new Quick Access list. You can pin your favorite folders to the top of the list for quick, one-click access. Folders you've used recently show up below the pinned items, which is handy when you're working with a group of files as part of a short-term project.
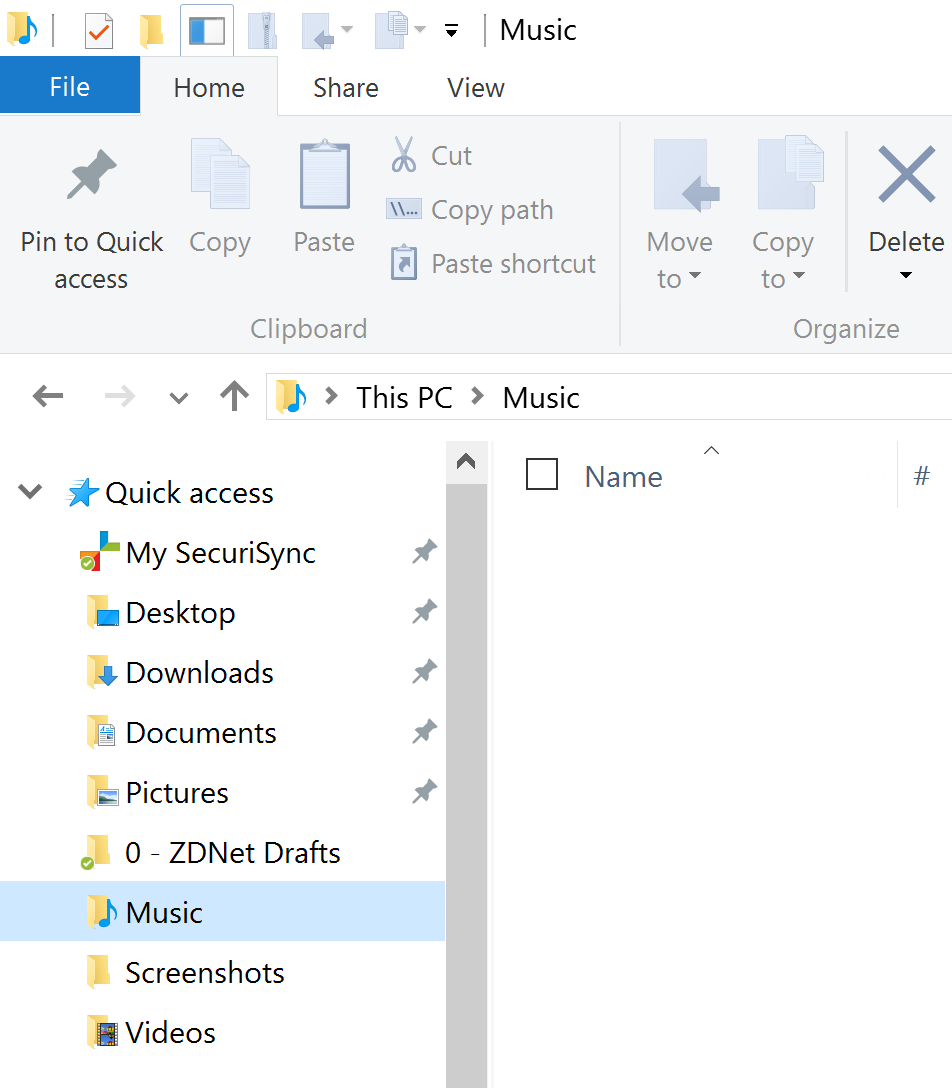
Anything in the Quick Access list is a drop target, which means you can move files to that location by dragging them from the main window (or even from another File Explorer window) and dropping them on the pinned folder.
To pin the current folder, click the big Pin to Quick Access button on the ribbon's Home tab.
3. Change File Explorer's opening folder
In Windows 10, File Explorer opens with Quick Access selected. Old-school Windows users might prefer to start in This PC (previously known as My Computer), which includes the six standard data folders in your user profile as well as any local drives and removable media such as USB drives.
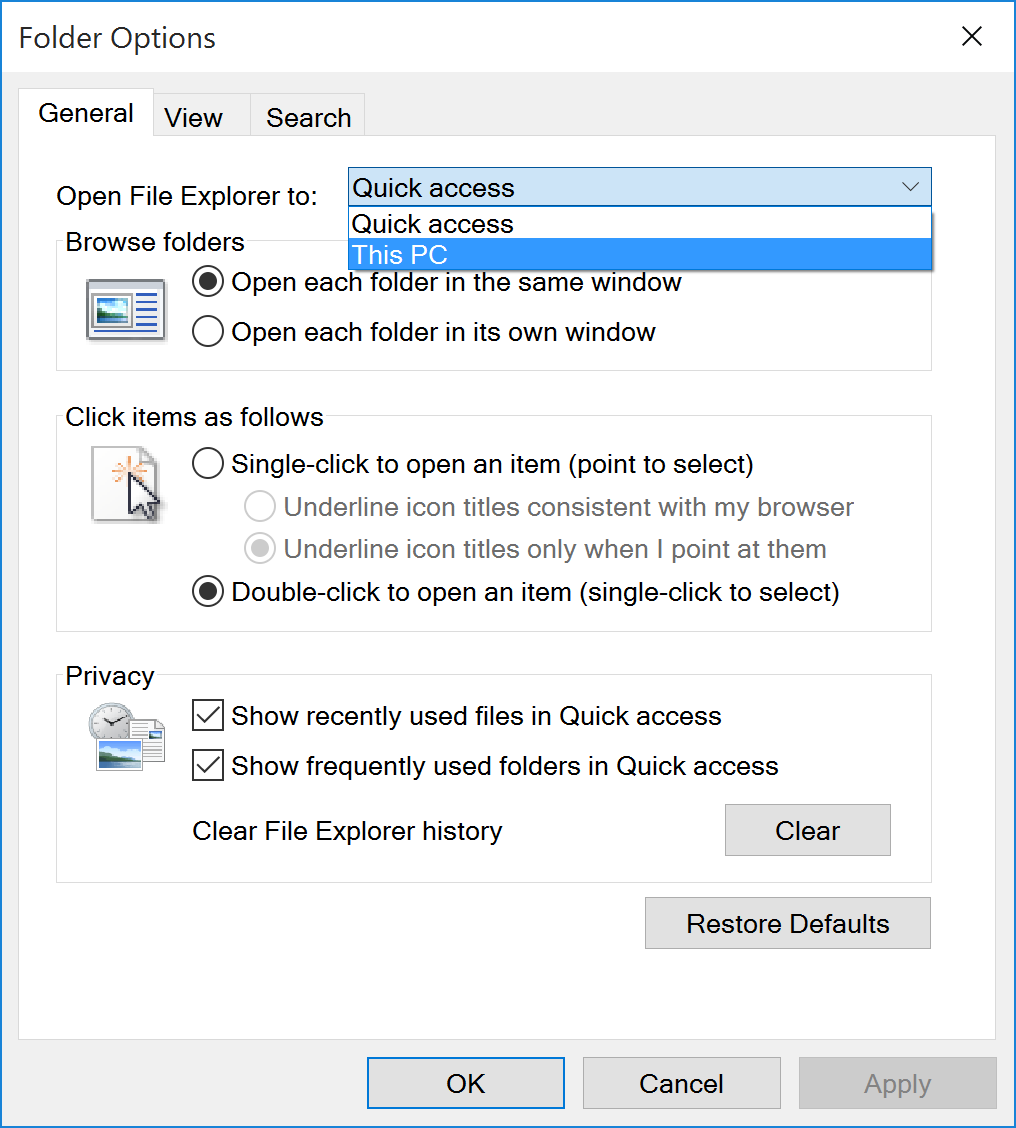
No problem. On the ribbon, open the View tab, click Options, Change folder and search options, and then choose one of these two options.
4. Use the expanded Send To menu

Yes, you can right-click a file or folder (or multiple items, for that matter) and use the Send To menu to do a few interesting things, like move or copy the selection to your Documents folder, create a compressed file (in .zip format), or send the selection as an email attachment. But the selection is pretty weak and, frankly, weird. Fax recipient? Really?
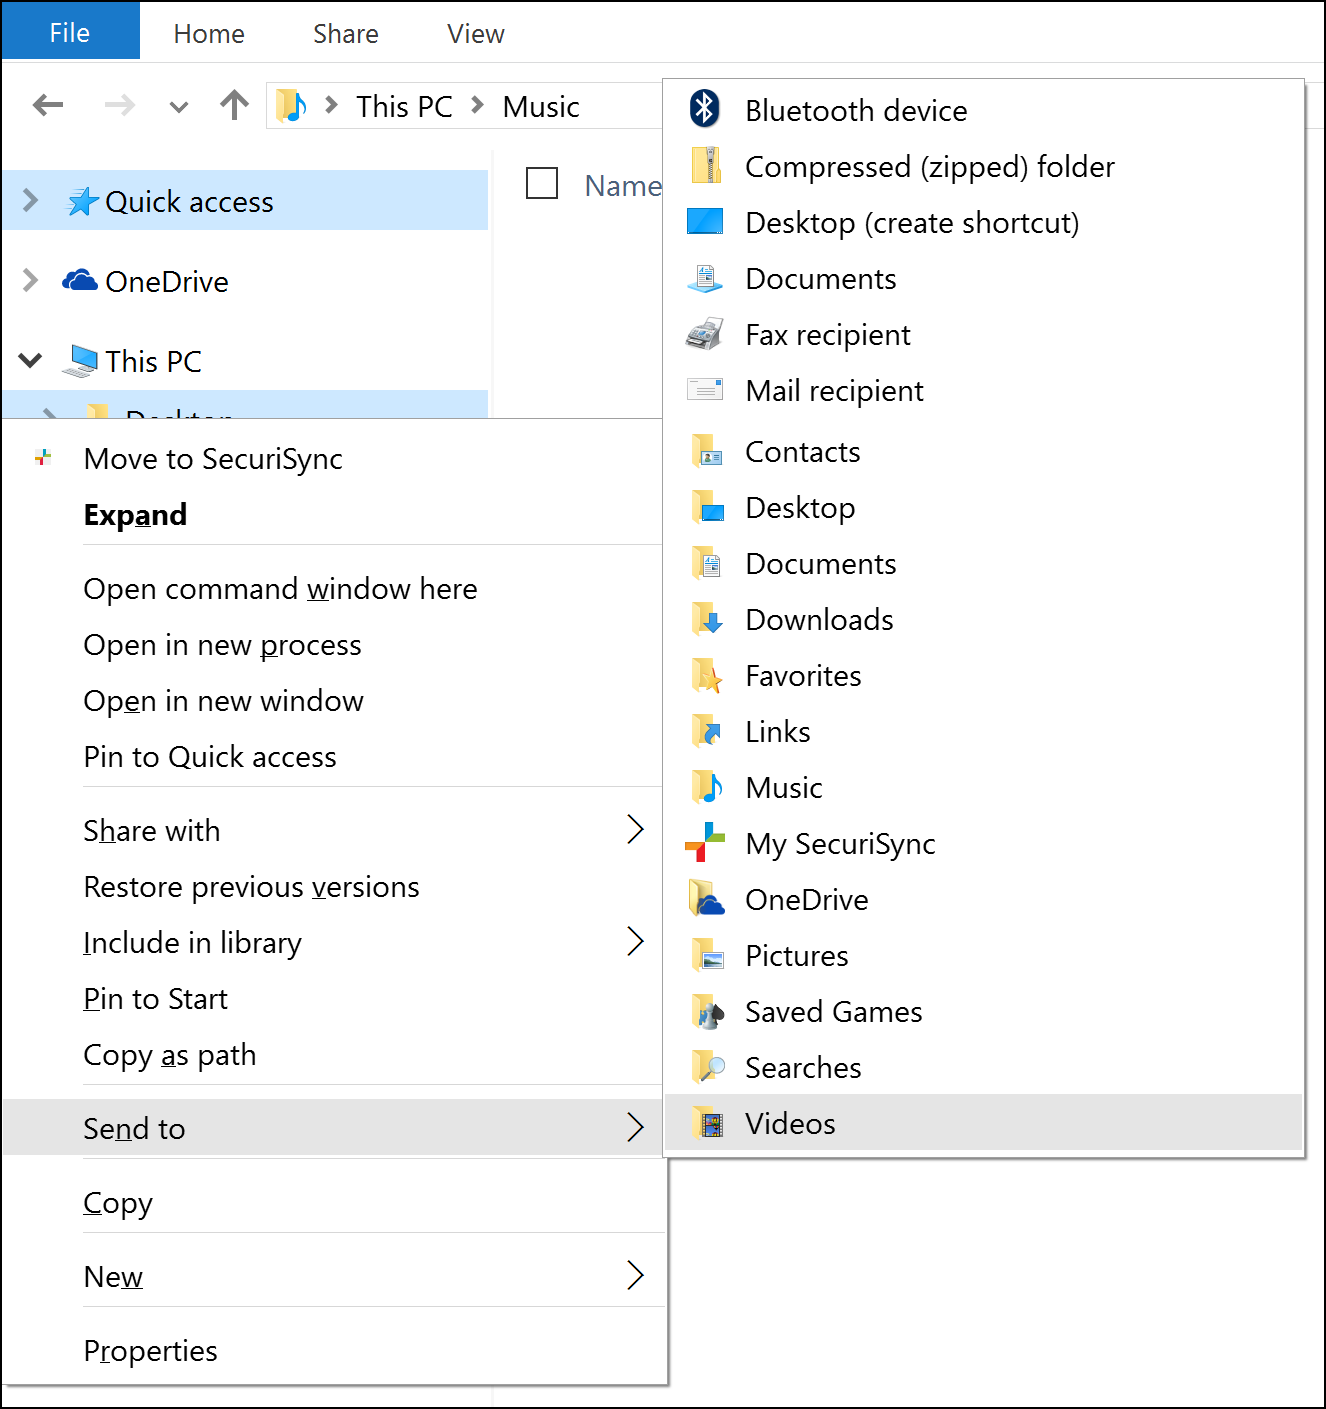
But the Send To menu gets much more interesting if you hold down the Shift key before you right-click. The menu you get after doing that is just filled with interesting stuff, including every folder in your user profile. Here, see for yourself.
5. Customize the Send To menu
Speaking of the Send To menu, you can make it much more useful by adding and removing the options on the default (short) menu. They're just shortcuts, but good luck finding them, because they're buried in a folder hidden deep within your user profile.
To get to that folder, open the Run box (Windows key+R), type shell:sendto, and then press Enter.
First order of business: delete the Fax Recipient shortcut. After that, you can add shortcuts to favorite folders (local and network). You can also add shortcuts to programs. Adding a shortcut to Notepad or another text editor makes it much easier to quickly edit any file, for example. Ditto for pictures and your favorite image editor.
6. Customize the Quick Access toolbar
If you've jumped straight from Windows 7 to Windows 10, the addition of an Office-style ribbon is probably the biggest change in File Explorer.
Its companion, the Quick Access Toolbar, is equally noteworthy and arguably more useful. It appears in the title bar, above the ribbon. Customize that toolbar with the commands you use most often and you can bypass the ribbon completely for many tasks.

Some obvious customization options are available on the menu that appears when you click the arrow to the right of the toolbar. Not so obvious and much more useful is the option to add any individual command from any tab on the ribbon. Just right-click the command and then click Add to Quick Access Toolbar.
But even most Windows experts don't know you can right-click an entire group of commands and add the group as a menu on the Quick Access Toolbar. Right-click the name under the group to see the option. I use this trick to add the Panes group from the View tab, so I can easily show or hide the Preview pane or Details pane on the right.
7. Master advanced search
See that search box in the upper right corner of the File Explorer window? Type a word or two in there and you can find any file in the current folder that contains your search term, either in the file name or (for file types that are fully indexed) in the body of the file.
But there's an entire advanced search syntax, complete with Boolean operators, parameters, and operators. My favorite is the datemodified: operator, which accepts actual dates but also understands relative dates, like today, this week, last week, this month, and last month.
If you want to see all the Excel spreadsheets you've worked on so far this month, for example, just enter this in the search box:
type:excel datemodified:this month
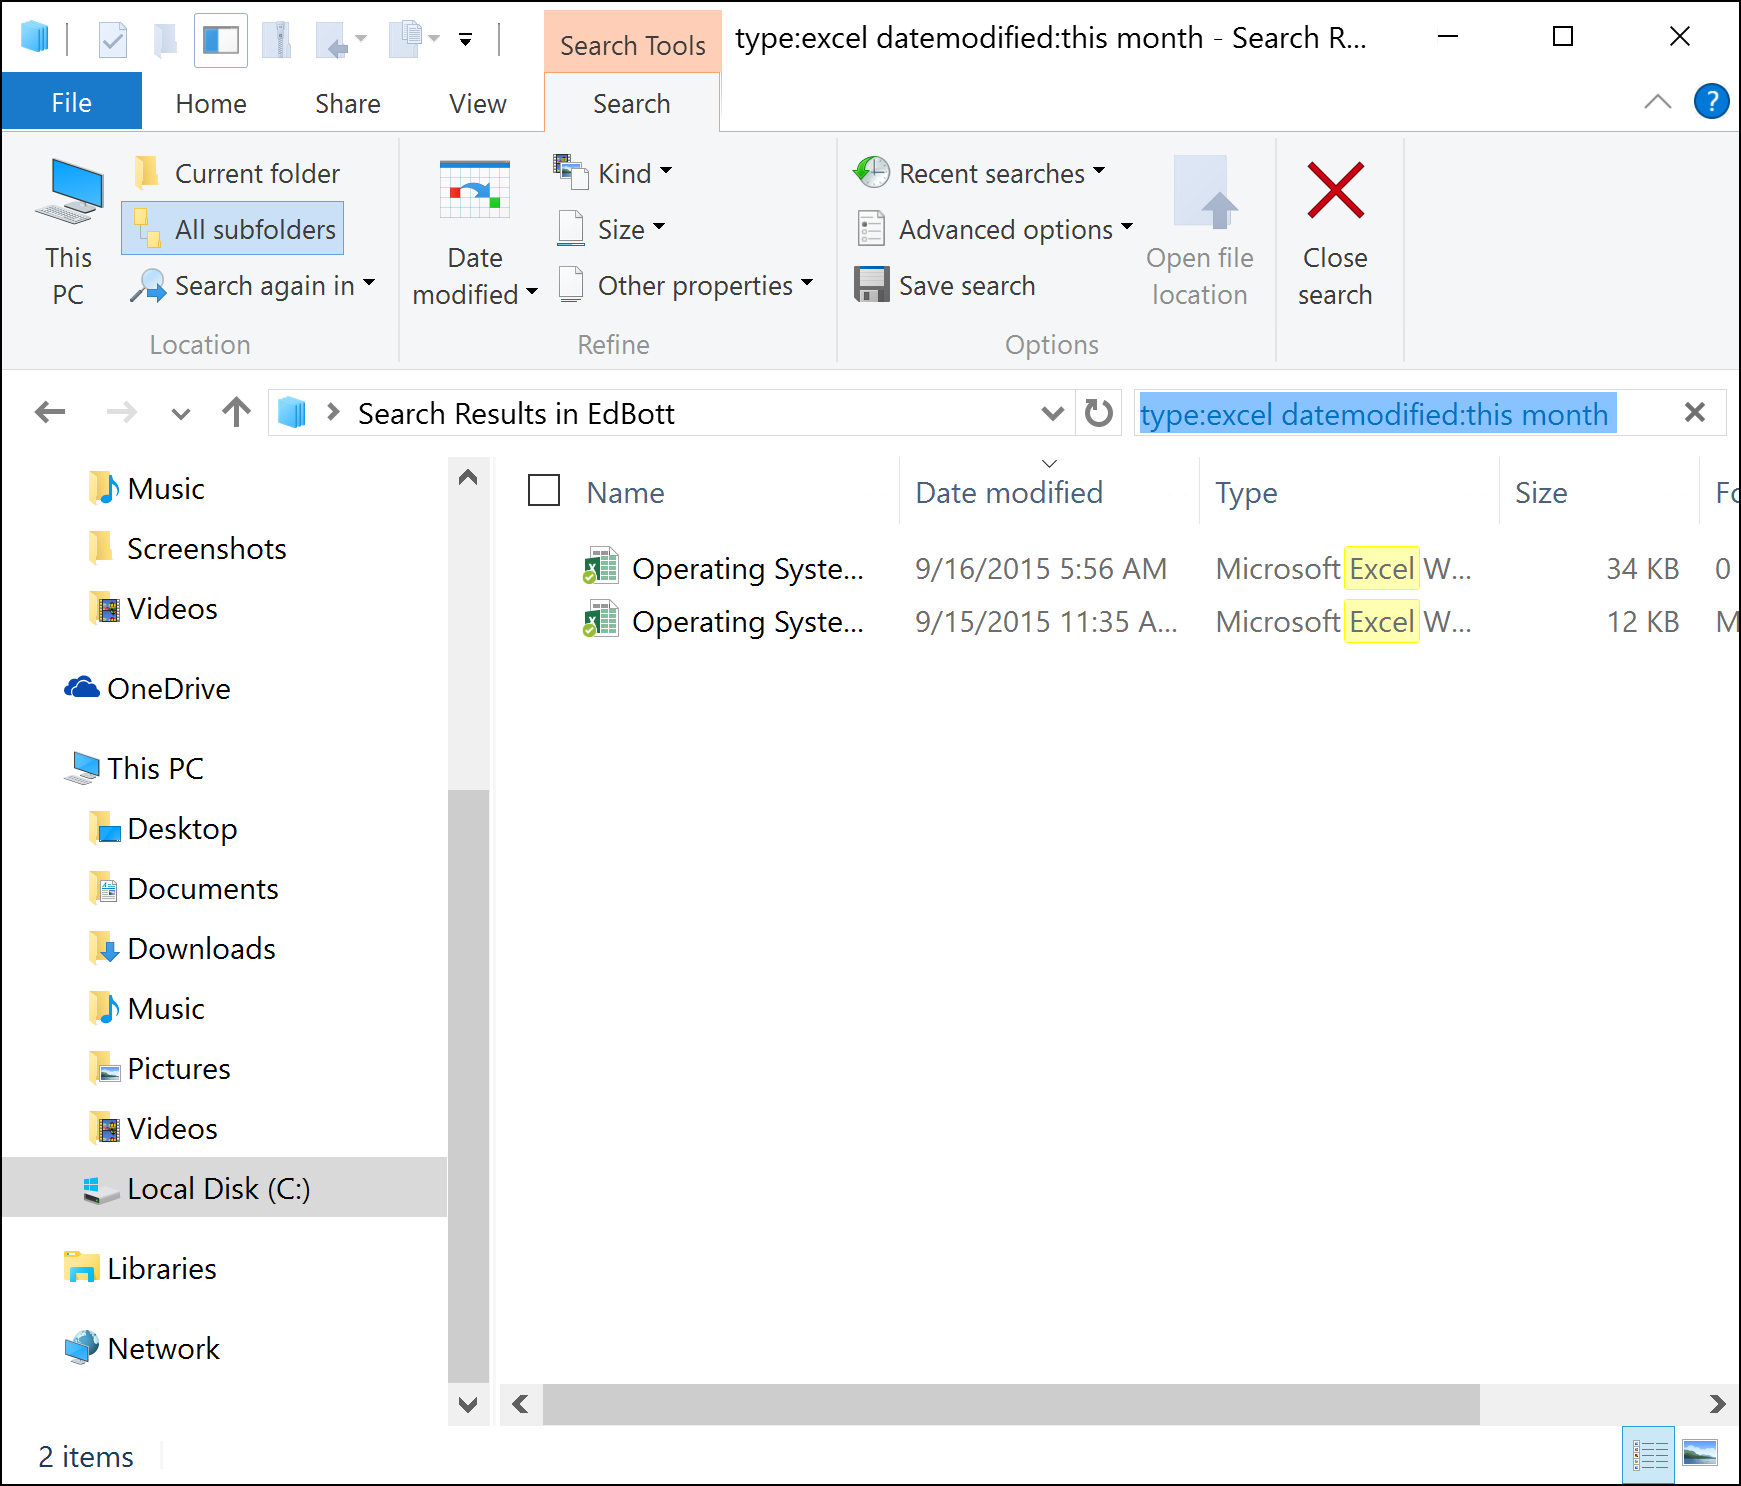
The search syntax assumes you want to find files that match both criteria, treating the query as if you had added the AND operator between the two terms.
8. Pin saved searches to Start
So maybe you didn't like that last tip, because the idea of typing commands in a box seems too retro. Fair enough.
But what if you could save those searches, so you could just click a shortcut to show only files that you worked with in the past week or two? You can, and the search results will always be relative to the current date.
Start in the folder or library you want to use as the search scope - that could be your synced OneDrive or Dropbox files, your local Documents folder, or a network store, for example.
Enter datemodified:(this week OR last week) in the search box. Be sure to include the parentheses and capitalize the Boolean OR.
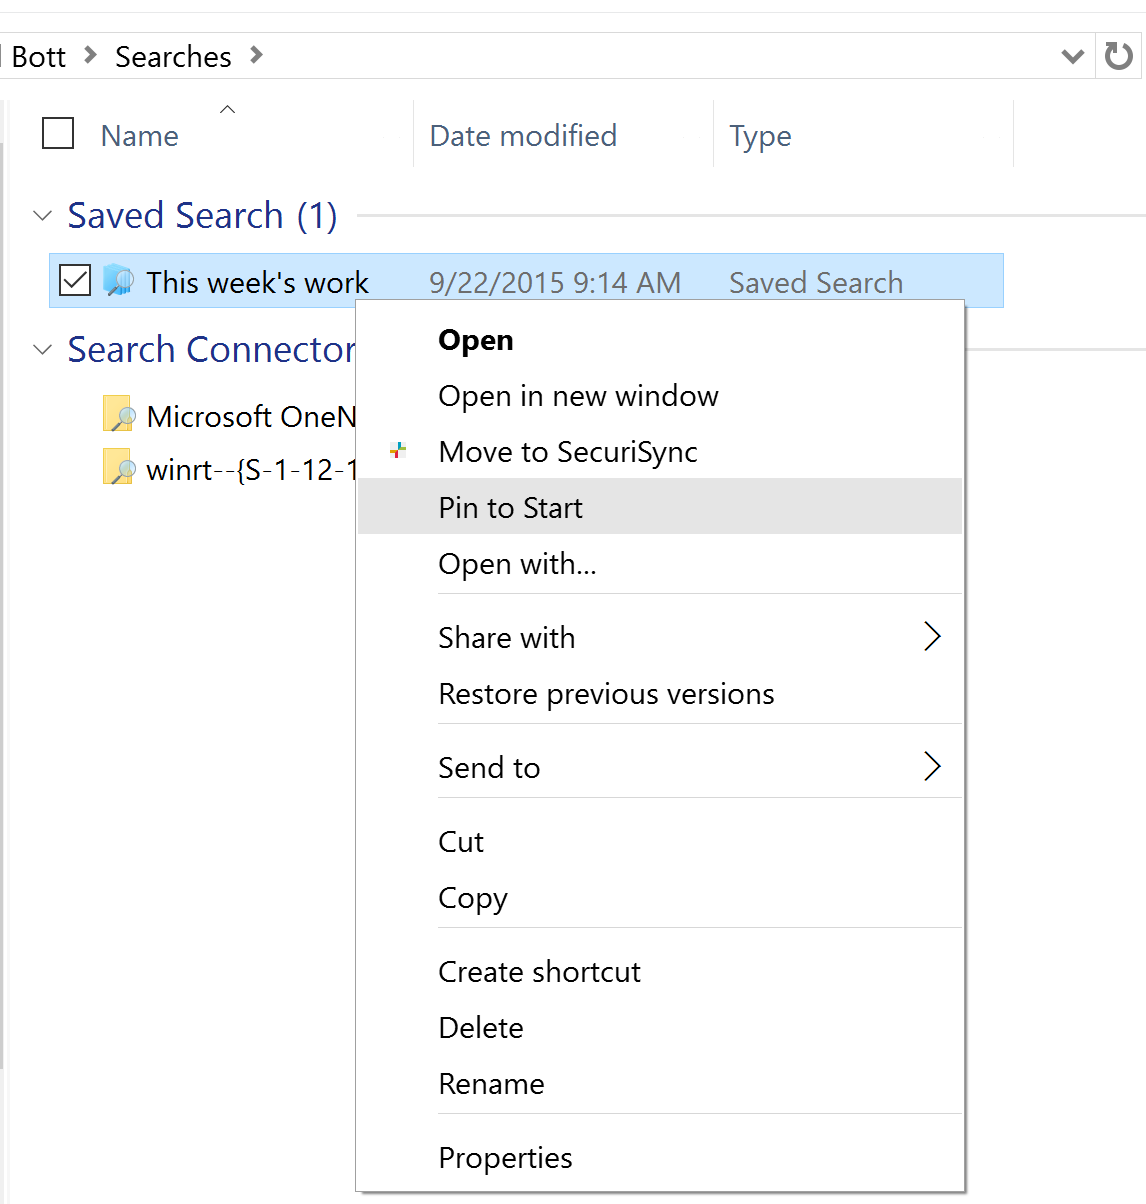
Because you've just run a search, File Explorer politely switches the ribbon to the Search tab, where you can click Save Search and give those parameters a name. The search gets saved, logically enough, in the Searches folder in your user profile. Right-click that saved search to pin it to the Start menu, or drag it onto the File Explorer icon on the taskbar to add it to the jump list.
9. Use filters to find files faster
Typing in the search box is one way to narrow a large group of files to a more manageable one, but it's not the only way. Filters are an even easier way to point and click your way to search success.
Start in the folder or library you want to search, and then use the button in the lower right corner of a File Explorer window to switch to Details view, which arranges your files into columns. Now look to the right of each heading, where you'll find a small arrow. Click that arrow to show a filter list for the data in that column. By clicking a check box or two (or three), you can cut a very large list of files down to size.
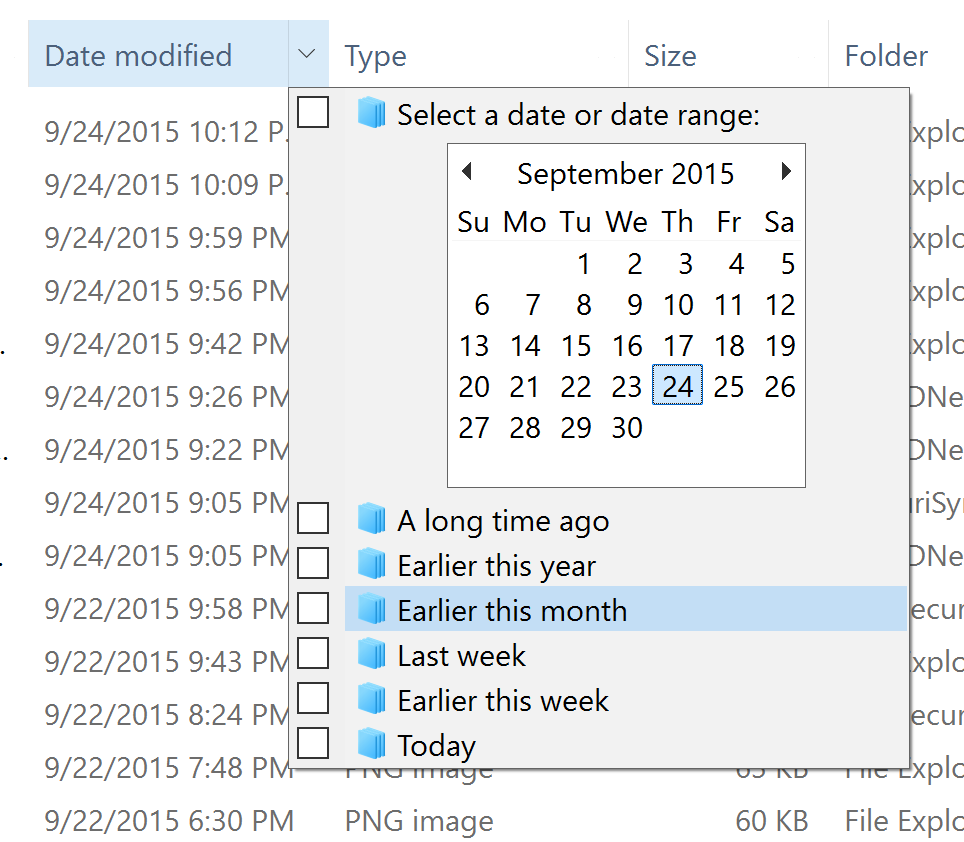
The date navigator is much more powerful than it looks at first glance. Use the calendar to zoom in or out and narrow or expand your view of the contents of a folder or a search. Initially, the calendar shows the current month, with today's date highlighted. Click the month heading to zoom out to a display showing the current year as a heading with the current month highlighted. You can then drag or hold down Ctrl and click to select multiple months.
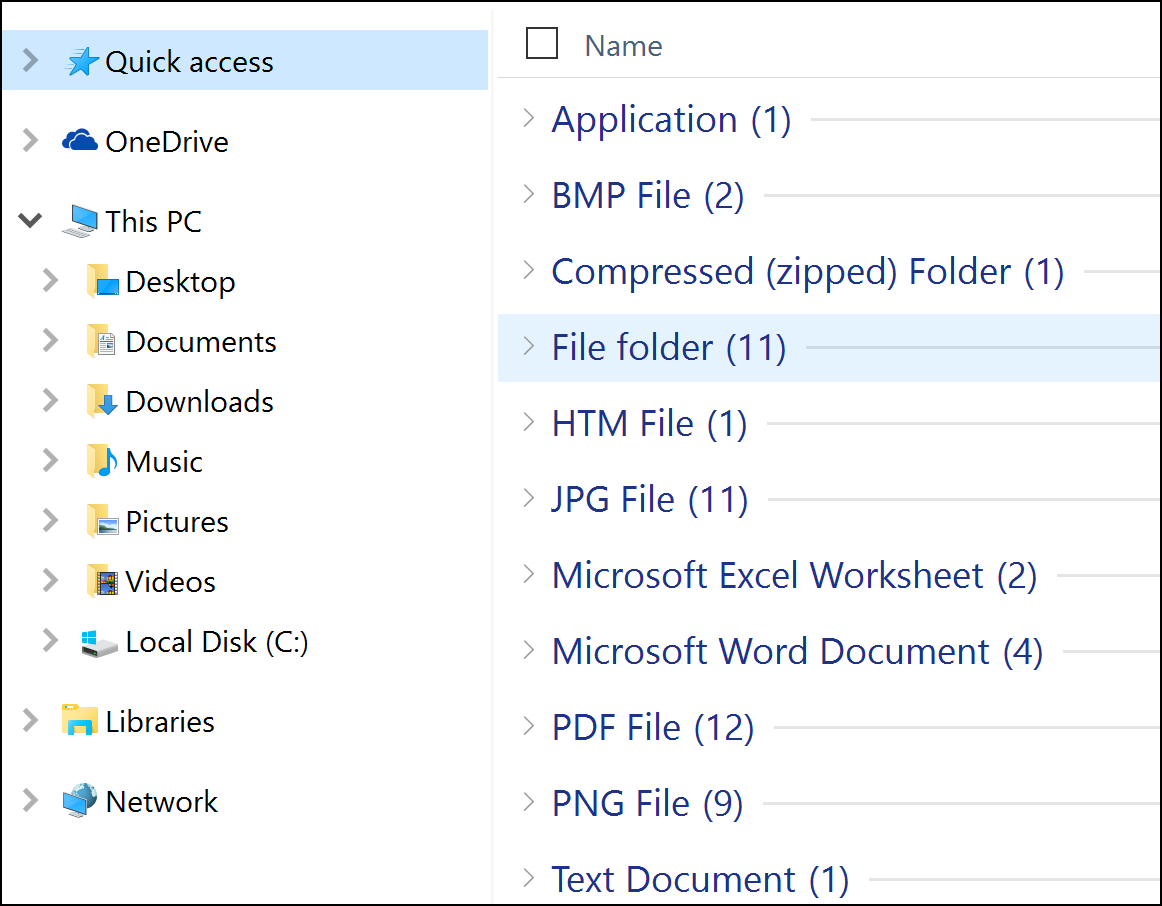
10. Group files
Everyone knows how to sort files--just click a column heading to sort by that value, and click again to reverse the sort order.
But you can also group files by date, size, or type, making it much easier to see similar files in a folder or a set of search results. The Group command is on the View tab of the ribbon. It's also available when you right-click in the File Explorer window.
Each group gets its own heading in File Explorer, with a count of how many items are in that group. You can right-click a heading to expand or collapse it. You can also collapse all groups to produce a neat breakdown of groups, with the number shown beside each one.