How to copy colors with the Color Picker tool in PowerToys

Whether you're a graphic designer, a web developer, or a programmer, sometimes you need to precisely duplicate a color you see on the screen to use in your work. And one tool up for the job is Color Picker, courtesy of Microsoft's free PowerToys.
Also: How to use the free PowerToys FancyZones in Windows (and why you should)
With Color Picker, you use an eyedropper to select a specific color on the screen. From there, the app identifies the color and translates it into different values, including RGB, HEX, and CMYK. The default value is copied to the Windows clipboard, where you can paste it into a graphic or web design program or insert it into your code.
I've turned to Color Picker when I need a specific color for editing images or tweaking code for a webpage, and it's proven to be a helpful, time-saving tool. Here's how it works.
Also: How to copy colors on macOS with System Color Picker
Enable Color Picker
- If you don't already have PowerToys, download and install the PowerToysSetup.exe file from the program's GitHub page.
- Open the PowerToys Settings window by double-clicking its System Tray icon.
- Select the entry for Color Picker and make sure its switch is turned on (Figure 1).
Figure 1
Tweak Color Picker
- Before you start using Color Picker, review its settings to see if there are any you want to tweak. By default, the shortcut to activate Color Picker is Windows key+Shift+C. If you prefer to use a different shortcut, click the pencil icon for Activation shortcut and try a different combination. But keep in mind that the shortcut must start with the Windows key, Ctrl, Alt, or Shift (Figure 2).
Figure 2
2. By default, pressing the activation shortcut opens Color Picker, lets you pick a color, and then takes you to the editor for further actions. By clicking the dropdown menu for Activation behavior, you can change the response to opening the editor directly or only picking a color. But the default behavior works best for most situations.
3. In the section for Picker behavior, you can choose the default format for the color you pick, meaning the value that's copied to the clipboard. When working with an application or web design code, HEX is typically the most commonly used format, so it's the default. But you can click the dropdown for Default color format to change it to a different format (Figure 3).
Figure 3
4. Beyond seeing the HEX value or other format, I always like to see the name of the color I pick. To enable this, turn on the switch for Show color name.
5. That takes us to the Editor section. Here is where you can specify which color formats should appear in the editor, so you have a choice of using other values beyond the default. At a minimum, I usually select HEX, RGB, and CMYK. But other formats are available for more specialized purposes. Turn on the switch for any format you want to see. Click the ellipsis icon next to a specific format you've chosen, and you can move it up or down in the list that appears in the editor (Figure 4).
Figure 4
Use Color Picker
Now it's time to take Color Picker for a test drive. Let's say you're creating code for an application or website, or you're trying to duplicate a color to use in a graphic program. You like a color you see somewhere on the screen.
- Press the shortcut for Color Picker. The picker part of the program appears (Figure 5).
Figure 5
2. Move your mouse cursor until it's precisely on the color you want to select. Sometimes nailing the exact color is tricky if the section with that color is very small or too close to surrounding colors. In that case, Color Picker will let you zoom in on the area to select the color more easily. Move your mouse's scroll wheel or use two-finger swiping on a trackpad to zoom in on the spot (Figure 6).
Figure 6
3. When ready, click your mouse to capture that color.
4. The value of the default format is copied to the clipboard, and the editor pops up, showing you the values in all the formats you enabled (Figure 7).
Figure 7
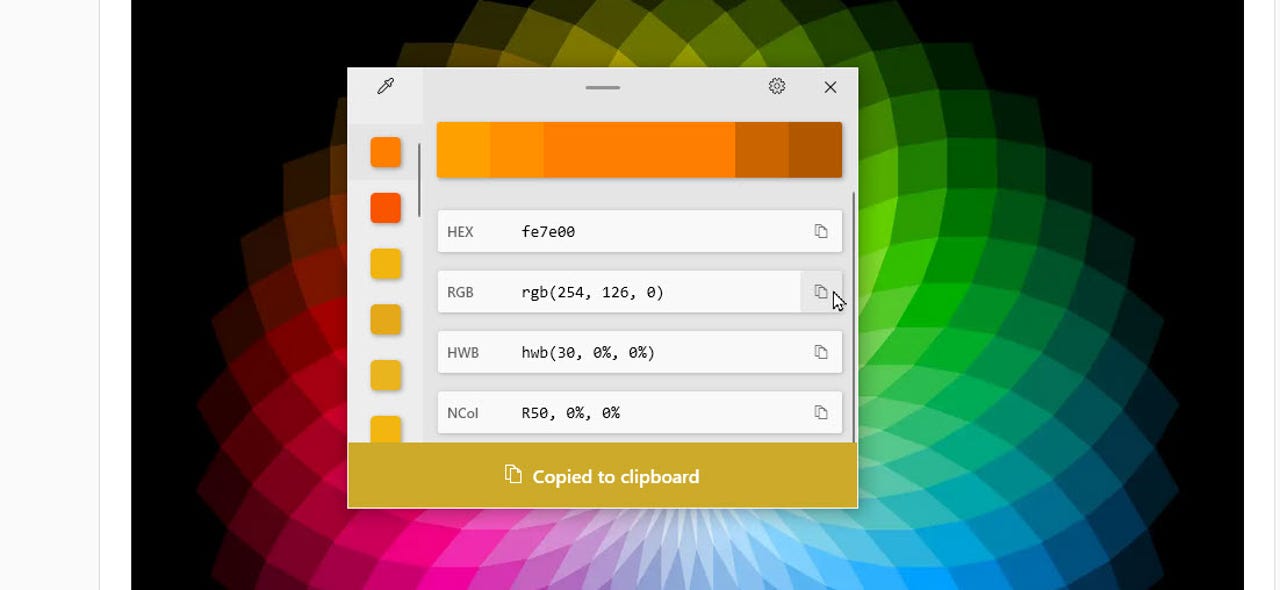
5. If you just need the value for the default format, simply paste it into your graphic or web code. If you want the value for a different format, click the Copy to clipboard button next to it and then paste that value where you need it (Figure 8).
Figure 8
6. What if you want to modify the color? The color you picked appears in the middle of the bar at the top. Click that section on the bar, and another editor pops up where you can manually refine the HSV (Hue, Saturation, Value) by dragging the three different sliders or the RGB or HEX values by changing the numbers (Figure 9).
Figure 9
7. What if you want a variation of the color you picked? Notice that the bar at the top displays the color you selected along with lighter and darker variations. Click one of the variations to select it and modify it or copy it to the clipboard (Figure 10).
Figure 10
8. Finally, as you pick additional colors, each one appears on the left side of the editor. Scroll down the list of previous colors if you wish to return to one that you selected in the past (Figure 11).
Figure 11