Six steps to hosting heaven for web designers

Like many web designers, I host my own websites. After recently breaking everything and having to do a complete reinstall of the web server, I thought I'd share my point-by-point pain/experience to help lighten the load for fellow folk who aren't au fait with the murky world of web-server administration.
Take heart, there are only six steps to easy hosting heaven.
YMMV, terms & conditions apply
1. Register your domain names
Choose a domain registrar that you can trust and who offers good support. As a rule, I always keep my domain registration and my web hosting separate, so that if need be, I can easily up sticks and move web hosts.
There are millions of domain registrars. Personally, I use Domain Monster and have done for years. They may have an ugly orange furball as a mascot but their customer support is excellent.
Domain registrars Domain Monster, complete with orange furball
Then you'll need to change the name servers to that of your web host, so that you're pointing the domain name at your web host's web servers.
Change Name Servers to point the name at the host
Any changes to DNS can take up to 24 hours, although I normally find it works within the hour.
2. Host your websites
The difficult part. For a while I was searching for a hosting company that doesn't also host porn. I tried GreenGeeks but had some real communication problems while upgrading. Now, I have settled for Memset, a UK company that has won the PC Pro Awards Best Web Host quite a lot.
If you have low-volume websites and no special requirements, then shared hosting would be the way to go. As I was using WordPress Multisite, I had to go the Virtual Private Server route.
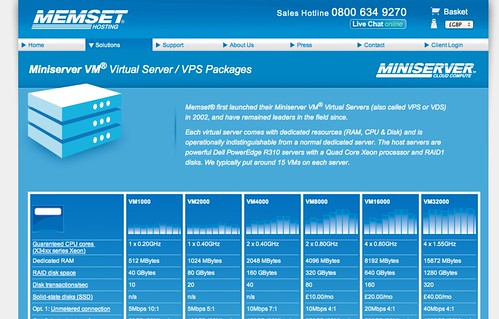
Memset hosting's Miniserver VPS offerings
Unless you are an experienced sysadmin, you will need to choose a control panel for managing your websites. The American megacorp hosting company Dreamhost has its own custom-built control panel, which is pretty good. For the rest of us, the industry standard seems to be cPanel.
To get an idea of cost, Memset's VPS VM2000 with cPanel costs about £300 ($465) per year.
3. Use Gmail and configure DNS
Back in the day, I used to manage everyone's email. Now, I just set them up with the free version of Google Apps, which includes Gmail. Much easier to manage, and I recommend setting up IMAP, so that your clients' email is synced wherever they are.
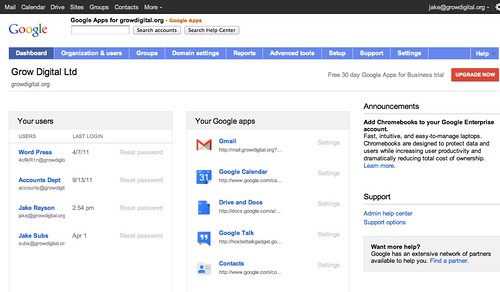
Google Apps a-go-go
Configure DNS records
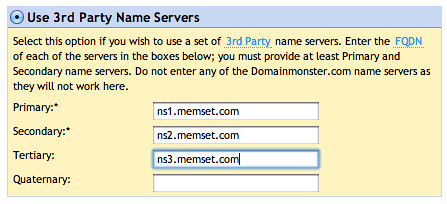
If you are using Google Apps and Gmail, then you'll have to set up the Domain Name Server records, so that email is routed correctly through to Google's mail servers. This is a case of adding these MX records via your webhost's DNS control panel. Here's my version:
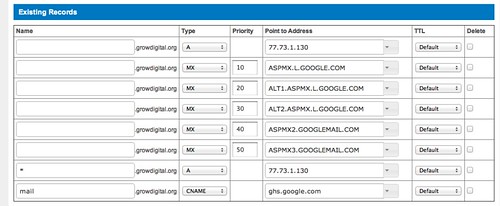
My very own DNS settings
And then, the important bit: you'll have to add your domain to the DNS. Elsewhere, I'd done this using WHM but Memset have their own DNS management system, which looks a little bit like this:
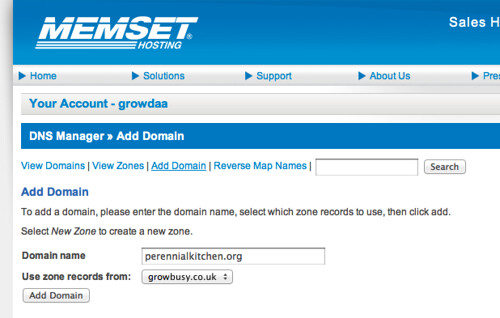
Adding the domain to the DNS
4. Setup WHM accounts
If you are using cPanel, then more than likely that you'll be using WHM, the WebHost Manager side of cPanel. You can sell accounts with full cPanel access to your clients, or you can manage every client yourself, which is what I do.
If you're managing every client yourself, it's still necessary to create a cPanel account. I would recommend creating at least a couple, one for business and one for all your charity cases.
Create a package
As I'm only using WHM accounts to keep my business and charity domains separate, I give myself God Powers to make me one with everything:
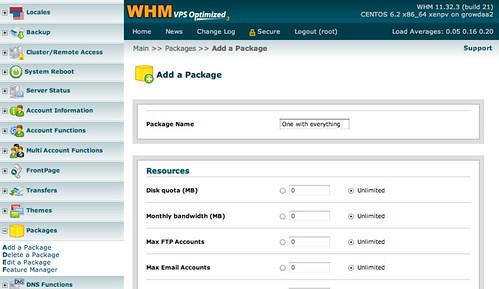
Add a God Powers One With Everything package in WHM
Add accounts
I have registered .co.uk domains to handle the cPanel accounts, as they're cheap. In the following example, I have used growbusy.co.uk for the business account and growpersonal.co.uk for the charity account.
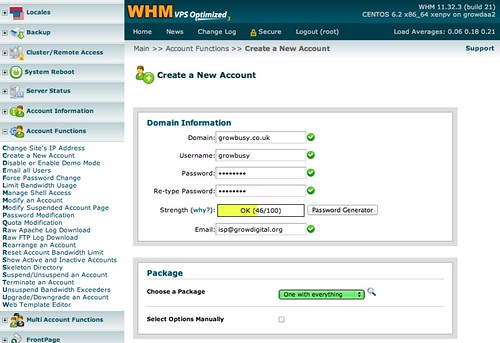
Add WHM accounts, one for business, one for charidy
5. Access cPanel account
To access my business cPanel account, I use https://growbusy.co.uk:2083. The https bit is important, otherwise the URL will forward to your hosting account URL, and you'll only be able to log in to one account at a time.
Create a MySQL database user
Time was when most websites were made out of plain old HTML, maybe with a couple of photos thrown in for good measure. But nowadays, clients are asking for WordPress, Drupal or Concrete5, and all manner of other new-fangled database-driven Content Management Systems.
So you need to add MySQL user, yet again with full God Powers, which you do via Databases > MySQL®databases
And now, you are all set for the fun bit: adding a client's website.
6. Add a client’s website
- Change Name Servers: remember to log in to your domain registrar and change to your webhost's Name Servers, as outlined above.
- Add subdomain: From the cPanel homepage, select
Domains > Addon Domains, and enter your client's domain name, a suitably snappy username and instantly forgettable, high-security password. Like thus:
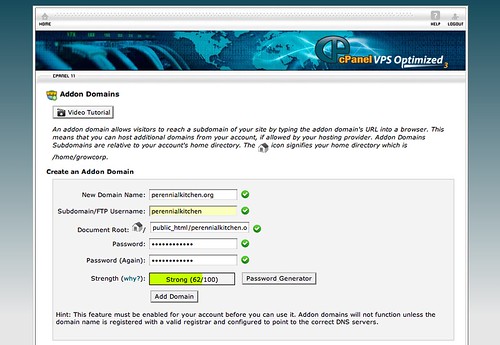
Adding an Addon Domain
Your username becomes your SFTP username, in this caseperennialkitchen@growbusy.co.uk. You can check the login details for your FTP accounts underFiles > FTP Accounts. - Create database: Nice and easy, simply go
Databases > MySQL®databases > Create New DatabaseAll databases have the prefixacctname_, so if creating a database for WordPress, I'll addwpandclientname, ending up withacctname_wp_clientfor the full database name. You can access your databases by using the web-based tool PHPMyAdmin, which you access viaDatabases > PHPMyAdmin. - Add user to database: Add the God Powered User that you created earlier to the database, by
Databases > MySQL®databases > Add User To Database. - Access files with SFTP: If you're new to the world of Content Management Systems, I'd recommend giving WordPress a spin, as it's a doddle to set up.
And that's all there is to it. Happy hosting.