Six tips for flash photography


1. Avoid glass: Don't put your subjects in front of glass like windows and mirrors. The reflection will show the flash and create ugly and unnecessary noise in your photo. Small objects like figurines should be alright, but no guarantees. Subtle and soft colors often work best in the background.
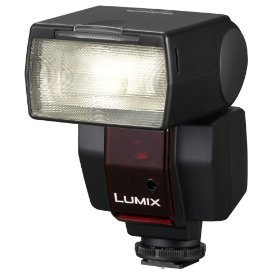
2. External flashes: Almost every quality point-and-shoot model and DSLR come with a built-in flash. (Camera phones are not included in this statement.) If you have a DSLR and are serious about involving flash in your photos, you might want to spring for an external flash. While I think its benefits are debatable versus the price (being that quality flashes are around $200-400 and that I'm a bit anti-flash), there are some to be sure. Often times it makes skin look more natural, it doesn't cause red-eye as often as a built-in flash and you have the power to direct your flash up/down, left/right, etc.
3. Notice Flash "Fall-Off": Flash only brightens up so much space in your photo, depending on how much light is already in the room and the distance you are from your subjects. If you plan on taking a lot of photos with flash, it would be best to find your flash "fall-off" points early. These are the spots where your flash is weakest. You can test your camera's flash by pointing it a white-painted wall (or as close to white as possible) and notice how far the flash radiates from the center of the frame.4. Use other lights: If you want to offset the intensity of your flash and you have access to other sources of light in your setting (floor lamps, flashlights, etc.), set them up where you see fit so you can bump up the shutter speed time to at least 1/60. This will (possibly) prevent camera shake and won't require you to have a tripod either.
5. Hide some light: If your picture is coming out too bright, such as giving your subjects washed-out faces, take a small piece of paper and try to cover part of the flash and/or lens. This takes a bit of just playing around with what works in your setting and your particular camera. But covering up a bit can tone down the brightness and also give your photo a nice glow.
6. Practice: It might sound obvious, unnecessary, whatever. But amazing pictures with flash takes a lot of work, and the best way to master the technique is to practice shooting with flash as often as possible. Try varying situations involving different lighting levels and subjects. Also try shooting the same picture twice: once with flash and once without to discover what you need to work on.
Do you have any extra tips for flash photography?