Safeguard your Office 2007 files with encryption, document protection, and digital signatures

In today's business environment, we expect more from office productivity software than just the ability to send and receive e-mail, format documents, produce spreadsheets, and create slide presentations. We also want a way to protect those files from unauthorized access, infiltration of malicious code, and even misuse by those with whom we share them.
Many security mechanisms to help protect our files are in play on modern networks. But even with network-level protections and the security mechanisms built into modern operating systems, it never hurts to have extra protections built into the applications, as well. Microsoft Office 2007 has a number of data protection features that help to protect the confidentiality and integrity of files created with Microsoft Word, Excel, PowerPoint, and Outlook. We'll look at three of these features here.
To encrypt a file with password protection in Word, Excel, or PowerPoint, start by clicking the Microsoft Office button at the top-left corner of the Office program window. Select Prepare and then Encrypt Document, as shown here.
Enter a strong password (at least eight characters, containing upper- and lowercase alpha characters, numbers, and symbols) into the Password field. Retype the same password when prompted to do so.
You can save the file in either the Office 2007 format (.docx, .xlsx, or .pptx) or in the Office 97-2003 format (.doc, .xls, or .ppt). If you attempt to save in the older format, you'll see this dialog box advising you that the XML formats provide stronger encryption and asking if you want to convert to the XML-based format to increase the security of the document.
Now when you or anyone else tries to open the document, this dialog box will open, prompting for the password.
To set a password to modify, you use the Tools in the Save As dialog box (this is also another way to set a password to open). Just click the Office Logo button and select Save As. Then, in the Save As dialog box, enter a name for the file, click the down arrow beside Tools, and select General Options.
In the General Options dialog box, you can type a password to open and/or a password to modify. Note that the file-sharing password does not encrypt the document and is not a security measure. The General Options dialog box also allows you to open the Macro Settings section of the Trust Center.
Sometimes, you want to distribute a document to others but don't want them to make changes to the formatting -- or want to limit them to only certain types of editing (such as inserting comments. Clicking Protect Document selection on the Review tab of the Office ribbon) opens a task pane where you can select and apply formatting and editing settings.
You can also choose whether to allow AutoFormat to override the formatting restrictions, to block theme or scheme switching, and/or to block Quick Style Set switching. (By default, none of these options is enabled.)
Once you've set the restrictions and exceptions you want, click the Yes, Start Enforcing Protection button. Then, in the Start Enforcing Protection dialog box, shown here, choose the option to protect with a password only (no encryption) or with user authentication (document is encrypted and Restricted Access is enabled).
In Outlook, you can digitally sign individual messages or you can configure Outlook to digitally sign all outgoing messages. To sign a message individually, create the message and then, on the Message tab, click beside Options to open the Message Options dialog box.
Click the Security Settings button and then check the Add Digital Signature To This Message check box.
If you don't already have a digital certificate associated with the e-mail address from which you're sending the message, you'll see an Invalid Certificate warning, which tells you how to get a digital ID to use with the account.
To add a transparent signature, click the Microsoft Office button at the top-left corner of the application window and select Prepare, then Add A Digital Signature.
If you haven't yet saved the document, you'll be notified that you must save it before you can sign it, and the Save As dialog box will appear to allow you to do so. Then, the Sign dialog box appears, showing the name that will be used to sign the document and providing a space where you can enter a reason for signing the document. You can leave the Purpose field blank if you wish.
You can also add digital signature lines to a document, so that signers can add their own digital signatures. To do so, click the Insert tab on the Office ribbon, click the Signature Line button, and then select Microsoft Office Signature Line to open this dialog box. Here, you insert the signer's name, title, and e-mail address, as well as any special instructions to the signer(s).
Here's how the signature line will look when it's inserted into the document.
When you double-click the signature line, this dialog box will appear. You can sign by typing your name into the signature field, handwriting your name with a pen (in a Tablet PC), or inserting a graphic file containing an image of your handwritten signature.
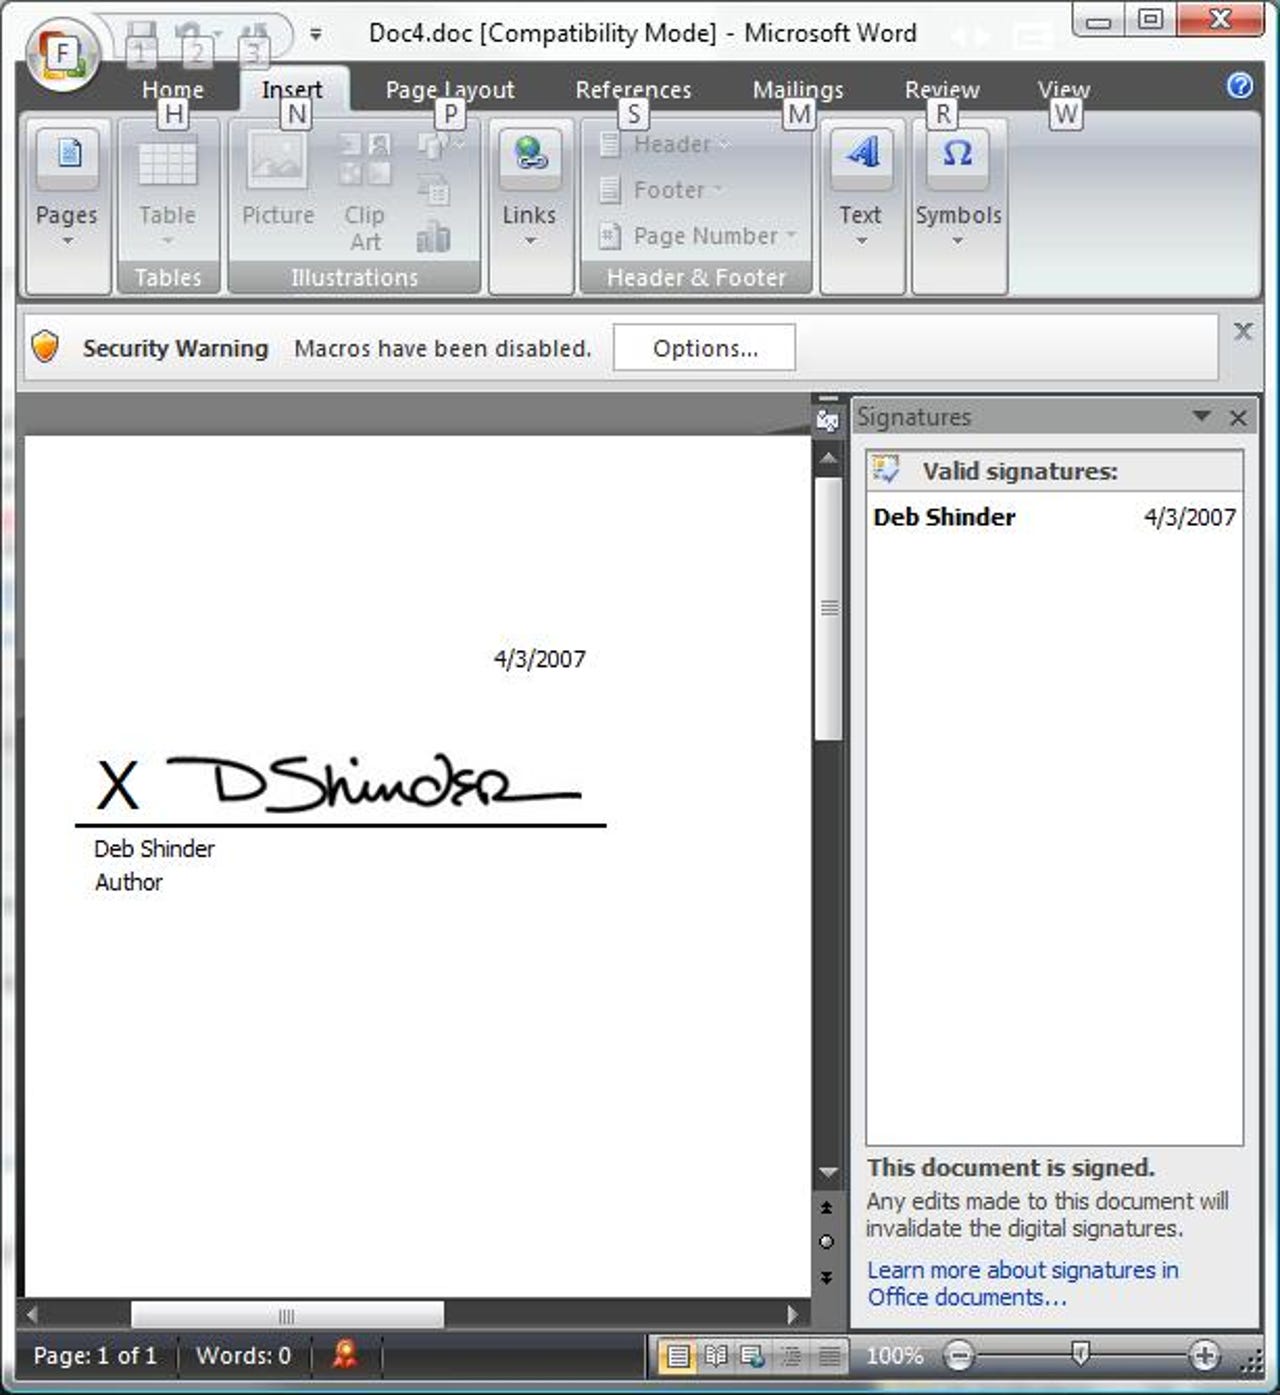
After the document is signed, a dialog box notifies you that the signature has been saved with the document and the date is inserted (if you checked that option) above the typed or handwritten signature in the document.
The Signatures task pane will appear when the document is opened in Office 2007, notifying you that the document is signed. Any changes will invalidate the signature.