DIY: Build a hackable, weight-tracking scale with a sense of humor using Raspberry Pi

Are you tired of staring at that stupid, soulless, bearer of bad news bathroom scale every morning? Good news: The gurus at Initial State, the data analytics for the Internet of Things company, came up with a hackable, weight-tracking, text messaging bathroom scale that comes with a built-in sense of humor.
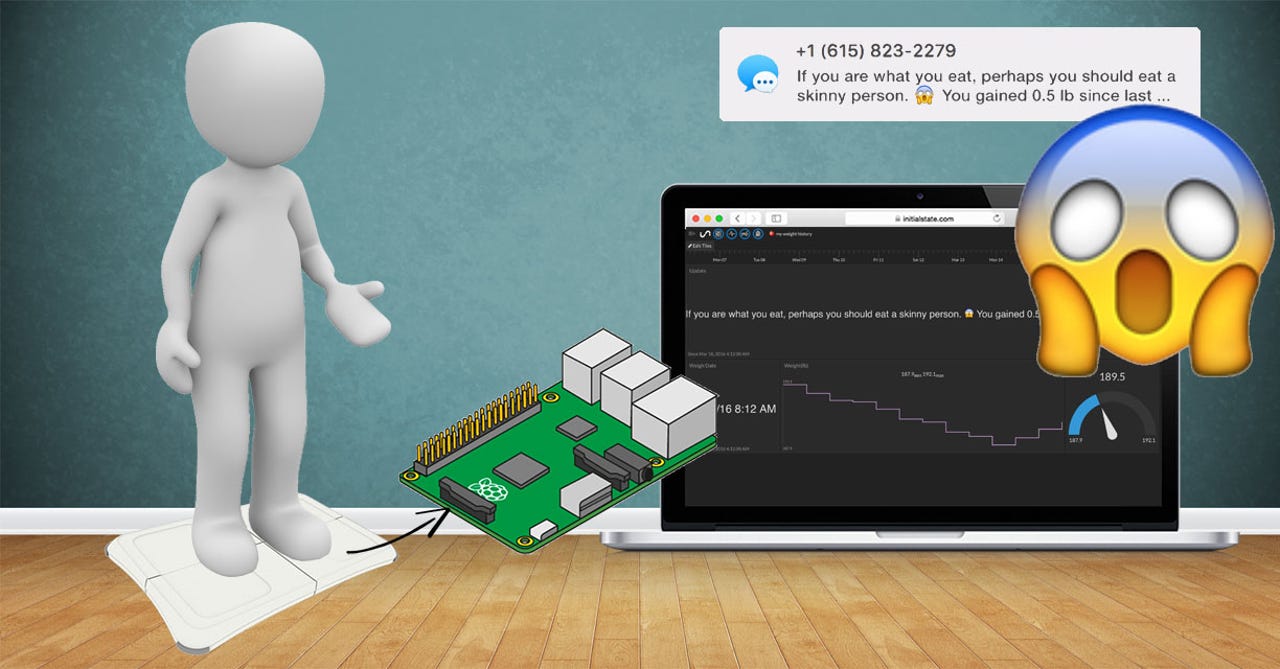
This is a fun, easy project that combines a Wii balance board, a Raspberry Pi, and an online data analytics platform to create a web-connected scale controlled by a Python script you can hack.
Project level: Beginner Approximate time to complete: 20 minutes
Part I: Equipment
In this step-by-step tutorial, you will:
- connect a Wii balance board to a Raspberry Pi through bluetooth
- run a Python script that measures your weight when you step on the balance board
- use a Raspberry Pi to stream your weight to Initial State's cloud service
- setup a SMS notification every time you weigh yourself
- build a weight-tracking dashboard you can access in your web browser
Here is a list of all the equipment that we will be using in this tutorial with links to where you can purchase each item.
- Raspberry Pi 3* with a SD card and Power Supply
- Wii Balance Board
- Wii Fit Rechargeable Battery Pack
- "="">
- Pencil (I'm not giving you a link to where to buy a pencil ... consider that your homework)
*If you have a Raspberry Pi 1 or 2, you will need a bluetooth adapter (example: http://www.amazon.com/gp/product/B00JN5Y5E0).
Part II: A Wii balance board scale
Why a Wii Balance Board? It turns out that it is a really nice, durable scale that has bluetooth connectivity. This will allow us to connect it to a single-board computer (Raspberry Pi) to read your weight in a Python script and send those measurements to an online data service to do cool stuff. Plus, there is a good chance that you or someone you know already has one that is simply collecting dust.
We will need to make a couple of simple modifications to our Wii Balance Board to really make this project practical and convenient.
Bluetooth setup:
The Raspberry Pi 3 comes with bluetooth built on-board, all we need to communicate with the Wii Balance Board. If you have a Raspberry Pi 1 or 2, we will have to use one of our USB ports to plug in an adapter such as this inexpensive iAnder USB Bluetooth 4.0 Low Energy Adapter.
Power on your Pi (I am assuming you have already installed Raspbian and it boots up) and go to your Raspberry Pi terminal window. You can see the address of your bluetooth dongle with the
"hcitool dev" command: $ hcitool dev
Devices:
hci0 00:1A:7D:DA:71:13
Install the bluetooth modules that we will be using in our Python scripts:
$ sudo apt-get install python-bluetooth
Reading the scale:
It is time to connect our Wii Balance Board to our Raspberry Pi. We will do this by modifying a version of Stavros Korokithakis' Gr8W8Upd8M8.py script. The python script we will be using for this step is located here. You can copy the contents of this file to a file you create on your Raspberry Pi or you can clone all of the python files we will be using for this entire project. Let's do the latter. Type the following commands into a terminal on your Raspberry Pi:
$ cd ~
$ git clone https://github.com/InitialState/smart-scale.git
cloning into 'smart-scale'...
remote: Counting objects: 14, done.
remote: Compressing objects: 100% (12/12), done.
remote: Total 14 (delta 1), reused 8 (delta 0), pack-reused 0
Unpacking objects: 100% (14/14), done.
Checking connectivity... done.
You should see two python files in the new smart-scale directory - smartscale.py and wiiboard_test.py.
$ cd smart-scale
$ ls
README.md smartscale.py wiiboard_test.py
Run the wiiboard_test.py script to test communication and take weight readings from the Wii Balance Board:
$ sudo python wiiboard_test.py
You will see the following response:
Discovering board...
Press the red sync button on the board now
Remove the battery cover underneath the Board to locate the red sync button. Make sure you press the button within a few seconds of running the script or a timeout will occur. Once successful, you will see something similar to the following:
Found Wiiboard at address 00:23:CC:2E:E1:44
Trying to connect...
Connected to Wiiboard at address 00:23:CC:2E:E1:44
Wiiboard connected
ACK to data write received
84.9185297 lbs
84.8826412 lbs
84.9275927 lbs
The wiiboard_test.py script is taking the number of weight measurements specified on line 10 and outputting the average:
# --------- User Settings ---------
WEIGHT_SAMPLES = 500 #
---------------------------------
You can play with this number by changing the value and re-running the script to see the variation in weight measured and time required for each measurement. Weigh yourself, weigh your dog, weigh whatever and see if the measurements make sense. To stop the script, press CTRL+C.
Hardware tweaks
Nintendo assumed you would always power your Wii Balance Board with four AA batteries and included no AC power adapter. Having only battery power would be inconvenient because we cannot permanently pair our Wii Board to our Pi through bluetooth. We need to sync it, then allow it to remain sync'd w/o draining the batteries so we can simply step on the scale and weigh. Luckily, there are several third-party adapters made for the Wii Balance Board that we can use to provide constant power from a wall outlet. The Wii Fit Rechargeable Battery Pack is a perfect solution to our power problem. Replace the batteries with this battery pack, and plug the ac adapter into a wall outlet.
Having to pair the Wii Balance Board and Raspberry Pi every time we run our Python script presents another inconvenience due to the location of the sync button. The sync button is at the bottom of the Wii Board, which means we would have to flip it over every time we sync. We can fix this by making a hacky little lever using a pencil and three 3/8" felt pads as shown above. The rechargeable battery pack exposes the sync button to the underneath surface of the Board. Tape a pencil (or something similar) that spans from the sync button to the outside front of the Board. Stack three 3/8" felt pads (or something similar) on the center (ish) of the pencil to create a stationary pivot. Be careful to not expose too much of the pencil out from the Board as you don't want someone to accidentally kick it out. Flip the Board over and you can press the sync button by simply pressing down on the lever. Hacky but effective.
Depending on how you store your Wii Board, you may want to remove the rubber grip pads from the feet of the Board (the pads are simply stickers you can pry off). 3/8" felt pads can be placed on the Board's feet for easy sliding.
Part 3: Initial State
We want to stream our weight/data to a cloud service and have that service turn our data into a nice dashboard that we can access from our laptop or mobile device. Our data needs a destination. We will use Initial State as that destination.
Step 1: Register for Initial State Account
Go to https://app.initialstate.com/#/register/ and create a new account.
Step 2: Install the ISStreamer
Install the Initial State Python module onto your Pi:
At a command prompt (don't forget to SSH into your Pi first), run the following command:
$ cd /home/pi/
$ \curl -sSL https://get.initialstate.com/python -o - | sudo bash
Security Note: The above command has some important anatomy that the user should be aware of. 1) There is a preceding \ before curl. This is important to ensure no alias of curl gets run if one was created. This helps mitigate risk of the command doing more than intended. 2) The command is a piped command, so when running, you are piping the output of a script that is being retrieved from https://get.initialstate.com/python into the command sudo bash. This is done to simplify installation, however, it should be noted that https is important here for helping ensure no man-in-the-middle manipulation of the install script, especially since the script is being run with elevated privileges. This is a common way to simplify install and setup, but if you are a little more weary there are some slightly less convenient alternatives: you can break the command out into two steps and investigate the bash script being downloaded from the curl command yourself to insure it's fidelity OR you can follow the pip instructions, you just wont get an automatically generated example script.
Make some Automagic
Where do you want to save the example? [default: ./is_example.py]:
You can either type a custom local path or hit enter to accept the default.
Access Keys
Let's take a look at the example script that was created.
$ nano is_example.py
Run the Example
$ python is_example.py Step
Profit
You will want to step through the Waves tutorial to familiarize yourself with how to use this data visualization tool. Next, view the data in Tiles to see this same data in dashboard form.
You are now ready to start streaming real data from your scale.
Part 3: The final script
Assuming you ran the "git clone https://github.com/InitialState/smart-scale.git " command in Part 2, the final script that puts everything together is called smartscale.py in your ~/smart-scale directory. (https://github.com/InitialState/smart-scale/blob/master/smartscale.py)
A few settings need to be set in the script before you can run it. Open up smartscale.py in your favorite text editor such as nano.
$ cd ~
$ cd smart-scale
$ nano smartscale.py
Near the top of this file, there is a User Settings section.
# --------- User Settings ---------
BUCKET_NAME = ":apple: My Weight History"
BUCKET_KEY = "weight11"
ACCESS_KEY = "PLACE YOUR INITIAL STATE ACCESS KEY HERE"
METRIC_UNITS = False
WEIGHT_SAMPLES = 500
THROWAWAY_SAMPLES = 100
WEIGHT_HISTORY = 7
# ---------------------------------
- BUCKET_NAME sets the name of the Initial State data bucket that your weight/data will be streamed into. This can be set here and changed later in the UI.
- BUCKET_KEY is the unique bucket identifier that specifies where your data will stream into. If you want to create a different bucket/dashboard, use a different identifier here (*note, if you archive a bucket, you cannot reuse its key in a new bucket).
- ACCESS_KEY is your Initial State account key. If you do not put your ACCESS_KEY in this field, your data will not show up in your account.
- METRIC_UNITS allows you to specify your weight in kg if set to True or lb if set to False.
- WEIGHT_SAMPLES specifies how many measurements are taken and averaged together to get your actual weight. 500 measurements takes about 4-5 seconds and provides fairly accurate results.
- THROWAWAY_SAMPLES specifies the number of samples that are thrown away when you first step on the board. This prevents the initial steps and shifting from throwing off the final measurement. This should always be much less than WEIGHT_SAMPLES.
- WEIGHT_HISTORY sets the number of measurements taken before an extra update is sent. Only measurements taken two hours or more apart count toward the history.
Once you have specified each parameter in this section and saved your changes, you are ready to run the final script. Before we run the script, let's go through what it is going to do.
- At the start of the script, you will be asked to pair your Wii Balance Board with your Raspberry Pi. Use the lever that you hacked together in section Hardware Tweaks to press the sync button when prompted.
- Once the script is running, step on the Wii Board to begin measuring your weight. After a 4-5 seconds, your weight will be automatically sent to your Initial State account.
- After we setup SMS notifications (in a couple of steps), you will receive a text message soon after your measurement.
Run the script to start the magic.
$ sudo python smartscale.py
Dashboard
Go to your Initial State account and click on the new data bucket with the name corresponding to the BUCKET_NAME parameter (i.e. My Weight History). Click on Tiles to view your weight history dashboard. You should see three tiles the first time you view your data in Tiles - Update, Weight Date, and Weight(lb). You can customize your dashboard by resizing and moving tiles as well as changing view types and even adding tiles. This dashboard gives you the ability to see your weight history at-a-glance. It is mobile friendly and you can even share it with other people.
SMS
Let's create a SMS alert whenever the scale takes a weight measurement.
We are going to follow the Trigger notification setup process outlined at http://support.initialstate.com/knowledgebase/articles/834354-triggers-adding-a-trigger.
- Make sure your beer data bucket is loaded.
- Click on the bucket's settings in the data shelf (under its name).
- Click on the Triggers tab.
- Select the data stream to trigger on (you can use the drop-down list to select from existing streams once a data bucket has loaded or you can type in the stream name/key manually; *note Safari does not support HTML5 dropdown lists). In my example screenshot above, I selected "Update".
- Select the conditional operator, in this case 'match'.
- Select the Trigger value that will trigger an action (manually type in the desired value). Type in lb if you are not using metric units or type in kg if you are using metric units. Whenever the stream, Update, contains "lb" (or "kg"), you will get a text message notification.
- Click the '+' button to add the Trigger condition.
- Select the action (select notify by SMS).
- Click the '+' button to add the action.
- Input any verification code if adding a new phone number to complete setup.
Your trigger is now live and will fire when the condition is met. Click done to return to the main screen.
Once setup is complete, you will get a SMS every time you weigh yourself that contains your weight, how much you weight changed since the last measurement, and a random joke / insult / compliment.
Conclusions
Possibilities for you to build on this project:
- You can stream data from other sources into the same weight history dashboard (info) to create your own personal health dashboard.
- You can change the jokes in the messageWeighFirst, messageWeighLess, messageWeighMore, and messageWeighSame functions to whatever wacky brand of humor you have.
- You can change the jokes into practical messages or even remove them and use the scale code to track the weight of something important besides your own body weight.
- You can create your own smart beer/wine fridge using the same approach. There is already an awesome tutorial made for that here.
Hack away!