How to use Microsoft Launcher to access Microsoft apps and services on your Android phone

Those of you who own an Android phone and use a Microsoft account or a business account to run Microsoft apps and services can bring the two worlds together with a custom launcher. Designed for Android, the Microsoft Launcher lets you tweak the design and layout of your phone's home screens to quickly access your Microsoft apps, documents, calendar, contacts, sticky notes, and more.
Beyond setting up Microsoft-related wallpaper, themes, and widgets, you can create specific gestures to tap and swipe your way to your favorite Microsoft content. Here's how it works.
First, grab your Android phone and download the Microsoft Launcher app from Google Play. Open the app and tap the Get Started button.
Also: How to link and sync your Android phone with Windows 11
The first screen asks if you want Microsoft Launcher to access this device's location, a useful option if you wish to get the weather or find nearby businesses and other local information. If so, choose Precise or Approximate and select While using the app or Only this time. If not, select Don't allow. The app then asks for permission to access your photos and media (Figure 1).
Next, pick your phone's wallpaper, opting to choose daily wallpaper from Bing if you wish. You're then prompted to sign in with your Microsoft account or your business account. To get the full experience, set Microsoft Launcher as the default look (Figure 2)
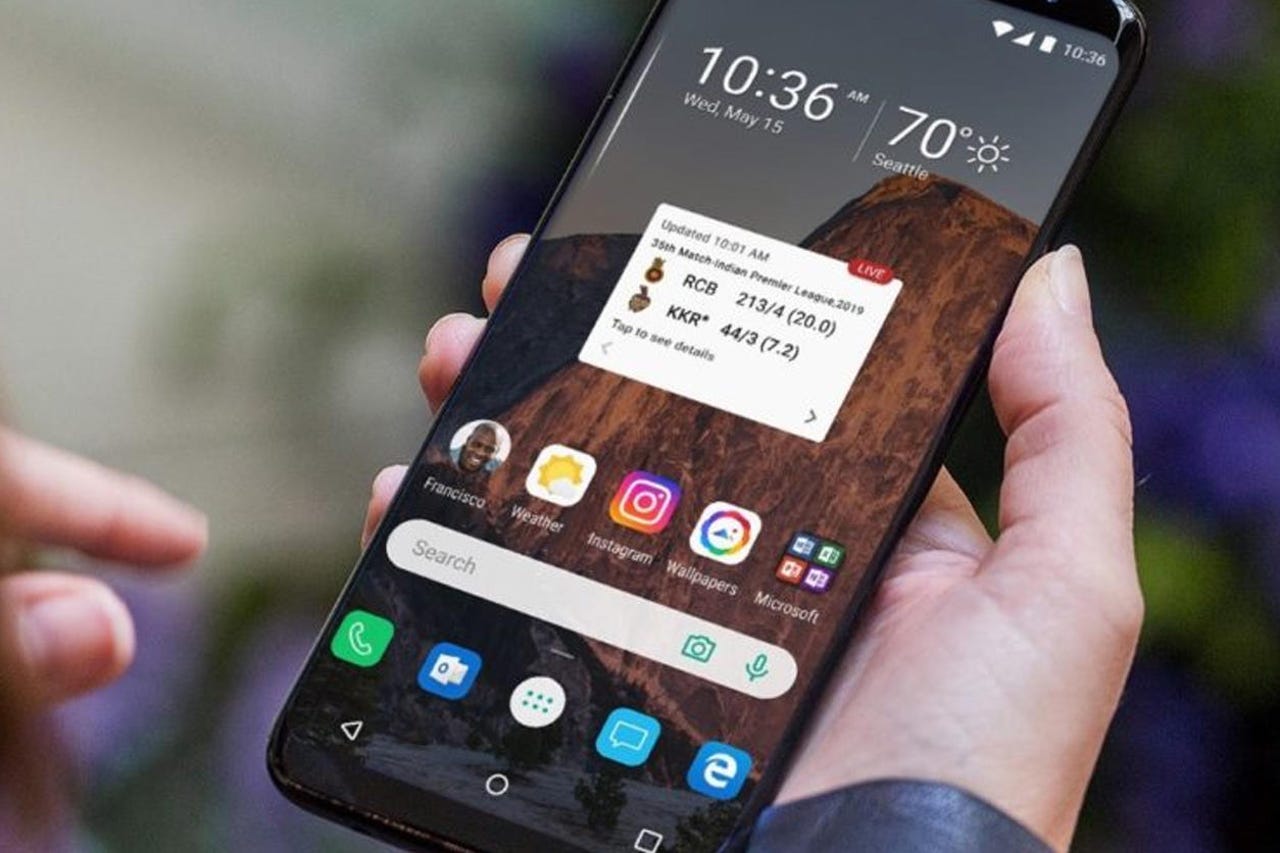
You can now explore your phone via your new Microsoft Launcher integration. To see your feed with Microsoft-specific widgets, swipe to the right. By default, the widgets screen can show you your calendar appointments, to do list, sticky notes, apps, documents, screen time, and recent activities.
Tap the Sign in button at the top to sign in with your Microsoft account or your work/school account. If you have both types of accounts, you can sign in with each one separately. Any associated content from your Microsoft account or work/school account or from Windows will now be synced with your phone (Figure 3).
Swipe down the feed to see the individual cards and widgets. Your calendar will show any upcoming appointments, your to-do list will display upcoming tasks, and the Sticky Notes card will display any sticky notes you've created in Windows. Frequently used apps and recent documents also appear as do screen time settings, recent activities, and Microsoft rewards. Tap a specific app, document, or another item to open it (Figure 4).
Next, you can customize your feed. Swipe down to the bottom of the screen and tap the button for Edit this view. Uncheck any widgets you don't wish to see. Tap the Add widget button and then add any that you do want to see in your feed (Figure 5).
Beyond adding widgets to the feed, you can add them anywhere else on the Home screen. Swipe to the left. Long press on any empty area and then tap the icon for Add widgets. Set up and position the new widget on any available spot (Figure 6).
As your next step, you'll likely want to install any Microsoft apps that you plan to use on your phone. On your home screen, tap the Microsoft folder to open it, and then tap any apps that you want to install. Tap an installed app to use it, sign in with the associated account, and then select any document or other file you wish to view or edit (Figure 7).
Change your wallpaper if you want something different. Long press on any empty area of the home screen and select the icon for Change wallpaper. Select a new image and then decide if you want it to appear on your Home screen, Lock screen, or both (Figure 8).
With your feed, widgets, and apps all set up, now it's time to customize other features and aspects of the Microsoft Launcher.
Tap the Launcher app on the Home screen or long press on any empty area and select the icon for Launcher Settings. At the settings screen, the category for System Settings brings you to the Android settings for your phone. The category for Wallpaper lets you change the wallpaper.
Tap the category for Themes to change the theme between dark and light, adjust the opacity, enable a blur effect, and use an accent color. Select the category for Home screen and you can tweak the size and layout of the Home screen icons as well as the appearance of folders (Figure 9).
Back at the settings screen, choose the category for Dock to determine if and how you wish to display the Dock at the bottom of the screen. Next, select the App drawer category to tweak the options for the App drawer that appears when you swipe up on the screen (Figure 10).
Return to the settings screen and select the Gestures category. Here, you can create your own customized gestures to set what happens when you tap the home button, swipe up or down with one finger or two fingers, double tap, pinch in, or pinch out. The Feed category lets you determine what items appear on your feed. The Search category allows you to control the search options (Figure 11).
To back up your Microsoft Launcher customizations, select the Back up and restore category. You can then restore your tweaks from the backup. Finally, the category for Advanced settings lets you reset Launcher back to the default settings or even switch to a different Android launcher (Figure 12).