Windows 10 installer files too big for USB flash drive? Here's the fix

Microsoft has made Windows 10 version 2004 available to the developer community, a couple weeks ahead of its release to the general public. Like many IT pros with a Visual Studio (formerly MSDN) subscription, I downloaded the ISO file yesterday and set about to copy it to a bootable USB flash drive.
Normally, that's a simple process: First, use the Recovery Media Creator to create a bootable USB flash drive; then double-click the Windows 10 v2004 ISO file in File Explorer to mount it as a virtual drive and drag the contents of the mounted drive to the bootable USB flash drive.
That option works fine when you download the Windows 10 installer files using the official Windows 10 Download page, because those files are packaged specifically for use on USB flash drives. But that page only includes the latest official release. If you're downloading an advance release, as I was, or if you need the previous release, you'll run into an old, familiar, and extremely annoying problem. Instead of completing a simple drag-and-drop copy operation as expected, File Explorer puts up this File Too Large error message:
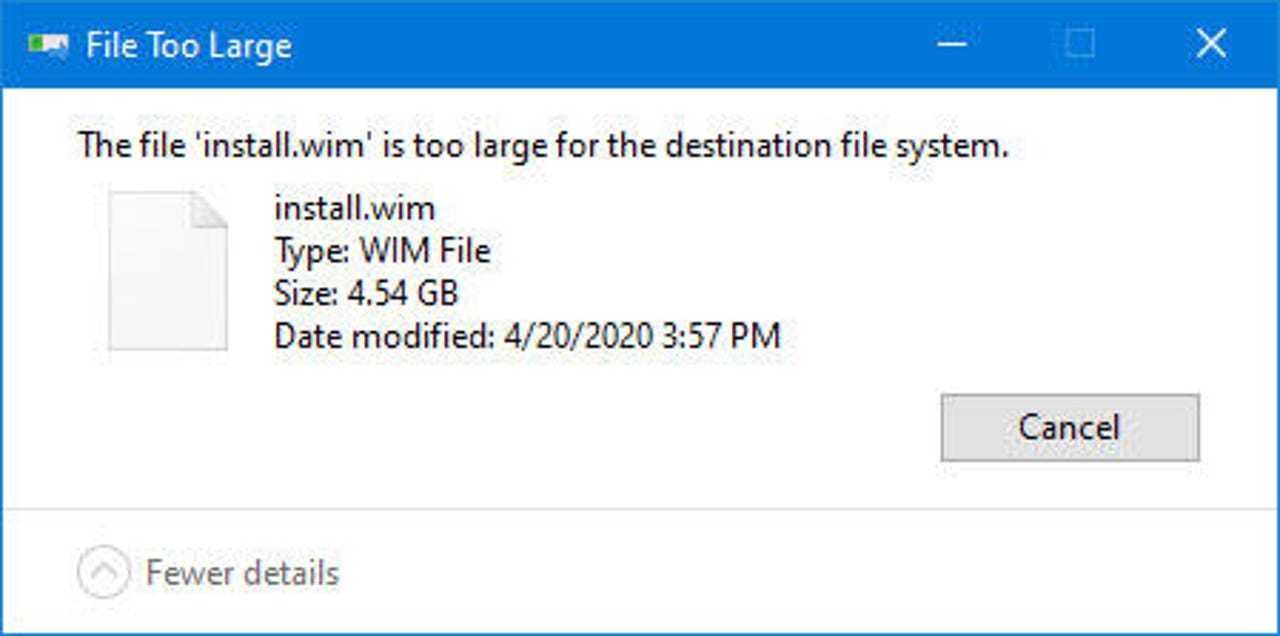
Files larger than 4 GB won't fit on a drive that's formatted with FAT32
The reason for the error is simple: The Windows Imaging format (WIM) file in that download, which contains the compressed files that the Windows Setup program uses for installing the new version, is a little over 4.5 GB in size, which is well beyond the 4 GB maximum file size for a USB flash drive formatted using the FAT32 file system. That extra-large file would be fine for a drive formatted using NTFS, but modern UEFI-based hardware requires a FAT32 drive to boot for a clean install of Windows.
What's an IT pro to do?
Well, you could just mount the ISO as a virtual drive and run Setup from within Windows. Or you could attach the ISO file as a virtual DVD drive in a virtual machine. Or you could use various deployment tools to manage the installation over a network.
But if you require the option to run Setup from a bootable drive so you can do a completely clean install, you'll need to jump through the following command-line hoops to split the WIM file into pieces that are under the 4 GB FAT32 size limit. Here's how.
Step 1: Create a bootable recovery drive. On a PC that's already running Windows 10, create a bootable flash drive using the Windows Recovery Media Creator (RecoveryDrive.exe). You'll need a drive that's at least 8 GB in size. Don't select the option to back up system files to the recovery drive, and note that all files on the drive will be erased when it's formatted.
Use a USB flash drive that's at least 8 GB in size, and make sure to leave this check box unselected
Step 2: Mount the ISO file and copy it to a local drive. Open File Explorer and double-click the downloaded ISO file to mount it as a virtual drive. Leave that File Explorer window open and press Ctrl+N to open a new window. In the new window, create a folder on a local hard disk and copy the contents of the mounted drive from the other window to that folder.
Step 3: Use the DISM command to split the WIM file into multiple pieces. Open a Command Prompt window as an Administrator and type the following command, substituting the name of the folder that you created in Step 2.
Dism /Split-Image /ImageFile:C:\folder_name\sources\install.wim /SWMFile:C:\folder_name\sources\install.swm /FileSize:3800
After the operation completes, check the contents of the Sources folder. You should see two new files, Install.swm and Install2.swm, alongside the original Install.wim. You can now safely delete the Install.wim file from the folder you created.
After splitting the Windows Imaging file into chunks that are less than 4 GB in size, you can safely delete that Install.wim file
Step 4: Copy the installation files from your local folder to the bootable USB drive. Make sure you copy all the folders, as shown here. If you're asked whether you want to replace files on the destination drive, say yes.
Drag all these files to the bootable flash drive; choose the option to replace files if prompted
This time, you shouldn't receive that pesky File Too Large error. Windows Setup recognizes the two split files with the .SWM file name extensions and uses them to create the new installation.