How do you make an app?

Thinking about making an app, but not sure where to start? Perhaps you know a coding language like Java and have some ideas you'd like to try out, but feel a little intimidated by phrases like "market research" and "minimum viable product."
We can help.
The important thing to remember is that app development is a process. The creative spark inspiring you is important, and the technical know-how involved in doing market research, creating mockups, and publishing the finished product is not as hard as it seems.
Read on for our guide on the steps that go into making your first mobile app.
Considerations before designing an app
Creating an app is a serious investment of time, money, and creative effort. While it is achievable, you need to keep the practical considerations involved in mind.
The cost of building an app can range from $10,000-$300,000. Your first project will likely cost $10,000-$30,000. Your return on investment can vary. The average Apple App Store app makes $4,000 in its lifespan.
Developing an app can take anywhere from a few months to a year. Your first will generally take the most time. The process gets easier with practice.
You need to be prepared to maintain your app for at least one to three years.
People of varying technical abilities build apps all the time, though it typically helps to know at least one coding language like Java or Kotlin. You can learn to code at a coding bootcamp or online courses on coding websites.
Aspiring app developers need to be wary of scams such as fraudulent app developing services and "copycat" apps, as well as intellectual property issues.
It is feasible to make an app by yourself while working a full-time job.
If you design an app on one platform, it is possible to make it available on others using a cross-platform development kit. This presents challenges but is achievable with experience.
The perks of developing an app include increasing your knowledge of coding and software, as well as the satisfaction of seeing a project to completion.
Checklist for making an app
The process of creating an app is one of constant revision. To be successful, you need to be humble and ready to switch gears whenever necessary.
Keep an open mind as you work towards perfecting your final product — and stay focused on both your target audience and creative vision.
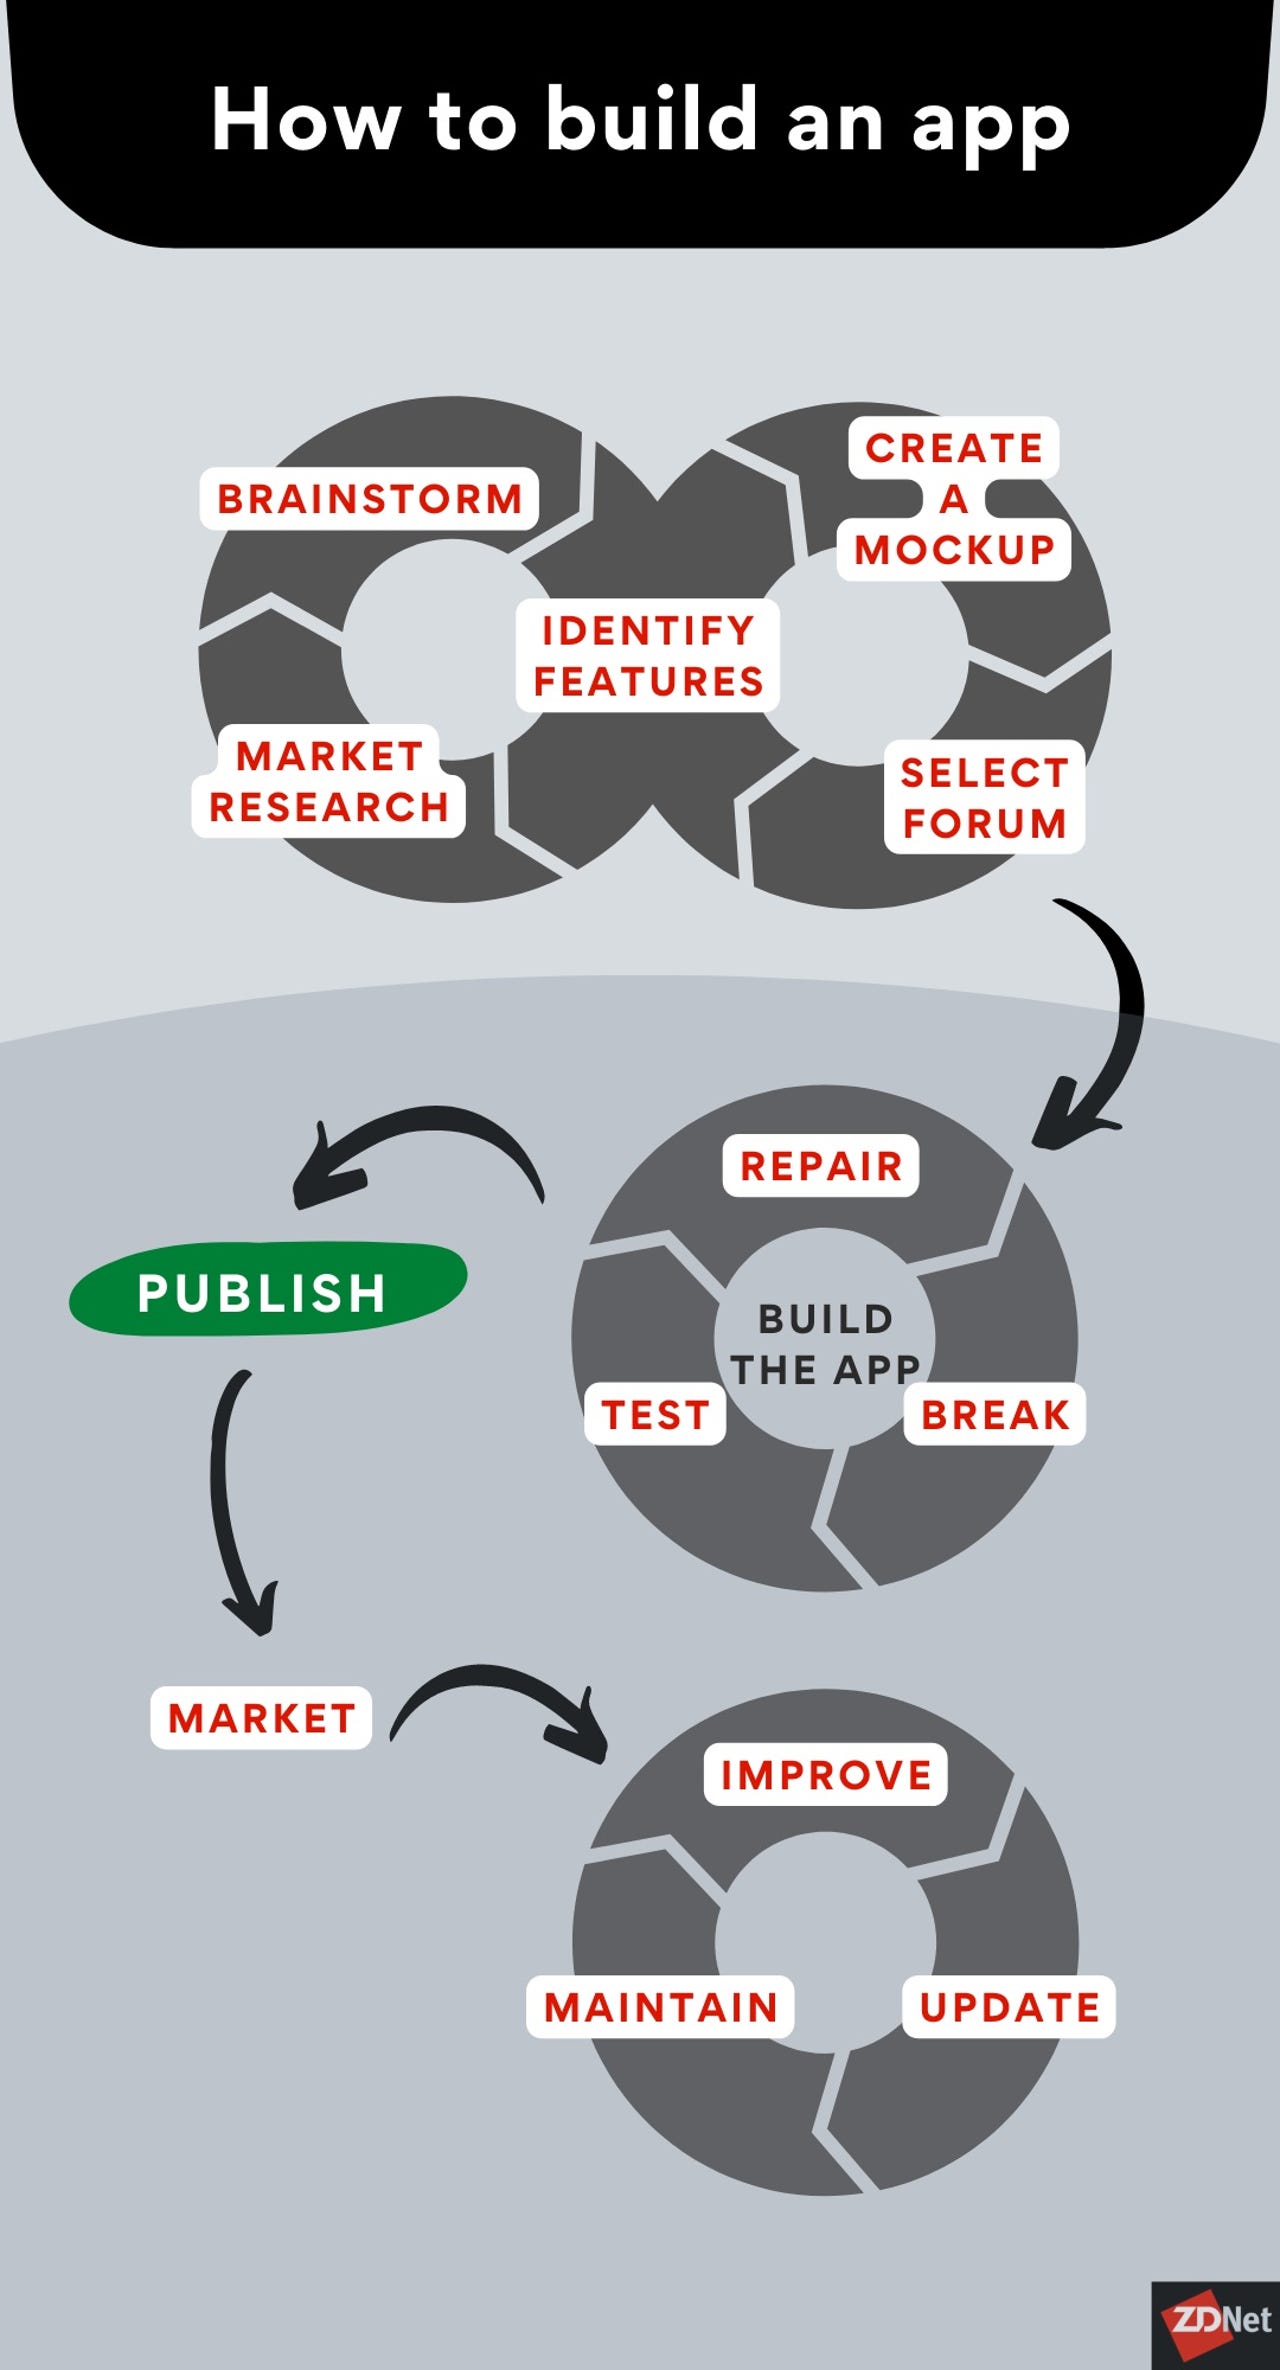
1. Brainstorm, ideate, innovate: Come up with your idea
All great apps start with an idea. Your idea for an app can take a variety of forms, including:
- Fulfilling a want or need
- Improving on an existing app
- Mixing-and-matching elements from multiple existing apps
When you're brainstorming, you want everyone with a big stake in this project in the room. Going it alone can limit you. Other people's creative input can lead to new ideas for your creative vision.
Your first idea is likely to have some kind of essential spark, but it may not resemble what your final ideation (creation vision) becomes. That is okay!
Viable ideas for an app realistically need limitations, a target audience, and possibilities for monetization.
2. Conduct market research: What's already out there?
To tailor your app according to what people want and need, you need to conduct market research. Market research is the process of gathering information about target audiences/users.
You can conduct market research yourself by going into the App Store or Google Play and reading reviews and comments on existing apps that serve your target audience. When you're doing this, you should record:
- Ratings and comments
- App features
- Publisher (i.e. indie or big developer)
- Monetization strategy
Try to figure out where similar apps have succeeded or failed. How can your app build on this?
You can also outsource market research to external companies. For large-scale projects, this might be more cost-effective than hiring your own marketing team. It may not be necessary for smaller projects, though.
3. Identify features: What do you need for an MVP?
Once you understand how market data connects with your vision, you can start working on the minimum viable product (MVP). The MVP is a bare-bones first version of your app that you can show to early adopters, sometimes made with tools such as Siberian CMS.
Developing the MVP before the full-scale app allows you to:
- Determine blind spots in the app's functionality
- Get feedback on features you could add later
- Create early buzz and attract investors
The MVP can help you determine where your app succeeds and fails from a user perspective before moving forward. You'll discover missing features and pain points in functionality.
Be wary about adding too many user-requested features, however. This is not always feasible within budget or functionality constraints.
4. Create a mockup: Know what you're aiming for
Now you can make a rough draft of how the final product will look and feel with a mockup. A mockup is a design or wireframe that encapsulates the visual design, layout, and user experience of your app.
User interface (UI) and user experience (UX) elements you'll need to define in your mockup include:
- Color scheme
- Fonts
- Art style
- Navigational components
- Input controls and onboarding
Common software tools for creating a mockup include:
The plus side of many of these tools is that they are often free to use and do not require in-depth knowledge of UX best practices. It helps to learn about UX ahead of time, which you can do through resources such as UX bootcamps.
5. Select your store: Apple, Android, and beyond
Next, decide on a platform for your app. The Apple App Store and the Google Play Store are the most popular. Each offers advantages. The Apple App Store is slightly more popular than the Google Play Store, and offers the highest immediate ROI, as most apps there are paid. Apple App Store support is also generally more reliable.
However, the search function of the Google Play Store is more intuitive than the Apple App Store's keyword-driven system. The app review system is more lenient and generally allows for more creativity, too.
You can leverage this to make free apps that allow for in-app purchases, such as free language learning apps on the Google Play Store.
Third-party platforms include:
Apple App Store is better for: | Google Play Store is better for: | |
Visibility | Visibility from the Apple App Store's huge popularity | Visibility from an intuitive search function |
Business model | Paid apps | Free apps |
Approval process | A time-consuming approval process that offers in-depth feedback | An easy, quick approval process giving developers more room to experiment |
6. Build the app: Easier than it looks (perhaps)
From there, you're ready for the hard part: Actually making the app.
- You have a few options for how to go about this:
- Code the app yourself
- Partner with a professional programmer
- Use an app-building service, such as Yapp or Shoutem
It depends on your skill and comfort levels. You can expand your skills through resources such as a mobile app development bootcamp.
If you build the app yourself, you'll need to decide between using a native, cross-platform, or web-based development tool. Choose your tools based on your coding proficiencies. For example, if you know Kotlin, use Android's software development kit or another Kotlin-driven platform.
You'll also need to keep in mind technical concerns such as:
- Device compatibility and screen size
- Performance
- Security
7. Test, break, repair, repeat: A ongoing process for long-term success
Now it's time to test your app in order to fix potential bugs. There are two main ways to do this:
- Testing your app yourself
- Using beta testers
Beta testers offer the advantage of being able to offer less-biased feedback — and more users mean more chances to spot bugs.
The process of testing your app is variable but typically it takes three weeks to a month. Once you uncover bugs you must find the bugged line of code and amending it.
Testing and fixing software is an ongoing process that can last months or even years. If you update the app, there is always the possibility that different moving parts won't line up. Mistakes are inevitable, but you can fix them.
8. Publish: Time to go live
Now it's time to publish. Begin by making a developer account for whichever forum you have chosen. The Apple App Store charges a $99 annual fee, while the Google Play Store charges a one-time fee of $25.
Read app review guidelines next. Both the Play Store and App Store have standards for performance, safety, and functionality, along with intellectual property. The App Store has generally more stringent guidelines that encompass originality and quality control concerns.
It typically takes two to three days to hear back from either platform, but the App Store can take up to a week.
Between the two platforms, App Store is more likely to give you detailed feedback if your app gets rejected.
Apple | Android | |
| Comes with $99 annual fee | Comes with one-time $25 fee |
| Guidelines are more stringent and cover "copycat" or limited utility concerns | Guidelines mostly cover standard safety, performance, and functionality concerns |
| Review process can take several days to a week | Review process usually takes two to three days |
9. Market: Get eyes, gather buzz, grow user base
You can increase your chances of a good ROI on your app by combining your launch with a marketing campaign promoting it. Strategies at your disposal for marketing your app include:
- Creating promotional videos
- Leveraging app store optimization (ASO)
- Enabling push notifications
- Asking friends and family to write reviews
- Creating posts and surveys on social media
ASO can be particularly useful. By including screenshots, engaging copy, and quotations from positive reviews in your app's description, you can encourage people to download your app!
There is no one-size-fits-all strategy for successfully marketing an app. Some developers find that getting a social media influencer to promote their product works, while others prefer to rely on word-of-mouth.
It depends on what works for you.
10. Maintain, improve, update: An ongoing process
The lifespan of an app can vary greatly, depending on its success. Many apps published to the market reach their peak usage within a month and fade away not long after.
Very successful apps, however, can last for 10-15 years, over which the developer will need to commit to keeping up with changing user needs and technical concerns.
If your app catches on, expect to roll out updates once every two to three weeks. This ensures that you are staying in-step with:
- Protecting user security
- Maintaining performance/fixing bugs
- Incorporating user feedback in new updates
- Keeping your app relevant
- Rebranding your app when necessary
If you skip regular minor updates, in about a year's time your app will likely need a complete overhaul due to technology changes.