Hands-On: Sparky Linux 4.2 Enlightenment

Sparky Linux is derived from the Debian Testing distribution (currently stretch), and is focused primarily on on lightweight desktops (Xfce, LXDE/LXQt, Openbox and Enlightenment), although they also have MATE and KDE versions. I have been looking for an Enlightenment distribution that I could use for testing, so when I saw that Sparky Linux had just made a new release, and that it included the latest Enlightenment 20 release, I decided to give it a try.
The release announcement gives a brief overview, including a list of the various desktops and window managers with their versions, and other major packages included. The ISO images can be obtained from the Sparky Linux Downloads page. These are hybrid images, so as usual you can either copy them directly to a USB stick or burn them to a DVD.
The Live image boots with no problem on my UEFI firmware systems (with Secure Boot disabled, of course). The Live desktop looks like this:
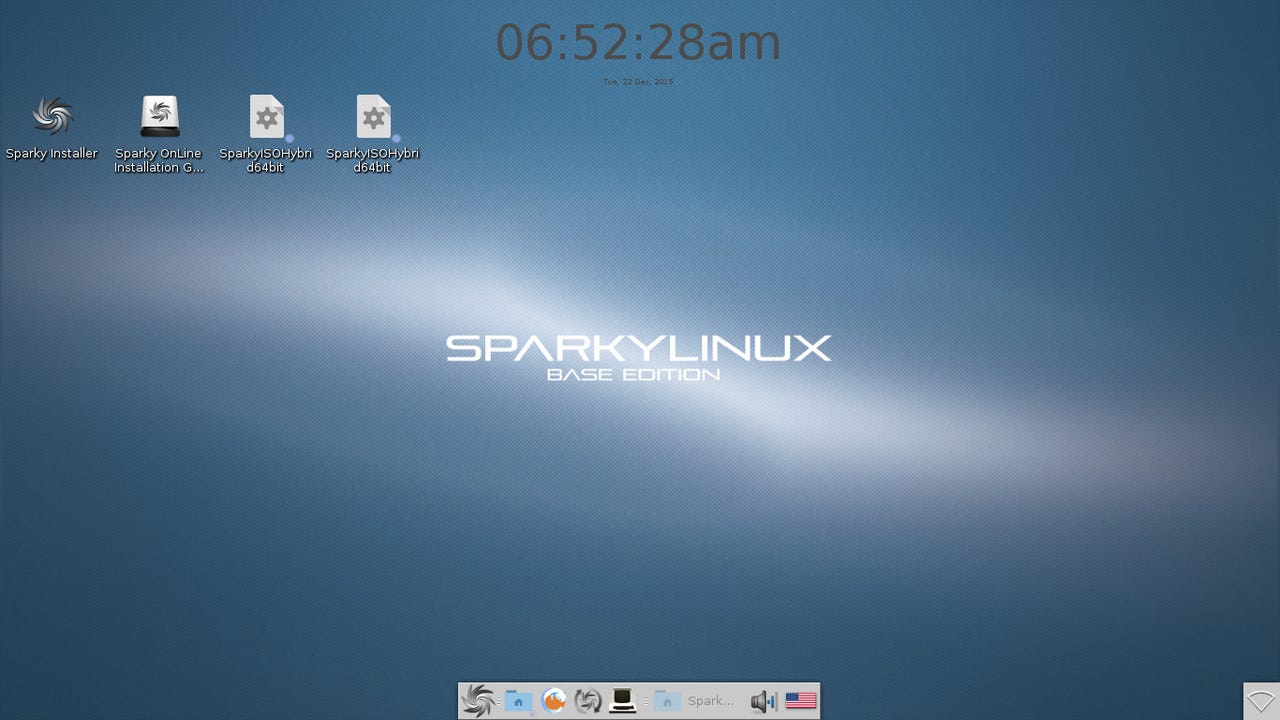
Sparky Linux 4.2 Enlightenment 20 Live Desktop
Considering all the recent discussion about how different Enlightenment is, that looks like a pretty normal GUI desktop. I spent long enough poking around on it to be sure that basic things like keyboard/mouse/network were working normally, and that I wouldn't be completely lost trying to run everyday programs. Once I was satisfied with that, I started the Sparky Installer from the desktop.
It quickly became obvious that the Sparky Installer is a customized version of the Linux Mint Debian Edition installer. That's a good choice: it's clear, easy to use and flexible enough to handle all of the weird situations that my laptops put it into. It's not the fastest installer around, but it was done in less than 30 minutes, and it didn't have any problems.
When the installation was finished and I rebooted the installed system, Sparky Linux ran through a first-boot procedure which installed all of the latest updates, checked and installed all of the locale/language files, and installed a complete set of codecs for the media player. That's a nice touch.
The initial desktop on the installed system looks like the Live system, but without the desktop icons for the installer and USB drive at the top left corner. In fact, it was so much like the Live desktop that it had that big, bright American flag on the bottom panel, and that wasn't good news. That's because that is the keyboard language icon, and despite the fact that the installer had asked me for the language, the installed system wasn't configured for a German (Swiss) keyboard.
Not to worry: I just had to click on the flag and then choose Settings to get into the Keyboard Settings dialog. Then it was no problem to choose the correct layout again, and this time it stays selected across reboot, so that is solved.
The bottom 'panel' is actually called a 'Shelf' in Enlightenment, but it serves essentially the same purpose as panels in the other common Linux desktops, it is a container for menus, launchers, controls and indicators which are collectively known as 'Gadgets' in Enlightenment.
The Sparky icon at the left end of the bottom shelf is actually a menu button, which brings up the main desktop menu shown here. The same menu can be accessed by simply clicking anywhere on the desktop background.
There are a couple of interesting things here, besides the main application menu at the top. Run Everything is the Enlightenment application/utility search and start utility, roughly the equivalent of Gnome Go but without the file search capability.
I am particularly pleased with the next item in the list, Take Screenshot, which does just what it says... no more digging around in the application menus looking for whatever screen shot program is installed. Yay for me!
The other useful item right now is the last one in the list, because that is where you find the Shutdown/Reboot/Logout options.
Getting back to the bottom Shelf, there are also application launchers there for the Enlightenment File Manager, Iceweasel (browser) and Terminology (Enlightenments own terminal emulator). I particularly like the icon for Terminology, because it looks like an old VTI ascii terminal.
The Shelf also includes a Tasks gadget, which dynamically displays icons for open windows, pretty much the same as a window selector or task manager from other desktops. When I have Iceweasel and GIMP running, the bottom Shelf looks like this.
Right-click on the window icons to get the window menu, which has a lot of familiar options and a few interesting new ones. In addition to the usual maximize/iconfiy/close and such, you can set the stacking order so this window is always on the top or bottom, or pin it to the desktop, add it to the Favorites list, and all sorts of other things. I had to smile again when I saw Take a Shot, which makes a screen shot of this window. Nice touch.
The Network icon at the bottom right corner of the screen is actually the NetworkManager applet. It works pretty much as you would expect, to connect to a wireless network just click the icon and select the network.
Right-clicking this icon gives you nice networking control/information menu. This is once again a nice touch: simple access to enabling/disabling all networking or just wireless networking, and an easy way to disable network notifications without having it natter at you about "Don't show this again" every time.
In summary, I would say that I have been very pleasantly surprised by Sparky Linux Enlightenment in the short time I have been using it. It was easier to install than I expected, especially on my UEFI firmware systems. I expected to struggle to figure out the Enlightenment desktop, at least at first, and I have to say honestly that so far I have found it to be very easy to use.
I am going to continue to use Sparky Enlightenment for a while, so that I can explore and learn a lot more about it, and I will then use it for the base of the next post in the "Customizing Linux Desktops" series.
Until then, Merry Christmas!
Read more on Linux and open source:
- How to customise your Linux desktop: MATE
- How to customise your Linux desktop: Cinnamon
- How to customise your Linux desktop: Xfce
- Hands-On with openSuSE Leap RC1: A walk through of the installer
- Hands-On: KaOS Linux 2015.10
- Thus versus Calamares: Comparing Manjaro 15.09 installers
- Upgrading my Linux-Windows multi-boot system to Windows 10
- Hands-On: Linux UEFI multi-boot, my way
- Hands-On: Linux UEFI multi-boot, part two