'ZDNET Recommends': What exactly does it mean?
ZDNET's recommendations are based on many hours of testing, research, and comparison shopping. We gather data from the best available sources, including vendor and retailer listings as well as other relevant and independent reviews sites. And we pore over customer reviews to find out what matters to real people who already own and use the products and services we’re assessing.
When you click through from our site to a retailer and buy a product or service, we may earn affiliate commissions. This helps support our work, but does not affect what we cover or how, and it does not affect the price you pay. Neither ZDNET nor the author are compensated for these independent reviews. Indeed, we follow strict guidelines that ensure our editorial content is never influenced by advertisers.
ZDNET's editorial team writes on behalf of you, our reader. Our goal is to deliver the most accurate information and the most knowledgeable advice possible in order to help you make smarter buying decisions on tech gear and a wide array of products and services. Our editors thoroughly review and fact-check every article to ensure that our content meets the highest standards. If we have made an error or published misleading information, we will correct or clarify the article. If you see inaccuracies in our content, please report the mistake via this form.
How to use Leonardo AI to generate stunning artwork and images

With all the buzz around generative AI, a variety of AI-driven image creators have cropped up this year. One tool you may want to try is Leonardo. Named after the celebrated Italian artist, Leonardo offers a host of options to help you generate the images you want.
Also: Thanks to my 5 favorite AI tools, I'm working smarter now
You can control the image size and dimensions, choose an image that's photorealistic, and specify the number of images you want. Select a specific image, and you're able to tweak it, refine it, copy it, and download it.
How to use Leonardo AI to generate images
What you need: The basic version of Leonardo is free but does impose daily tokens that get used up with each new prompt. Paid plans with more features and fewer restrictions start at $10 a month, but most people should be fine with the free flavor. Here's how to create images with Leonardo.
1. Sign up for Leonardo
To start, browse to the Leonardo website and click the button to create an account. Choose whether you wish to sign in with your Apple account, Google account, Microsoft account, or an email account. Sign in with your new account.
2. Access the image generator
At the home screen for Leonardo, click the entry for Image Generation on the left pane, the icon in the center, or the Create New Image button in the upper right.
3. Try your first image
To dive in right away, type a description of the image you want in the prompt at the top. Besides typing the description, you can specify a style of artwork. For example, you could write that you want an image of a giant grasshopper drinking a martini in the style of Renoir. Click the Generate button. Hovering over that button will tell you how many tokens this prompt will chew up if you're using the free version.
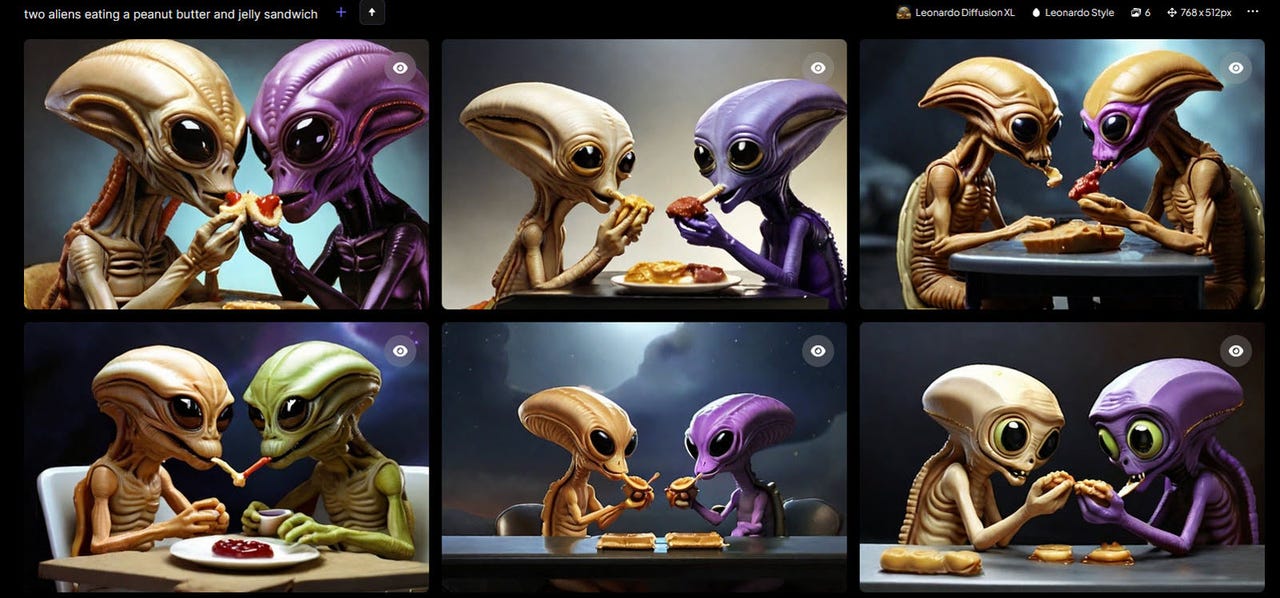
4. View the results
In response, Leonardo creates four different images for you to view and review.
5. Specify a model or style
Next, you can select a specific model. Click the drop-down menu for Leonardo Diffusion XL and change it to a different model. Some of the model names are self-descriptive, such as 3D Animation Style and Anime Pastel Dream. But you may need to try most of the other models to see what type of image is generated.
Also: How this simple ChatGPT prompt tweak can help refine your AI-generated content
Click the drop-down menu for style and you can switch between Leonardo style and None. You'll want to experiment with both options to see which works best. After setting your options, click the Generate button.
6. Add elements
Click the drop-down menu for Add Elements to choose a specific element such as Coloring Book, Folk Art Illustration, Kids Illustration, Toon & Anime, or Vintage Christmas Illustration. You can select more than one element, however, Leonardo cautions that choosing more than two elements may have unexpected outcomes.
7. View images with elements added
After selecting one or more elements, click Confirm to return to the previous screen. You can decrease the weight that a particular element factors into the image by moving the slider. When ready, click Generate to create the image.
8. Add a negative prompt
In generative AI, a negative prompt is one in which you mention things that you don't want to see in the results. For example, maybe you're requesting the image of a grasshopper drinking a martini but you don't want it to have wings.
Also: One in four workers fears being considered 'lazy' if they use AI tools
To set this up, turn on the switch for Add Negative Prompt. In this case, type the word wings in the negative prompt and then click Generate.
9. Specify the number of images
Next, you can control how many images are included in the results. At the top of the left pane, click the number to indicate how many images you want and then click Generate.
10. Ask for photorealistic images
Turn on the switch for PhotoReal to generate photorealistic images. You can then set the Depth of Field to High, Medium, or Low and enable RAW mode to create a more detailed and larger image.
11. Set the dimensions
Skip down to Input Dimensions and click the number for the dimensions you want to apply to the generated images. Alternatively, go to Advanced Controls. Click the drop-down menu for Aspect Ratio and choose a specific rate, such as 4:3 or 16:9. You can also move the sliders for Height and Width to manually set the dimensions.
12. Choose and tweak your desired image
Once you like the batch of generated images, click a specific one that you want to use. The image screen offers you a few options.
Also: How to use Bing Image Creator (and why it's better than ever)
Click the Unzoom Image button to zoom out on the image, the Remove Background button to eliminate the entire background, and the Alchemy Smooth Upscale or Alchemy Crisp Upscale to increase the resolution of the image. You can then switch between the image with your changes and the original version.
13. Copy or download the image
Click the Copy to Clipboard button to copy the image and paste it elsewhere. Click the Download Image button to download it to your computer.