Windows 10 tip: Use the Magnifier tool to zoom in on text or objects


Memorizing a few keyboard shortcuts makes it much easier to use the Magnifier tool.
Like its predecessors, Windows 10 is filled with accessibility tools. One of my favorites is the Magnifier app, a handy system utility that allows you to zoom in on a portion of the display so you can read the fine print on a web page, distinguish between confusing characters in a product key, or take a closer look at detail in an image.
You can run the Magnifier app by finding its executable file, Magnify.exe. But it's much easier to use the built-in keyboard shortcuts:
- Press the Windows key and then tap the plus sign to turn Magnifier on and zoom the current display to 200 percent. If Magnifier is already running, that key combination zooms the display in 100-percent increments all the way to 1600 percent.
- Press the Windows key and then tap the minus sign to zoom back out, again in 100-percent increments, until you return to normal magnification.
- Press the Windows key and tap Esc to close Magnifier and return to the normal display.
After zooming the screen, you can use the mouse to pan to portions of the screen that aren't currently visible.
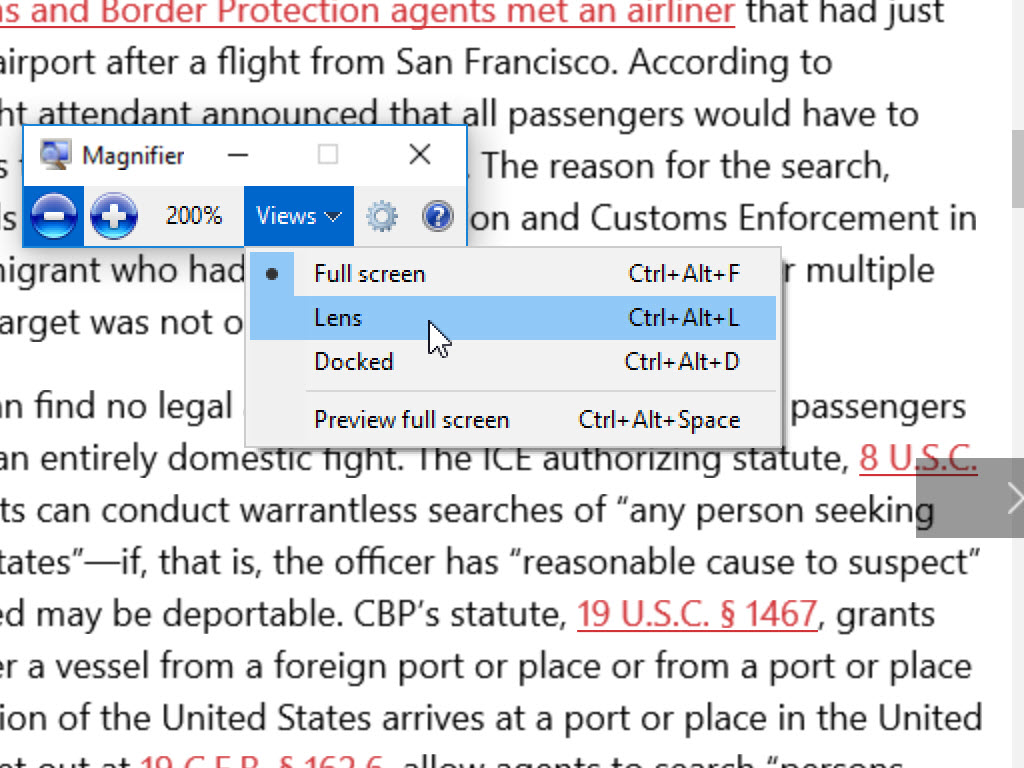
Four additional options on the View menu, shown here, allow you to change the Magnifier view.
- Ctrl+Alt+F: This is the default, full-screen view.
- Ctrl+Alt+L: Press this combination to turn the Magnifier into a lens that zooms only the portion of the screen directly under the mouse pointer.
- Ctrl+Alt+D: Use this option to dock the magnifier window to the top of the screen.
- Ctrl+Alt+Spacebar: Pressing this combination when you're zoomed in temporarily shows you the entire display, with the zoomed portion highlighted.
The Magnifier control is always visible on the screen when it's running, although it backs off to a dim icon of a magnifying glass when you're focused on a different portion of the screen. To see the full set of Magnifier controls, move the mouse pointer back over the magnifying glass icon and click once. When the full Magnifier interface is visible, click the red X in the upper-right corner to close it.
Previous tip: Cut to the front of the line for the next version
Next week: Another Windows 10 tip from Ed Bott
see all of ed bott's Windows 10 Tips
VIDEO: Here's what Windows 10 Creators Update can do